
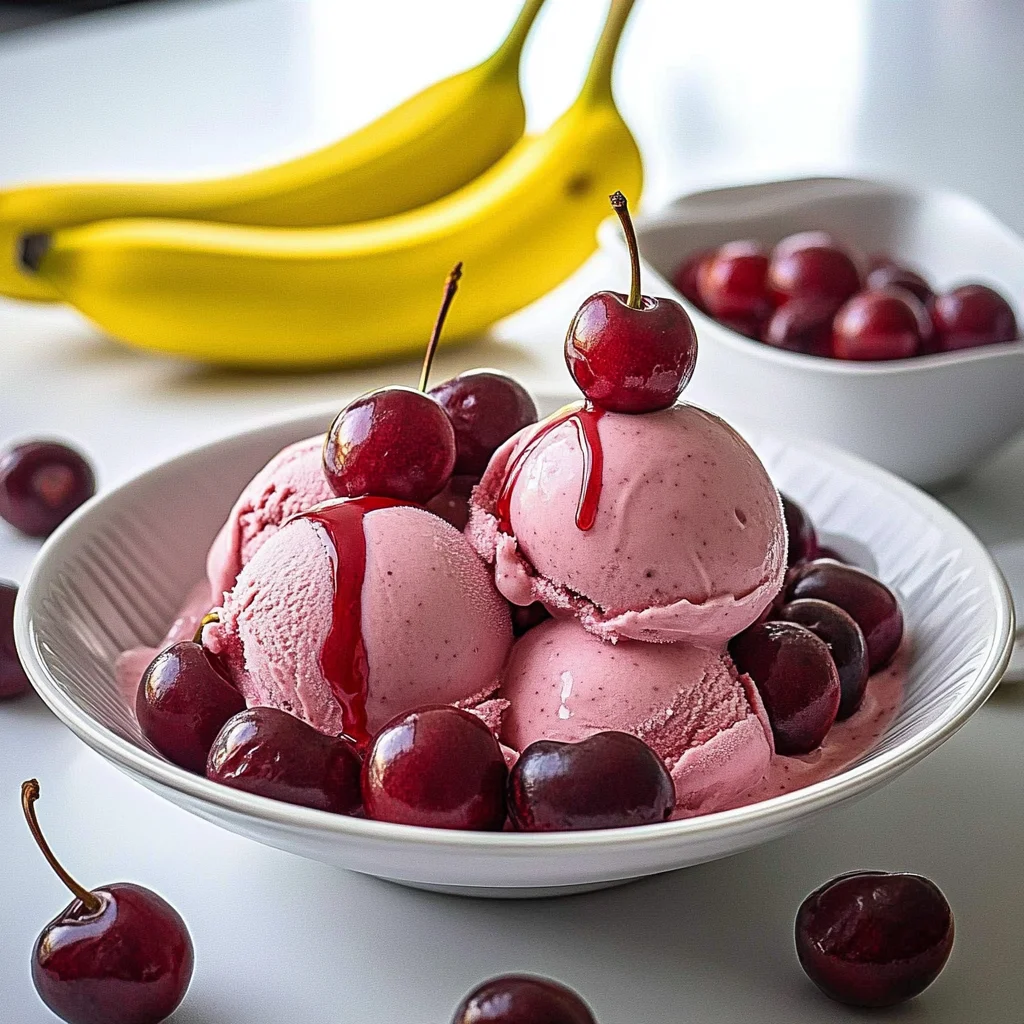
Imagine a bowl brimming with the vibrant colors of cherry banana nice cream, where the luscious sweetness of ripe bananas dances playfully with the tart burst of juicy cherries. The creamy texture melts in your mouth, leaving behind a symphony of flavors that sings summer joy with every spoonful. It’s the perfect antidote to those sweltering days when you crave something cool and delightful.
As I reminisce about my childhood summers, when my friends and I would race each other to the ice cream truck, this cherry banana nice cream brings back those carefree moments. It’s not just a dessert; it’s a nostalgic treat that transforms any occasion—be it a sunny picnic or a cozy movie night—into a celebration of flavor. Get ready for an amazing flavor experience that will have you smiling with every bite!
Why Is Cherry Banana Nice Cream So Irresistibly Good?
Indulge in a creamy delight that’s not only delicious but also healthy! Made from ripe bananas and sweet cherries, this nice cream is a guilt-free treat for any occasion. Quickly whip up this refreshing dessert in just 10 minutes, making it perfect for busy days. Customize it with a splash of vanilla or a drizzle of maple syrup for extra flavor and sweetness. Loved by all, this vibrant dessert is sure to please kids and adults alike, proving that healthy can be incredibly tasty!
Cherry Banana Nice Cream Ingredients
- For the Base
- 4 medium ripe bananas (peeled and sliced, frozen) – Choose bananas that are spotty and sweet for the best flavor in your Cherry Banana Nice Cream.
- 2 cups cherries (pitted and frozen) – Frozen cherries provide a rich, tangy sweetness that perfectly complements the creamy banana base.
- Optional Add-ins
- 1 tablespoon vanilla extract – A splash of vanilla enhances the overall flavor, making it extra delicious.
- 2 tablespoons maple syrup – Use this for added sweetness, but adjust based on your taste preference and ripeness of the fruits.
How to Make Cherry Banana Nice Cream
1. Combine Ingredients: In a blender, combine 4 medium ripe bananas (peeled and sliced, frozen) with 2 cups of pitted and frozen cherries. For an extra flavor boost, add 1 tablespoon of vanilla extract and, if you like it sweeter, include 2 tablespoons of maple syrup.
2. Blend Smoothly: Blend on high until the mixture is smooth and creamy, scraping down the sides as needed to ensure everything is well incorporated. You’ll want a luscious texture—this shouldn’t take more than a couple of minutes!
3. Transfer Mixture: Carefully transfer your nice cream mixture into a freezer-safe container. Spread it evenly to allow for even freezing, ensuring it’s tightly packed for the best texture.
4. Freeze Firmly: Place the container in the freezer and let it chill for at least 2 hours or until firm. The longer it freezes, the better it will hold its shape when scooped!
5. Scoop & Serve: Once firm, scoop the cherry banana nice cream into bowls and serve immediately for a refreshing treat that’s both healthy and delicious.
6. Enjoy Your Treat: Dive into your homemade dessert and savor every blissful bite!
Optional: Top with fresh cherries or nuts for added crunch.
Exact quantities are listed in the recipe card below.
Pro Tips for Cherry Banana Nice Cream
- Banana Ripeness: Use medium ripe bananas for the best sweetness and creaminess; under-ripe bananas can make your nice cream less flavorful.
- Even Freezing: Ensure your bananas and cherries are evenly sliced and spread out during freezing to avoid icy chunks in your Cherry Banana Nice Cream.
- Blending Technique: Blend on high but pause to scrape down the sides frequently; this ensures a smooth and creamy texture throughout.
- Taste Testing: Adjust sweetness by tasting the mixture before freezing; adding too much maple syrup can overpower the fruit flavors.
- Serving Tip: Let the nice cream sit out for a few minutes before scooping; it makes serving easier and enhances the creamy texture.
How to Store and Freeze Cherry Banana Nice Cream

- Freezer: Store your Cherry Banana Nice Cream in an airtight container for up to 2 months. This keeps it fresh and prevents freezer burn.
- Thawing: When you’re ready to enjoy, let the nice cream sit at room temperature for about 10-15 minutes before scooping for a creamy texture.
- Serving Suggestions: If you have leftover nice cream, keep it stored in the freezer again; just remember to consume it within a week after thawing for optimal flavor.
- Add-ins Storage: If you’ve added maple syrup or vanilla extract, they can be stored in the pantry for up to 6 months, ensuring your next batch is just as delightful!
Cherry Banana Nice Cream Your Way
Feel free to unleash your creativity and customize this delightful treat with these fun variations!
- Nutty Crunch: Add 1/4 cup chopped nuts for a satisfying crunch. Walnuts or almonds pair brilliantly with the fruity flavors, adding both texture and healthy fats.
- Berry Blend: Swap in 1 cup of mixed berries for a vibrant twist. Strawberries or blueberries can add a burst of tartness that complements the sweetness of bananas.
- Chocolate Chip Delight: Stir in 1/4 cup mini chocolate chips for a decadent touch. The sweet, melted goodness of chocolate against the fruity base creates an irresistible combination.
- Creamy Coconut: Replace regular vanilla extract with coconut extract for a tropical vibe. This substitution gives your nice cream an exotic flair that’s perfect for summer days.
- Spicy Kick: Add a pinch of cayenne pepper or cinnamon to elevate the flavor profile. A hint of spice can surprise your taste buds and warm up this cool treat.
- Minty Fresh: Incorporate a few fresh mint leaves or a drop of peppermint extract for refreshing notes. The cooling sensation perfectly balances the sweetness and adds a refreshing twist.
Make Ahead Options
If you’re looking for a delightful dessert that’s perfect for meal prep, Cherry Banana Nice Cream is your answer! You can easily prepare the main components ahead of time by slicing and freezing the bananas and pitting the cherries. Both fruits can be frozen for up to 3 months, making it easy to have them on hand whenever a craving strikes. When you’re ready to whip up this creamy treat, simply blend the frozen bananas and cherries with vanilla extract and maple syrup as desired. Once blended until smooth, transfer the mixture to a freezer-safe container and freeze for at least 2 hours or until firm. When it’s time to serve, just scoop out your nice cream into bowls and enjoy your healthy dessert! This method not only saves you time but ensures you always have a refreshing treat ready in your freezer.
Cherry Banana Nice Cream Recipe FAQs
Can I use fresh bananas and cherries instead of frozen?
While fresh bananas can be used, they will not yield the same creamy texture as frozen ones. For cherries, using fresh will result in a more liquid-like consistency unless you freeze them first. To achieve that delightful nice cream consistency, it’s best to stick with frozen fruits.
How should I store leftover nice cream?
If you have any leftovers (though it’s hard to resist!), transfer the nice cream to an airtight container and store it in the freezer. It can last for up to 2 weeks, but for the best texture, consume within a week. When ready to enjoy again, let it sit at room temperature for a few minutes to soften before scooping.
What can I substitute for maple syrup?
If you’re looking for an alternative sweetener, honey or agave syrup works well too! You could also use a sugar substitute like stevia or erythritol if you prefer a lower-calorie option. Just remember that adjusting sweetness is all about personal taste, so start with less and add more if needed.
How long does it take for the nice cream to freeze?
To achieve the perfect firm texture, allow your nice cream to freeze for at least 2 hours. After that time, check its consistency—it should be scoopable but still hold its shape. If it’s too soft for your liking, leave it in the freezer a bit longer and check every 30 minutes.
What if my nice cream is too hard after freezing?
If your nice cream turns out too hard after freezing, don’t fret! Simply let it sit at room temperature for about 5-10 minutes before scooping. This will help soften it enough to make serving easier while retaining that luscious flavor!
How many servings does this recipe make?
This recipe yields about 4 servings, making it perfect for sharing with family or friends—or keeping all to yourself! With around 150 calories per serving, you can indulge guilt-free in this healthy dessert anytime you like.