
Creamy Spiced Pumpkin Cheesecake with Gingersnap Crust and Salted Caramel
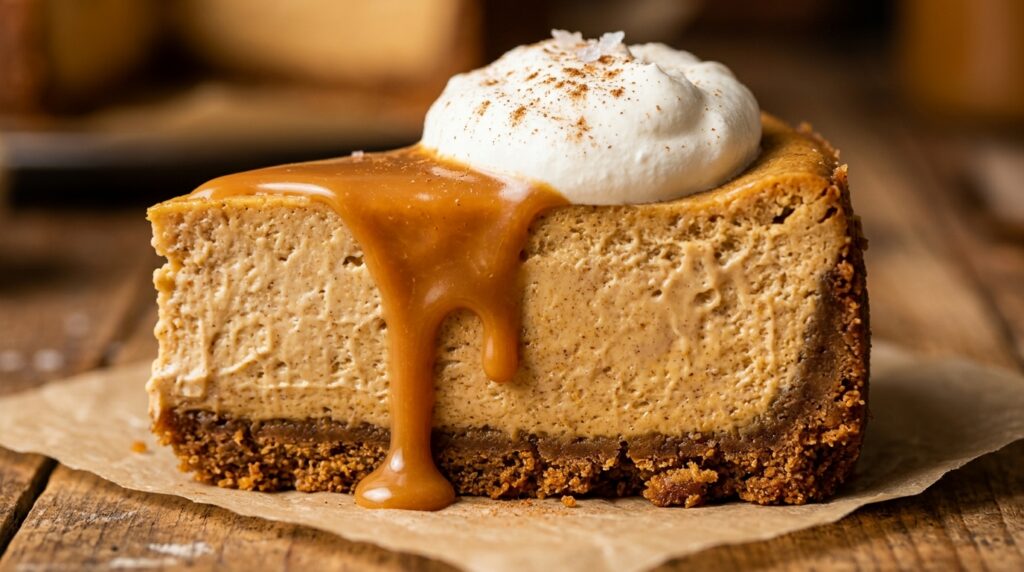
If there is one showstopping holiday centerpiece destined to outshine every traditional pumpkin pie on your autumn table, it is this magnificent Creamy Spiced Pumpkin Cheesecake with Gingersnap Crust and Salted Caramel. Nestled atop a spicy, buttery crushed gingersnap cookie crust, the ultra-velvety pumpkin cheesecake filling is enriched with real pumpkin puree, pure vanilla bean, and a harmonious medley of warm fall spices. Crowned with billowy rosettes of chantilly cream and a lavish cascade of warm homemade salted caramel drizzle, every decadent forkful is pure autumnal bliss. The culinary secret to baking a cheesecake that is impossibly creamy, silky-smooth, and completely free of cracks lies in two essential techniques: using full-fat cultured sour cream in the batter and baking gently in a hot water bath (bain-marie). The acidity of the sour cream cuts through the dense cream cheese fat, yielding a melt-in-your-mouth custard texture, while the ambient steam from the water bath maintains gentle, uniform heat that protects the delicate egg proteins from curdling or splitting. Why You’ll Love This Recipe Bold Gingersnap Crust: Replacing standard graham crackers with spicy gingersnap cookies infuses every bite with snappy ginger, molasses, and cinnamon that perfectly balances the creamy filling. Flawlessly Smooth & Crack-Free: Our foolproof gentle water bath and slow oven cooling method guarantee a glossy, perfectly flat top every single bake. Lush Salted Caramel Drizzle: The homemade warm sea salt caramel cuts the rich pumpkin spice with buttery, toffee sweetness. 100% Halal Wholesome: Made with pure cream cheese, real butter, fresh eggs, natural pumpkin, and organic spices—zero gelatin, zero alcohol extracts, zero lard. Key Ingredients & Smart Swaps Baking essentials: block cream cheese, pure pumpkin puree, crisp gingersnap cookies, farm eggs, and warm autumn spices. Full-Fat Brick Cream Cheese: Always use brick Philadelphia-style cream cheese (not spreadable tub cheese) softened completely to room temperature for a lump-free emulsion. Crisp Gingersnap Cookies: Crushed into fine crumbs and tossed with melted butter, they form a fragrant, crispy crust with warm ginger kick. 100% Pure Canned Pumpkin: Use pure pumpkin puree (such as Libby’s), not pre-spiced pie filling, allowing full control over sweetness and spice balance. Cultured Sour Cream: Tenderizes the rich cream cheese and provides a subtle tang that keeps the cheesecake light and luscious. Warm Autumn Spice Blend: High-grade ground cinnamon, ground ginger, freshly grated nutmeg, and a pinch of ground cloves create rich holiday warmth. Step-by-Step Cooking Walkthrough 1. Press & Par-Bake Gingersnap Crust: Pulse gingersnap cookies in a food processor into fine crumbs. Mix with 5 tablespoons melted butter and 2 tablespoons brown sugar. Press firmly into the bottom and 1 inch up the sides of a 9-inch springform pan. Bake at 350°F (175°C) for 10 minutes, then let cool completely. Wrap the outside of the pan tightly in heavy-duty aluminum foil. 2. Beat Cheesecake Batter on Low Speed: Beat room-temperature cream cheese and brown sugar on medium-low speed for 2 minutes until completely smooth and creamy. Beat in pure pumpkin puree, sour cream, pure vanilla extract, flour, and spices just until combined. Add eggs one at a time, beating on lowest speed just until incorporated (do not incorporate excess air). Pouring and smoothing the silky pumpkin batter into the foil-wrapped springform pan before water bath baking. 3. Water Bath Baking: Pour batter over cooled crust and smooth top with an offset spatula. Place springform pan inside a large roasting pan. Pour boiling water into the roasting pan until it reaches halfway up the sides of the springform pan. Bake at 325°F (160°C) for 65–75 minutes until edges are set and the center has a gentle, subtle jiggle. 4. Slow Cool & Chill: Turn off oven, crack the oven door open 1 inch with a wooden spoon, and leave the cheesecake inside for 1 full hour. Transfer to a counter to cool to room temperature, then refrigerate uncovered for at least 6 hours (preferably overnight). Slice cleanly with a warm knife and drizzle with salted caramel and whipped cream! 3 Chef Secrets for Perfect Results 1. Room Temperature Everything: Cold cream cheese or eggs will create stubborn lumps that cannot be beaten smooth without over-whipping. Pull all dairy and eggs from the fridge 2 hours before baking. 2. Mix on the Lowest Speed: Whipping at high speeds forces air bubbles into the dense batter. In the oven, trapped air expands and then collapses, causing deep cracks across the surface. Low speed guarantees a dense, velvety custard. 3. The Warm Knife Slice Trick: To achieve picture-perfect bakery slices, run a long chef’s knife under hot tap water, wipe it clean with a kitchen towel between every single cut, and press straight down in one smooth stroke. What to Serve With Pumpkin Cheesecake Garnished with fresh chantilly whipped cream, toasted pecans, and a warm drizzle of salted caramel. Spiced Chai Latte: Steaming black tea brewed with crushed cardamom, cinnamon, and frothy steamed milk complements the rich pumpkin spices. Toasted Candied Pecans: Coarsely chopped pecans toasted in brown butter add an exquisite nutty crunch over the silky cream topping. Hot Fresh Espresso: A dark roast espresso cuts through the sweet, rich caramel and creamy cheese layers. Storage, Freezing & Reheating Instructions Refrigeration: Keep cheesecake loosely covered with foil or in a cake carrier in the refrigerator for up to 6 days. It tastes even better on day two! Freezing Whole or Slices: Cheesecake freezes like a dream. Wrap completely chilled whole cake or individual slices tightly in plastic wrap, then heavy aluminum foil. Freeze for up to 3 months. Thaw overnight in the refrigerator before serving. Serving Temperature: For the most luxurious, silky mouthfeel, remove slices from the refrigerator 20 minutes before serving to take the icy chill off the cream cheese fat. Frequently Asked Questions Can I make this without a water bath?While a water bath yields the most velvety texture and crack-free finish, you can place a 9×13-inch baking pan filled with boiling water on the bottom rack of your oven directly beneath the cheesecake rack to create steam. Can
Savory Roasted Stuffed Butternut Squash with Sausage, Cranberries, and Pecans
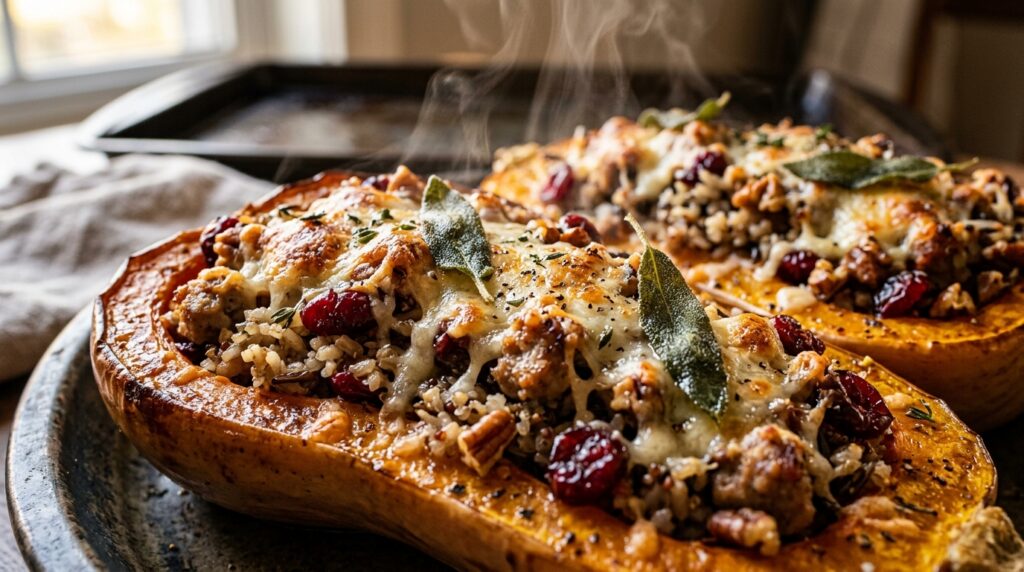
When the autumn table calls for a showstopping centerpiece that is as stunning to behold as it is comforting to savor, this Savory Roasted Stuffed Butternut Squash with Sausage, Cranberries, and Pecans takes center stage. Halved butternut squashes are roasted cut-side down until tender and caramelized, then brimming with a deeply savory stuffing of seasoned halal Italian sausage, fluffy wild rice, sweet tart cranberries, crisp apples, and toasted pecans. Topped with bubbling melted parmesan and crispy fresh sage, each forkful delivers the quintessential taste of harvest season. The culinary triumph of this dish comes down to balanced flavor layering. Butternut squash is naturally sweet with deep buttery notes when roasted at high heat. To contrast that luscious sweetness, our hearty filling combines savory Italian herbs—fennel, garlic, and cracked pepper—with lean ground halal sausage, tart ruby cranberries, and earthy wild rice. Scooping just a spoonful of the tender roasted squash flesh and folding it right into the warm stuffing binds the flavors together seamlessly before the squash boats return to the oven for a final golden broil. Why You’ll Love This Recipe Complete All-in-One Meal: Provides wholesome complex carbohydrates, high-quality lean protein, healthy fats, and vibrant autumnal produce in one gorgeous edible bowl. Holiday Table Showstopper: Elegant enough to serve as the main attraction for Thanksgiving or festive family gatherings, yet easy enough for weeknight meal prep. Make-Ahead Friendly: Both the roasted squash boats and the savory stuffing can be prepared a day in advance, assembled in minutes, and baked fresh when guests arrive. 100% Halal Wholesome: Made with premium halal ground sausage (or seasoned lean ground turkey), organic wild rice, orchard-fresh apples, and pure olive oil—zero pork, zero wine. Key Ingredients & Smart Swaps Harvest-fresh ingredients arranged on a clean quartz workstation. Butternut Squash: Two medium, uniform squashes (about 2.5 to 3 lbs each). Look for straight, sturdy necks to provide generous filling cavities. Halal Italian Sausage: 1 pound of lean halal beef or turkey Italian sausage with fennel and garlic seasonings. For a vegetarian variation, seasoned brown lentils or crumbled tempeh work beautifully. Wild Rice Blend: 1.5 cups of cooked long-grain wild rice blend. Quinoa, farro, or nutty brown jasmine rice make fantastic alternatives. Dried Ruby Cranberries: Add delightful pops of tart sweetness that cut through the richness of the sausage and cheese. Honeycrisp or Gala Apple: One medium apple, finely diced, offering crisp juicy sweetness and textural contrast. Toasted Pecans or Walnuts: 1/2 cup roughly chopped and lightly toasted for a buttery crunch in every mouthful. Fresh Aromatic Herbs: Minced fresh sage leaves and fresh thyme sprigs bring authentic holiday aroma. Parmesan or Gruyère Cheese: Freshly grated over the stuffed squash for a bubbling, golden-brown crust. Step-by-Step Cooking Walkthrough 1. Roast the Squash Halves: Preheat oven to 400°F (200°C). Slice squashes in half lengthwise and scoop out the seeds and stringy pulp. Brush cut sides with olive oil, season with salt and pepper, and place cut-side down on a parchment-lined baking sheet. Roast for 35 to 40 minutes until tender and easily pierced with a fork. 2. Brown the Savory Filling: While the squash roasts, heat a large skillet over medium-high heat. Add the halal Italian sausage, breaking it apart with a wooden spatula until browned and cooked through (about 6–8 minutes). Stir in diced onion, celery, minced garlic, diced apple, fresh sage, and thyme, cooking for 4 more minutes until tender. Packing the warm wild rice and sausage stuffing generously into roasted squash cavities ensures maximum flavor in every bite. 3. Fold in Rice, Fruit & Nuts: Remove skillet from heat. Stir in the cooked wild rice blend, dried cranberries, and chopped toasted pecans. Scoop out a small spoonful of roasted squash flesh from each half to enlarge the boat, and fold that squash meat right into the skillet mixture. 4. Mound & Top with Cheese: Flip the roasted squash halves cut-side up in a baking dish. Spoon the stuffing generously into each cavity, mounding it high. Sprinkle with freshly grated parmesan or gruyère cheese. 5. Golden Bake: Return the stuffed squashes to the 400°F oven for 10 to 12 minutes until the cheese is completely melted, bubbling, and golden brown around the edges. Garnish with fresh sage leaves and serve warm. 3 Chef Secrets for Perfect Results 1. Roast Cut-Side Down First: Roasting the squash halves cut-side down on the hot baking sheet traps steam inside while caramelizing the natural sugars in direct contact with the pan. This gives you sweet, fork-tender squash in less time without drying out. 2. Shave a Slivers off the Bottom: If your squash halves wobble or tilt when flipped over, slice a razor-thin piece off the curved skin on the back. This creates a flat bottom so they sit level and sturdy like natural bowls. 3. Toast Your Pecans Separately: Raw pecans will absorb moisture from the hot rice and soften. Toasting them in a dry skillet for 3 minutes before folding into the stuffing keeps them delightfully crunchy even after baking. What to Serve With Stuffed Butternut Squash Served restaurant-style with artisan crusty sourdough and festive seasonal beverages. Warm Artisan Sourdough: Thick toasted slices of sourdough or brioche dinner rolls with whipped honey herb butter. Crisp Seasonal Slaw or Salad: Shaved Brussels sprouts or massaged kale with pomegranate seeds and citrus vinaigrette. Holiday Beverages: Steaming hot spiced apple cider, iced cranberry spritzers, or sparkling pear punch. Storage, Freezing & Reheating Instructions Refrigeration: Allow leftover stuffed squash halves to cool to room temperature. Wrap securely in foil or store in airtight containers in the refrigerator for up to 4 days. Reheating: Reheat in a 350°F (175°C) oven covered with foil for 15–20 minutes until piping hot throughout. Uncover during the final 3 minutes to restore the crispy cheese topping. Freezing: Fully assembled unbaked squashes freeze well. Wrap tightly in plastic wrap and aluminum foil, and freeze for up to 2 months. Thaw overnight in the refrigerator before baking as instructed. Frequently Asked Questions Can I make this vegetarian or
Ultra-Moist Cream Cheese Swirl Pumpkin Bread with Cinnamon Streusel
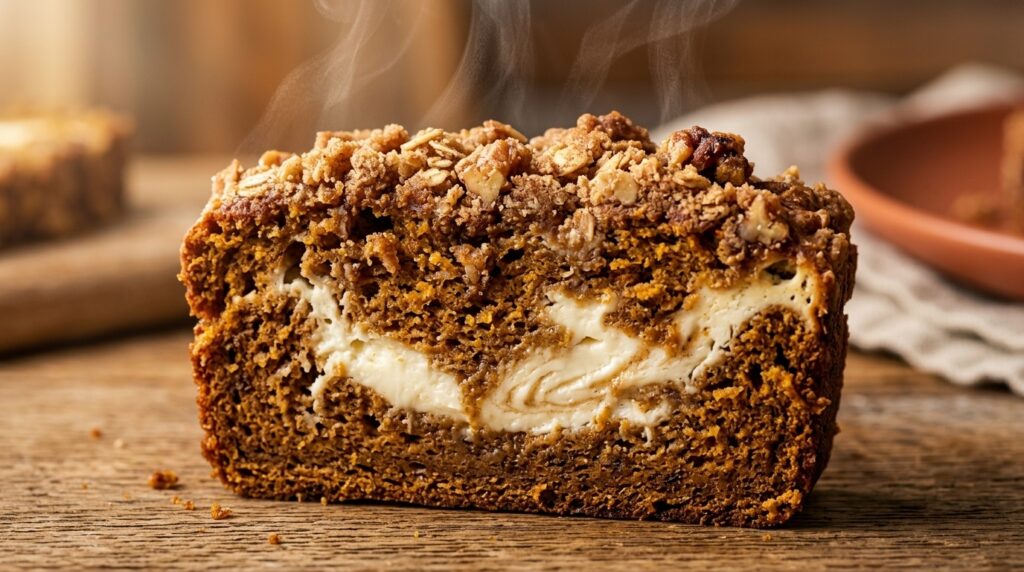
When the crisp autumn breeze fills the air, nothing welcomes the cozy season quite like the heavenly aroma of freshly baked spices wafting through your home. This Ultra-Moist Cream Cheese Swirl Pumpkin Bread takes fall baking to bakery-caliber heights, combining a rich, spiced pumpkin loaf with a velvety cheesecake ribbon baked right into the center and a crunchy brown sugar cinnamon streusel on top. Incredibly tender and staying moist for days, it is the ultimate companion to your morning coffee or afternoon chai latte. The secret to achieving an intensely moist crumb that never dries out lies in using pure canned pumpkin puree paired with melted butter and dark brown sugar. As the molasses in the sugar caramelizes during the bake, it locks in moisture while highlighting warm autumn spices like Saigon cinnamon, nutmeg, and ginger. Nestling a ribbon of sweetened cream cheese between two layers of batter creates a luxurious contrast between earthy pumpkin and silky, tangy cheesecake in every single slice. Why You\u2019ll Love This Recipe Unbeatable Moisture: Stays unbelievably soft, tender, and moist for up to five days thanks to real pumpkin puree and melted butter. Two Treats in One: Marries the comforting flavor of spiced pumpkin quick bread with the luxurious decadence of New York cheesecake. Irresistible Streusel Crunch: A golden-brown cinnamon and brown sugar crumb topping provides the perfect textural contrast to the soft interior. Simple One-Bowl Prep: Requires no fancy stand mixer\u2014just a whisk, a mixing bowl, and simple pantry staples. Key Ingredients & Smart Swaps Fresh, wholesome ingredients assembled for homemade cream cheese pumpkin bread. Pure Pumpkin Puree: Be sure to use 100% pure canned pumpkin (such as Libby’s), not pumpkin pie mix which contains added sugars and water. Cream Cheese: Brick-style full-fat Philadelphia cream cheese softened to room temperature creates a thick, stable cheesecake filling that won’t melt away during baking. Dark Brown Sugar & Granulated Sugar: Brown sugar brings rich molasses moisture and caramel undertones, while white sugar ensures a tender crumb structure. Warm Fall Spices: Ground cinnamon, nutmeg, ginger, and cloves (or a quality pumpkin pie spice blend) provide signature autumn warmth. European Butter & Neutral Oil: Combining melted butter for rich flavor with a splash of vegetable oil ensures long-lasting tenderness. All-Purpose Flour: Spooned and leveled to prevent a dense loaf. You can substitute with a 1-to-1 gluten-free baking blend with xanthan gum. Step-by-Step Cooking Walkthrough 1. Prep Pan & Make Streusel: Preheat your oven to 350\u00b0F (175\u00b0C). Line a 9×5-inch metal loaf pan with parchment paper, leaving an overhang on the sides for easy lifting. In a small bowl, combine flour, brown sugar, cinnamon, and cold diced butter; pinch together with your fingers until crumbly and set aside. 2. Whisk the Batters: In a medium bowl, beat the softened cream cheese, sugar, flour, and vanilla extract until completely smooth and lump-free. In a separate large bowl, whisk together the pumpkin puree, melted butter, oil, brown sugar, granulated sugar, eggs, and vanilla until glossy. Fold in the dry ingredients (flour, baking soda, salt, spices) just until combined. Swirling the velvety cream cheese ribbon through the pumpkin batter to create gorgeous marble layers. 3. Layer & Swirl: Spread half of the spiced pumpkin batter into the prepared loaf pan. Spoon the cream cheese filling evenly over the batter. Top with the remaining pumpkin batter, gently spreading it to cover the cream cheese. Use a butter knife or skewer to gently swirl the top layer. Sprinkle the cinnamon streusel generously across the top. 4. Bake to Golden Perfection: Bake at 350\u00b0F for 55 to 65 minutes. A toothpick inserted into the pumpkin portion (not the cream cheese) should come out with just a few moist crumbs. Tent loosely with foil during the last 15 minutes if the streusel browns too quickly. Cool in the pan for 20 minutes, then transfer to a wire rack to cool completely before slicing. 3 Chef Secrets for Perfect Results 1. Room Temperature Cream Cheese is Mandatory: If the cream cheese is cold, it will form stubborn lumps that won’t blend smoothly. Leave it on the counter for 45 minutes before starting, or microwave for 10 seconds on low power. 2. Don’t Over-Swirl: Just 3 to 4 figure-eight passes with a knife or skewer is ideal. If you swirl too aggressively, the cream cheese will blend entirely into the pumpkin batter rather than forming distinct, luscious white ribbons. 3. Chill Before Slicing for Clean Cuts: While warm pumpkin bread is tempting, chilling the baked loaf in the refrigerator for 1 to 2 hours sets the cheesecake layer, allowing you to slice clean, magazine-worthy bakery cuts without dragging the filling. What to Serve With Pumpkin Bread Served fresh with a steaming mug of spiced chai latte and crisp autumn foliage. Warm Spiced Beverages: Pair a thick slice with a hot cinnamon chai latte, freshly brewed French press coffee, or spiced hot apple cider. Whipped Honey Butter: Slather a slice with softened salted butter whipped with clover honey and a pinch of flaky sea salt. Fall Breakfast Spread: Serve alongside Greek yogurt bowls topped with fresh berries and toasted pecans for a balanced morning feast. Storage, Freezing & Reheating Instructions Refrigeration: Because of the real cream cheese center, store leftover slices in an airtight container in the refrigerator for up to 6 days. Gentle Reheating: Warm individual slices in the microwave for 10 to 15 seconds to soften the crumb and return the cheesecake center to creamy perfection. Freezing Guidelines: Wrap individual cooled slices tightly in plastic wrap and aluminum foil. Freeze for up to 3 months. Thaw in the fridge overnight or at room temperature for 30 minutes. Frequently Asked Questions Can I make muffins instead of a loaf?Yes! Divide the batter and cream cheese filling between 12 standard muffin cups and top with streusel. Bake at 375\u00b0F (190\u00b0C) for 18 to 22 minutes until set. Why did my cream cheese sink to the bottom?Adding a tablespoon of all-purpose flour to the cream cheese mixture stabilizes
Crispy Maple Balsamic Roasted Brussels Sprouts with Candied Pecans
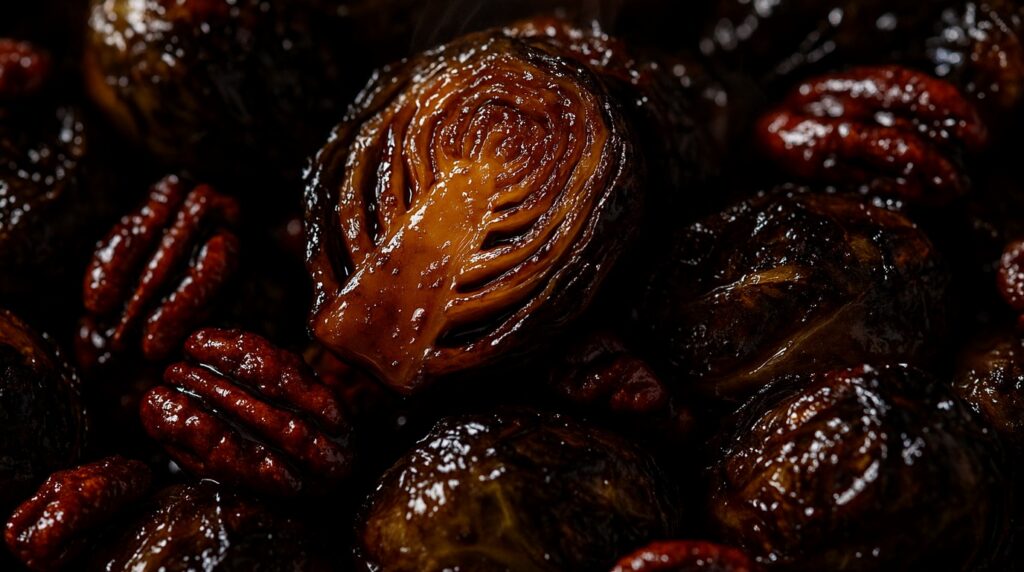
If you think you dislike Brussels sprouts, this showstopping holiday recipe will permanently change your mind. These Crispy Maple Balsamic Roasted Brussels Sprouts with Candied Pecans achieve the holy grail of vegetable cookery: shatteringly crisp, deeply caramelized outer leaves with meltingly tender, sweet interiors. Tossed in a glossy glaze of pure dark maple syrup and aged balsamic reduction, then finished with buttery toasted pecans and vibrant pomegranate jewels, this vibrant side dish steals the spotlight at any Thanksgiving, holiday feast, or weeknight dinner table. The culinary secret to roasting Brussels sprouts that turn ultra-crispy rather than soggy and sulfurous comes down to cut-side contact and high-heat roasting. Placing each trimmed sprout flat-side down directly onto a screaming-hot, oiled baking sheet at 425°F (220°C) flash-sears the surface through direct conduction. This triggers intense Maillard caramelization, converting the vegetable’s natural bitter glucosinolates into rich, sweet, nutty compounds while locking in a tender, moist interior. Why You’ll Love This Recipe Maximum Crispy Texture: High-heat roasting yields chip-like crunchy leaves and golden caramelized cut surfaces with zero sogginess. Irresistible Sweet-Savory Balance: Rich olive oil and savory garlic complement the tangy acidity of balsamic reduction and the mellow sweetness of pure maple syrup. Holiday Table Showstopper: Studded with ruby-red pomegranate seeds and toasted golden pecans, it looks like a gourmet catered centerpiece with under 10 minutes of prep. 100% Halal Wholesome: Completely vegetarian and wholesome—skipping pork bacon entirely in favor of smoky roasted pecans and natural maple glaze. Key Ingredients & Smart Swaps Fresh halved Brussels sprouts, extra virgin olive oil, pure maple syrup, balsamic reduction, raw pecans, and aromatic seasonings. Fresh Brussels Sprouts: Choose small to medium-sized, firm bright green heads. Smaller sprouts are naturally sweeter and more tender than large, cabbage-like ones. Trim the stems and halve lengthwise. Extra Virgin Olive Oil: Essential for conducting oven heat to crisp the exterior leaves. Be generous—coating every crevice ensures maximum crunch. Pure Dark Maple Syrup: Grade A dark or amber maple syrup provides complex woodsy sweetness that caramelizes beautifully under high heat. Avoid artificial pancake syrups. Aged Balsamic Glaze Reduction: Thick balsamic reduction provides a syrupy, tangy punch that cuts through rich savory dinners. Store-bought balsamic glaze saves time, or simmer regular balsamic vinegar until reduced by half. Raw Pecan Halves: Toasting pecans directly on the sheet pan or in a skillet releases their aromatic oils, adding a buttery crunch that rivals bacon. Walnuts or sliced almonds work great too. Ruby Pomegranate Arils: A fresh garnish that adds jewel-toned holiday elegance and burst-in-your-mouth tart sweetness. Step-by-Step Cooking Walkthrough 1. Prep & Preheat: Position an oven rack in the lower third of your oven and preheat to 425°F (220°C). Wash and pat the Brussels sprouts thoroughly dry with a clean kitchen towel—moisture is the enemy of crispiness! Trim the dry stem ends and slice each sprout in half lengthwise. 2. Season Generously: Place the halved sprouts in a large bowl. Drizzle with 3 tablespoons of olive oil, 1 teaspoon garlic powder, 1/2 teaspoon onion powder, 1 teaspoon kosher sea salt, and 1/2 teaspoon freshly cracked black pepper. Toss vigorously with your hands to work the oil into every leaf layer. CUT-SIDE DOWN TECHNIQUE: Placing every sprout flat-side down directly on the hot metal guarantees deep golden caramelization. 3. Arrange Cut-Side Down: Transfer the sprouts onto a large rimmed baking sheet. Take one minute to turn every single sprout cut-side down against the pan. Scatter any loose leaves across the sheet—they will crisp up into delectable vegetable chips! 4. High-Heat Roast: Roast undisturbed for 20 to 25 minutes. Do not stir or flip during the first 20 minutes! This allows the bottom cut surface to deeply brown. Add the pecan halves to the pan during the final 5 minutes so they toast without burning. 5. Glaze & Garnish: Remove the sizzling pan from the oven. Drizzle 2 tablespoons of pure maple syrup and 2 tablespoons of thick balsamic glaze directly over the hot sprouts, tossing gently to coat. Transfer to a serving platter, garnish with pomegranate arils, and serve warm! 3 Chef Secrets for Perfect Results 1. Dry Thoroughly Before Oiling: Any leftover water from washing will steam the sprouts in the oven rather than roasting them. Thoroughly drying each sprout with towels ensures instant blistered crispiness. 2. Never Line with Parchment If You Want Max Char: While parchment paper makes cleanup slightly faster, placing the oiled sprouts directly onto the bare metal sheet pan conducts heat far more aggressively, creating that steakhouse-style charred crust. 3. Glaze Only After Roasting: Adding maple syrup or balsamic glaze before baking will cause the sugars to scorch black before the sprouts cook through. Always toss with the sweet glaze right as the pan emerges sizzling from the oven. What to Serve With Roasted Brussels Sprouts Heaped in an artisan ceramic serving bowl with candied pecans, pomegranate arils, and a drizzle of balsamic reduction. Herb-Roasted Turkey Breast or Roast Chicken: The sweet and tangy balsamic glaze cuts through savory poultry, making it the quintessential Thanksgiving companion. Creamy Garlic Mashed Potatoes: The crispy texture of roasted sprouts pairs in heavenly contrast against fluffy, buttery mashed potatoes. Slow-Cooker Pot Roast: Serve alongside tender braised beef chuck roast and carrots for a comforting Sunday feast. Storage, Freezing & Reheating Instructions Refrigeration: Store leftover sprouts in an airtight glass container in the refrigerator for up to 4 days. Restoring Maximum Crunch: Reheat in an air fryer at 375°F (190°C) for 3 to 4 minutes, or on a baking sheet in a 400°F (200°C) oven for 6 to 8 minutes. Avoid the microwave, which turns roasted sprouts soggy! Freezing Guidelines: Roasted Brussels sprouts do not freeze well because the ice crystals break down cell walls, resulting in a mushy texture when thawed. Fresh is best! Frequently Asked Questions Can I make these in an air fryer?Yes! Cook in a preheated air fryer at 380°F (195°C) for 12 to 14 minutes, shaking the basket halfway through. Toss with maple syrup, balsamic glaze, and pecans right after
Creamy Green Bean Casserole with Crispy Shallots
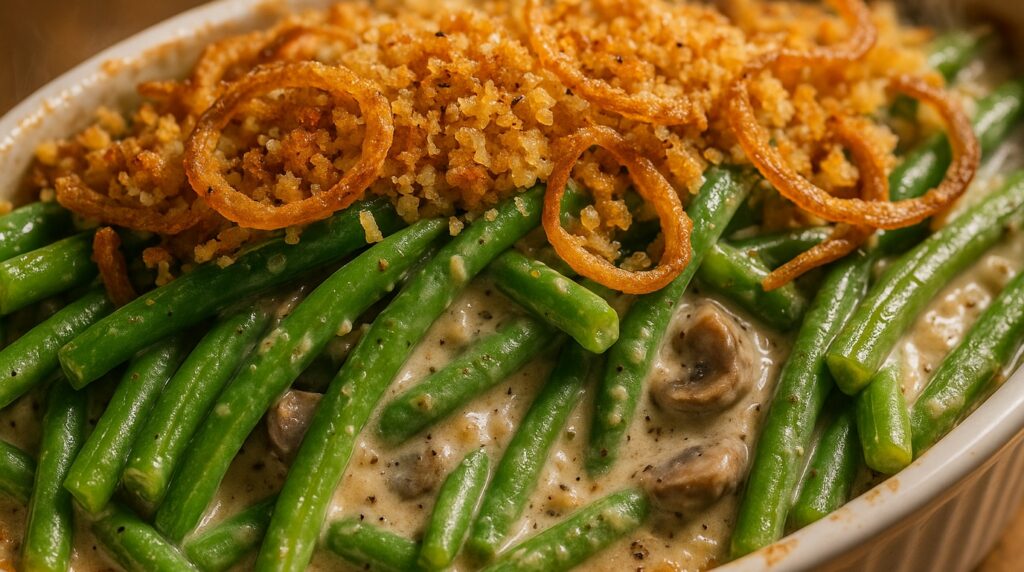
Say goodbye forever to mushy canned soup and soggy store-bought toppings with this incredible Creamy Green Bean Casserole with Crispy Shallots. Crisp-tender fresh green beans are tossed in a velvety, scratch-made garlic and cremini mushroom cream sauce, baked until bubbling, and crowned with a generous mountain of golden, shatteringly crisp homemade fried shallots. It is the definitive holiday side dish that elevates any Thanksgiving or family feasting table to pure gourmet luxury. The culinary secret to mastering this classic casserole from scratch is treating the green beans and the cream sauce with proper technique. Instead of boiling the beans until limp, a rapid 4-minute blanch in salted water followed immediately by an ice bath shocks the green beans, locking in an appetizing, vibrant emerald color and snappy bite. Simultaneously, creating the velvety sauce with caramelized cremini mushrooms, real dairy butter, garlic, fresh thyme, and a subtle whisper of nutmeg builds deep woodland umami that commercial condensed canned soups simply cannot rival. Why You’ll Love This Recipe 100% From Scratch (Zero Canned Soup): Made with real fresh mushrooms, sweet dairy cream, and roasted garlic for pure, wholesome, restaurant-quality flavor. Unbeatable Shatteringly Crisp Topping: Thinly sliced shallots fried to golden perfection with panko breadcrumbs deliver ten times more crunch and sweet aroma than processed french fried onions. Perfect Make-Ahead Holiday Side: You can prepare the casserole base up to 48 hours in advance, keeping Thanksgiving day kitchen stress to a minimum. 100% Halal Wholesome: Real dairy butter, fresh market produce, vegetable broth, and olive oil; strictly free from bacon grease, lard, and alcohol. Key Ingredients & Smart Swaps Fresh green beans, cremini mushrooms, sliced shallots, butter, cream, and fresh thyme arranged for preparation. Fresh Green Beans (Haricots Verts): Choose firm, slender fresh green beans. Trim the stem ends and slice them in half for comfortable bite-sized eating. Avoid canned beans entirely! Fresh Cremini (Baby Bella) Mushrooms: Sliced brown mushrooms add rich earthy depth and a meaty texture to the scratch-made cream sauce. Fresh Shallots: Thinly sliced shallot rings fry up sweeter, crispier, and far more delicate than regular yellow onions. Heavy Cream & Vegetable Broth: The combination of rich heavy cream and savory broth creates an unctuous, silky sauce that coats the beans without turning heavy or pasty. Fresh Garlic, Thyme & Nutmeg: Minced garlic, aromatic garden thyme, and a pinch of freshly grated nutmeg provide the quintessential French holiday flavor profile. Panko Breadcrumbs & Parmesan: Mixed with the crispy shallots for an extra dimension of golden, flaky crunch and savory sharpness. Unsalted Butter & Olive Oil: Butter lends rich browning for the mushrooms and roux, while olive oil provides the ideal medium for gently frying the shallots to amber perfection. Step-by-Step Cooking Walkthrough 1. Blanch the Green Beans: Bring a large pot of salted water to a rolling boil. Add trimmed green beans and cook for exactly 4 minutes until crisp-tender. Immediately transfer with a slotted spoon into a bowl of ice water to halt cooking and preserve their bright green color. Drain thoroughly and pat dry with clean kitchen towels. 2. Fry the Crispy Shallot Topping: Toss sliced shallot rings in a small bowl with 2 tablespoons of flour and a pinch of salt. Heat 1/3 cup olive oil in a skillet over medium heat. Fry shallots in batches for 3 to 4 minutes, stirring constantly until golden amber and crisp. Transfer to a paper towel-lined plate. Toss with panko breadcrumbs and set aside. FROM-SCRATCH LUXURY: Fresh blanched beans are coated in a simmering garlic mushroom cream reduction before baking. 3. Build the Mushroom Cream Sauce: In the same skillet, melt 2 tablespoons of butter over medium-high heat. Add sliced mushrooms and cook undisturbed for 4 minutes until golden browned. Add minced garlic, thyme, and nutmeg; cook 60 seconds. Sprinkle 2 tablespoons of flour over the mushrooms and stir for 1 minute. Slowly whisk in 1 cup of broth and 1 cup of heavy cream. Simmer for 3 minutes until thick and glossy. Stir in grated parmesan, salt, and pepper. 4. Assemble and Bake: Gently fold the drained green beans into the hot mushroom cream sauce until thoroughly coated. Transfer into a greased 9×13-inch (or 2-quart) ceramic baking dish. Bake at 375°F (190°C) for 15 minutes until bubbly around the edges. Scatter the crispy shallot and panko topping across the surface and bake for an additional 5 minutes until deeply golden. Rest 5 minutes before serving. 3 Chef Secrets for Perfect Results 1. Shocking Beans in Ice Water: Never skip the ice bath! Plunging boiled green beans into ice water stops the cooking instantly, ensuring the beans retain their snappy crunch and emerald color even after baking in the oven. 2. The Pinch of Grated Nutmeg: Just 1/8 teaspoon of freshly grated nutmeg elevates a dairy cream sauce from plain to gourmet. It cuts through the rich cream and enhances the earthy mushroom notes beautifully. 3. Add Shallots in the Final 5 Minutes: If you bake the delicate fried shallots for the entire 20 minutes, they will burn and turn bitter. Adding them during the last 5 minutes of baking keeps them shatteringly crisp and fragrant. What to Serve With Green Bean Casserole Served holiday-style alongside feasting mains with fresh thyme and coarse cracked black pepper. Garlic Herb Roasted Turkey: The savory mushroom cream sauce pairs seamlessly with tender roast turkey breast and savory herb pan gravy. Velvety Mashed Sweet Potatoes: Brown butter mashed sweet potatoes provide a sweet, buttery contrast to the savory green bean casserole. Flaky Honey Cranberry Bites: Warm puff pastry bites with melted brie and tart ruby cranberry sauce make the ultimate festive appetizer. Spiced Sparkling Apple Cider: Chilled sparkling cider with cinnamon sticks and orange wheels keeps the holiday palate refreshed. Storage, Freezing & Reheating Instructions Make-Ahead Strategy: Blanch the beans and make the mushroom cream sauce up to 2 days ahead. Mix and store in the covered baking dish in the fridge. Fry the shallots separately and store in an airtight container at
Flaky Honey Cranberry Brie Puff Pastry Bites

When it comes to festive entertaining, nothing dazzles holiday guests faster or disappears quicker from the table than these Flaky Honey Cranberry Brie Puff Pastry Bites. Golden, buttery, shatteringly crisp puff pastry cups cradle a pocket of molten, gooey melted brie cheese, crowned with glistening sweet-tart spiced cranberry sauce, crunchy toasted pecans, and fragrant fresh rosemary needles. Requiring just 6 simple ingredients and 20 minutes of baking, they deliver five-star French hors d’oeuvre luxury with almost zero holiday stress. The secret to keeping puff pastry cups crisp and structurally sound beneath warm, melting cheese lies in temperature management. Commercial puff pastry relies on alternating micro-layers of cold butter and dough; if the pastry becomes too warm before hitting the oven, the butter melts into the pan rather than flashing into steam to puff the pastry. By working with slightly chilled pastry dough, pressing squares gently into a mini muffin tin, and popping the filled pan into a hot 400°F (200°C) oven immediately, each cup puffs rapidly into a crisp, golden cradle that holds the gooey melted cheese without soggy bottoms. Why You’ll Love This Recipe Instant Holiday Showstopper: Gorgeous festive colors—golden pastry, ruby red cranberries, and forest-green rosemary—make any holiday spread feel high-end. Only 6 Wholesome Ingredients: Puff pastry, creamy brie, whole berry cranberry sauce, pecans, fresh rosemary, and a touch of honey. Make-Ahead Friendly: Can be assembled in the muffin tin up to 6 hours ahead of time and kept chilled in the fridge, ready to bake right as guests arrive. 100% Halal Wholesome: Natural dairy butter puff pastry, vegetarian-rennet brie cheese, pure fruit preserves, raw honey, and fresh herbs; strictly alcohol-free and pork-free. Key Ingredients & Smart Swaps All-butter puff pastry, French brie cheese cubes, fresh cranberries, clover honey, toasted pecans, and rosemary arranged for baking. All-Butter Puff Pastry: Look for store-bought puff pastry made with real butter (like Dufour or Pepperidge Farm) for the flakiest lift and deepest flavor. Thaw in the fridge overnight. Creamy Brie Cheese: Choose a standard wheel of double-cream brie. There is no need to remove the edible rind—it softens in the oven and helps hold the melted cheese together. (Camembert is a fantastic swap). Whole Berry Cranberry Sauce: Use homemade simmered cranberry sauce with orange zest or quality canned whole-berry sauce. Avoid jellied cranberry sauce, which becomes too runny when heated. Chopped Toasted Pecans or Walnuts: Provides essential buttery crunch and textural contrast against the gooey melted cheese and flaky crust. Fresh Rosemary Needles: Fresh piney rosemary aromatics cut through the richness of the melted brie and amplify festive holiday flavors. Pure Amber Honey: A delicate drizzle over the hot bites right out of the oven ties the sweet, tart, and savory notes together. Step-by-Step Cooking Walkthrough 1. Prep Oven & Tin: Preheat oven to 400°F (200°C). Lightly grease a standard 24-cup mini muffin tin with olive oil or butter cooking spray. 2. Cut & Shape Pastry: Unfold 1 sheet of chilled puff pastry onto a lightly floured surface. Roll gently with a rolling pin into a 10×12-inch rectangle. Using a pizza cutter or sharp knife, cut into 24 even squares (about 2×2.5 inches each). Press each square gently into a muffin cup, allowing corners to flare out naturally. ASSEMBLY SECRET: Keep pastry cold before baking so the butter steam puffs the pastry walls tall and crisp around the melting brie. 3. Fill with Brie & Cranberries: Cut an 8-ounce wheel of brie into 24 bite-sized cubes (about 3/4-inch each). Place one cube of brie into each pastry cup. Top each cheese cube with 1 teaspoon of whole berry cranberry sauce, a sprinkle of chopped toasted pecans, and a small sprig of fresh rosemary. 4. Bake & Honey Glaze: Bake at 400°F (200°C) for 15 to 18 minutes until the pastry corners are deeply golden-brown and the brie is bubbling and molten. Remove from oven and let cool in the pan for 5 minutes. Drizzle lightly with warm honey, garnish with extra fresh rosemary, and serve warm. 3 Chef Secrets for Perfect Results 1. Chill the Brie Before Cutting: Warm brie gets sticky and impossible to cube cleanly. Keep your brie in the freezer for 15 minutes before slicing; the knife will glide through cleanly into perfect cubes without sticking. 2. Don’t Overfill the Cups: Resist the urge to heap extra cranberry sauce on top. Overfilled cups will boil over onto the tin, causing sticky burnt sugar edges that make the pastries stick to the pan. 3. The 5-Minute Pan Rest: Molten brie is very fluid straight out of the hot oven. Letting the pastries rest in the tin for 5 minutes allows the pastry to firm up and the cheese to stabilize so they lift out effortlessly with a small offset spatula. What to Serve With Cranberry Brie Bites Served holiday party-style on a slate platter with honey drizzle, whole cranberries, and fresh rosemary sprigs. Sparkling Spiced Apple Cider Mocktail: Chilled sparkling apple cider with cinnamon sticks and orange slices provides crisp, effervescent holiday cheer. Holiday Charcuterie Board: Pair alongside smoked almonds, fresh figs, artisan crackers, halal cured meats, and dark chocolate. Cranberry Pomegranate Punch: Tart pomegranate juice, ginger beer, fresh mint, and lime wedges over crushed ice. Gourmet Roasted Nuts & Olives: Warm rosemary-roasted Marcona almonds and Castelvetrano olives round out an upscale finger-food spread. Storage, Freezing & Reheating Instructions Best Served Fresh: These bites are phenomenal warm within 30 minutes of leaving the oven while the pastry is crispiest. Refrigeration: Store leftover baked bites in an airtight container in the refrigerator for up to 3 days. Reheating Hack for Maximum Crispness: Reheat in a 350°F (175°C) toaster oven or conventional oven for 5 to 7 minutes. The puff pastry will re-crisp completely and the brie will return to gooey perfection! (Avoid microwaving, which makes puff pastry chewy). Frequently Asked Questions Can I make these ahead of time?Yes! You can assemble the unbaked pastry cups with the brie, cranberry sauce, and pecans in the muffin tin up to 6
Velvety Brown Butter Garlic Mashed Sweet Potatoes
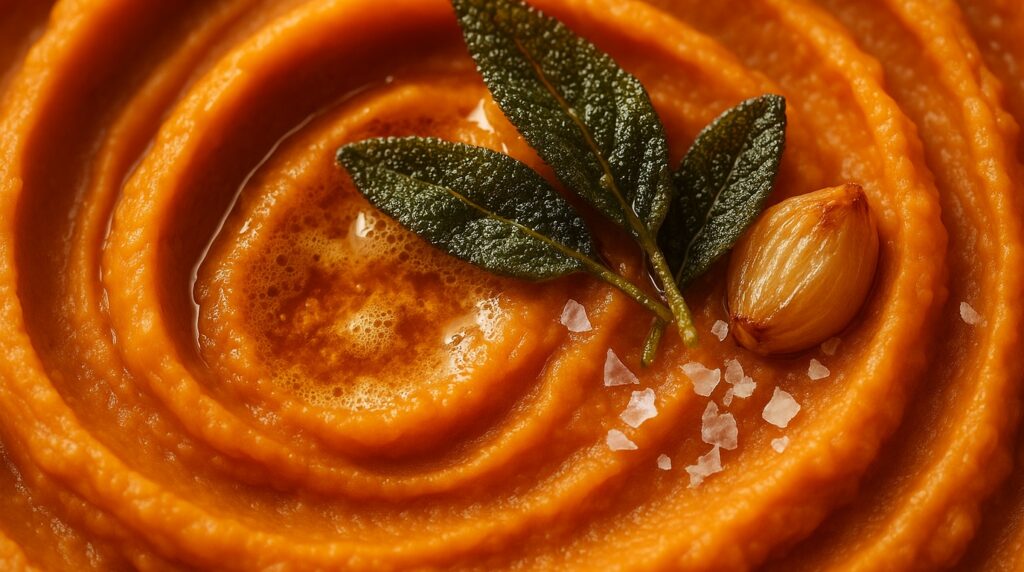
When it comes to holiday feasting and autumn dinner tables, traditional sweet potato casseroles weighed down with artificial marshmallows are officially taking a backseat. These Velvety Brown Butter Garlic Mashed Sweet Potatoes deliver a sophisticated masterclass in savory-sweet balance—featuring steaming, whipped garnet sweet potatoes folded with deeply caramelized nutty brown butter, sweet roasted garlic, fragrant fried sage leaves, and a delicate touch of pure maple syrup. The culinary secret to elevating humble sweet potatoes into a five-star dining centerpiece lies in the transformative chemistry of brown butter (beurre noisette). By gently simmering unsalted butter until its milk solids toast into amber specks, you unlock an intoxicating aroma of roasted hazelnuts and toffee. When blended with whole heads of slow-roasted garlic and warm cream, the savory depth cuts right through the natural starchiness of the tubers, yielding an impossibly silky, cloud-like texture that rivals the finest steakhouses. Why You’ll Love This Recipe Sophisticated Holiday Upgrade: Ditch cloying sugar-heavy casseroles for a naturally nuanced, gourmet side that earns rave reviews at Thanksgiving and holiday feasts. Incredible Texture & Moisture: Steaming the potatoes rather than boiling them locks in rich beta-carotene sweetness without absorbing excess waterlogging moisture. 100% Halal Wholesome: Made entirely with pure natural root vegetables, creamy dairy butter, roasted garlic, and pure amber maple syrup with zero gelatin or artificial syrups. Effortless Make-Ahead Side: Can be prepared up to two days in advance and gently rewarmed in a slow cooker or oven before your feast begins. Key Ingredients & Smart Swaps Fresh garnet sweet potatoes, unsalted butter, whole roasted garlic, and fresh herbs assembled on our workstation. Garnet or Jewel Sweet Potatoes: Dense, vibrant orange varieties offer superior moisture and natural sweetness compared to lighter white or purple sweet potatoes. Quality Unsalted Butter: The cornerstone of our nutty brown butter sauce. Unsalted butter allows complete control over the dish’s saltiness while toasting milk solids evenly. Whole Head of Roasted Garlic: Roasting whole garlic bulbs in olive oil caramelizes the pungent cloves into soft, spreadable sweet cloves that melt into the mash. Heavy Whipping Cream (Warm): Adding warmed dairy ensures the potatoes stay hot and fluff up into a velvety cloud without cooling the brown butter. Pro Swap: Full-fat coconut milk creates a luscious dairy-free alternative. Pure Grade A Amber Maple Syrup: Just 2 tablespoons enhance the earthy potato profile without turning the side dish into a dessert. Fresh Sage & Thyme: Earthy autumn herbs fried directly in the sizzling butter infuse every drop with woodsy aromatics. Step-by-Step Cooking Walkthrough 1. Roast the Garlic & Steam Potatoes: Slice 1/2-inch off the top of a whole garlic head, drizzle with olive oil, wrap tightly in foil, and roast at 400°F (200°C) for 40 minutes until golden and soft. Meanwhile, peel and cube 3 pounds of sweet potatoes into uniform 1-inch pieces. Steam in a steamer basket over boiling water for 18 to 20 minutes until easily pierced with a fork. 2. Brown the Butter with Crisp Sage: In a light-colored saucepan over medium heat, melt 1/2 cup of unsalted butter. Swirl frequently as it foams. Once the foam subsides and tiny golden-brown flecks appear at the bottom with a hazelnut aroma (about 4 to 5 minutes), drop in whole fresh sage leaves for 30 seconds until crisp. Immediately remove from heat and transfer sage to a paper towel. TECHNIQUE CUE: Swirling warm brown butter directly into freshly steamed potatoes coats each starch granule for a silky, lump-free texture. 3. Mash & Incorporate: Transfer the hot steamed potatoes into a large mixing bowl or back into the warm pot. Squeeze the soft roasted garlic cloves out of their skins directly over the potatoes. Pour in 1/3 cup of warm heavy cream, 2 tablespoons of pure maple syrup, 1 teaspoon of kosher salt, a pinch of freshly ground nutmeg, and three-quarters of the warm brown butter. Mash thoroughly with a hand potato masher or hand mixer until completely smooth and velvety. 4. Swirl, Pool & Garnish: Spoon the whipped sweet potatoes into a shallow serving dish, using the back of a large spoon to create decorative swooshes and shallow valleys. Drizzle the remaining brown butter over the top, letting it pool in the crevices. Garnish with the crispy fried sage leaves and a sprinkle of flaky sea salt flakes. 3 Chef Secrets for Perfect Results 1. Steam, Never Boil in Water: Boiling cut sweet potatoes in a pot of water waterlogs the tubers, diluting their natural honeyed flavor and resulting in a runny mash. Steaming locks the natural moisture inside while keeping the starch structure intact. 2. Use a Light-Colored Pan for Brown Butter: Browning butter requires precise visual monitoring. A stainless steel or light ceramic skillet lets you observe the milk solids turning amber, preventing the delicate butter from burning. 3. Always Warm Your Dairy: Pouring cold milk or cream straight from the fridge onto warm potatoes shocks the starches, resulting in a gummy or separated texture. Gently warm the cream on the stovetop before blending. What to Serve With Brown Butter Mashed Sweet Potatoes Served holiday-style with roast poultry, seasoned green vegetables, and warm dinner rolls. Garlic Herb Butter Roasted Turkey Breast: The savory pan juices from roasted poultry pair heavenly with the nutty sweetness of the potatoes. Crisp Garlic Green Beans or Roasted Brussels Sprouts: Charred, crunchy green vegetables provide a vibrant textural balance against the creamy mash. Warm Artisan Dinner Rolls: Freshly baked sourdough rolls to dip into the pooling sage brown butter. Spiced Apple Cider or Sparkling Cranberry Punch: A festive chilled glass of sparkling cider rounds out the autumn holiday spread. Storage, Freezing & Reheating Instructions Refrigeration: Cool completely and store in an airtight container in the refrigerator for up to 4 days. The garlic and brown butter flavors develop even more depth overnight. Oven or Stovetop Reheating: Reheat gently in a covered baking dish at 350°F (175°C) for 15 to 20 minutes, stirring in a splash of warm cream or butter to refresh the glossy consistency. Freezing:
Juicy Garlic Herb Butter Roasted Turkey Breast: Foolproof Recipe
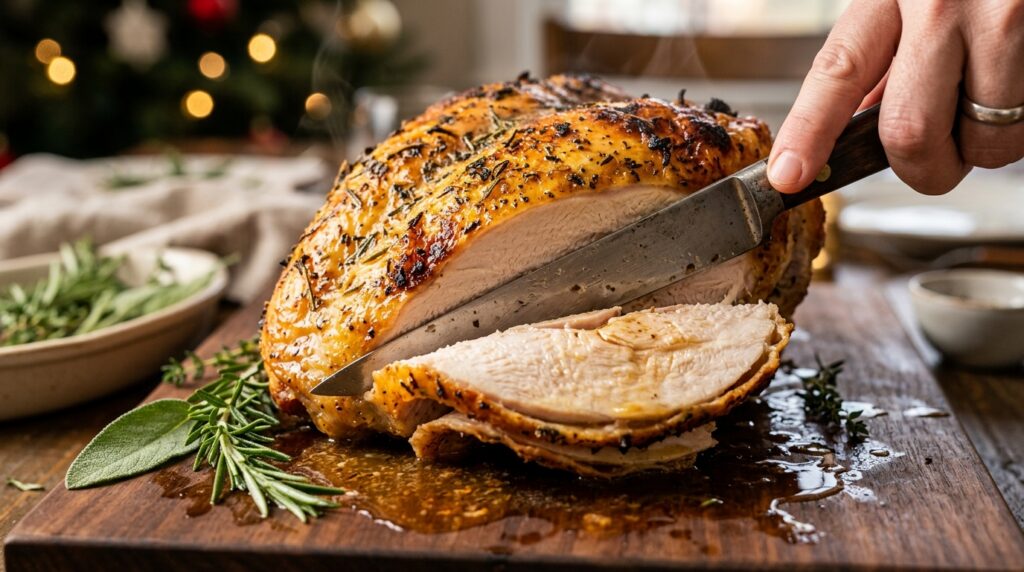
Roasting a showstopping holiday centerpiece does not require the stress of cooking an entire 15-pound bird. This Juicy Garlic Herb Butter Roasted Turkey Breast delivers shatteringly crisp, golden skin and exquisitely succulent, melt-in-your-mouth tender meat in just over an hour. Basted in fragrant garlic-herb compound butter and resting on a bed of sweet roasted aromatics, it yields rich, velvety pan drippings that create the most luxurious homemade turkey gravy you will ever taste. The secret to eliminating dry, chalky turkey meat lies in two essential culinary techniques: compound butter application under the skin and temperature-monitored roasting. By gently loosening the skin and massaging seasoned garlic, rosemary, sage, and thyme butter directly onto the breast meat, the fats melt slowly inward during roasting, continuously basting the lean meat from within. Meanwhile, keeping the exterior skin dry and basting it during the final 15 minutes creates that coveted crackling, golden-bronze holiday crust. Why You’ll Love This Recipe Foolproof & Stress-Free: Roasts to juicy perfection in just 60 to 75 minutes without the complex logistics of cooking a whole turkey. Unmatched Flavor & Moisture: Double herb-butter treatment (underneath the skin and brushed over the surface) guarantees tender, succulent meat every time. 100% Halal Wholesome: Made with all-natural halal turkey, rich chicken or turkey bone broth, garlic, and fresh herbs; completely free of wine or pork derivatives. Built-In Rich Pan Gravy: The roasting pan juices combine with aromatic shallots, celery, and broth to produce extraordinary velvet gravy in 5 minutes. Key Ingredients & Smart Swaps Whole bone-in turkey breast, herb butter logs, fresh herbs, and aromatics prepped on our workstation. Bone-In, Skin-On Turkey Breast (5 to 6 lbs): Bone-in retains significantly more moisture and flavor than boneless cuts, while the skin provides a crispy barrier against oven heat. Unsalted Butter (Softened): Forms the base of our compound herb butter. Quality butter emulsifies with minced herbs and roasted garlic for deep richness. Fresh Poultry Herb Trio: Finely minced fresh rosemary, sage, and thyme deliver quintessential holiday warmth and aroma. Fresh Garlic: 6 cloves minced finely into the butter plus whole crushed cloves in the bottom of the roasting pan. Smoked Paprika: Imparts a subtle smoky undertone and gives the skin a rich, appetizing mahogany-gold color. Low-Sodium Turkey or Chicken Bone Broth: Poured into the roasting pan bottom to prevent drippings from scorching and provide base stock for gravy. Step-by-Step Cooking Walkthrough 1. Prep & Dry: Preheat your oven to 375°F (190°C). Remove the turkey breast from refrigeration 30 minutes prior to cooking. Pat the skin completely dry inside and out with paper towels—dry skin is the key to crackling crispness. 2. Mix Compound Herb Butter: In a medium bowl, blend 6 tablespoons of softened unsalted butter with minced garlic, chopped rosemary, sage, thyme, 1 teaspoon kosher salt, 1/2 teaspoon black pepper, and 1/2 teaspoon smoked paprika until smooth and fragrant. TECHNIQUE CUE: Rubbing herb butter directly onto the meat under the skin bastes the turkey from within as it roasts. 3. Butter Under & Over Skin: Using clean fingers, gently separate the skin from the meat, taking care not to tear it. Spread two-thirds of the compound butter directly over the breast meat under the skin. Smooth the skin back into place and massage the remaining butter all over the exterior skin. 4. Roast to Golden Perfection: Place sliced shallots, celery ribs, and 1 cup of broth in the bottom of a roasting pan. Set a roasting rack inside and place the turkey breast skin-side up on top. Roast for 60 to 75 minutes until an instant-read thermometer inserted into the thickest part of the breast registers 162°F (72°C). 5. Rest & Carve: Transfer the roasted turkey breast to a warm wooden carving board and tent loosely with foil for 15 to 20 minutes. Carryover heat will bring internal temperature to a food-safe 165°F (74°C) while meat juices redistribute throughout every slice. 3 Chef Secrets for Perfect Results 1. Always Bring Turkey to Room Temperature: Placing an ice-cold turkey breast into a hot oven causes the exterior meat to dry out before the center near the bone reaches temperature. Resting on the counter for 30 minutes ensures even, uniform roasting. 2. Pull at 162°F (Never 165°F): Due to carryover cooking, dense turkey breast continues to rise 3 to 5 degrees while resting on the cutting board. Pulling at 162°F guarantees extraordinarily juicy meat that never tastes dry or stringy. 3. Carve Horizontally Across the Grain: For the most tender bite, slice each breast half completely off the central breastbone in one whole piece, then slice horizontally across the grain into 1/2-inch thick tender rounds. What to Serve With Roasted Turkey Breast Carved and served with velvety brown butter sweet potatoes, fresh green beans, and rich pan gravy. Velvety Brown Butter Mashed Sweet Potatoes: Nutty browned butter and roasted garlic mashed sweet potatoes provide the ultimate holiday pairing. Skillet Garlic Herb Green Beans: Crisp-tender green beans sautéed in butter with toasted sliced almonds balance the meal with vibrant freshness. Homemade Cranberry Citrus Sauce: Tart ruby cranberries simmered with fresh orange zest and cinnamon offer bright acidity that complements rich roasted poultry. Fluffy Dinner Rolls: Warm honey-buttered brioche rolls for mopping up golden pan drippings and gravy. Storage, Freezing & Reheating Instructions Refrigeration: Carve leftover turkey and store with a spoonful of pan gravy in an airtight container for up to 4 days. The gravy keeps the meat wonderfully moist during storage. Gentle Oven Reheating: Place sliced turkey in a baking dish with 2 tablespoons of broth or gravy, cover tightly with foil, and warm at 325°F (165°C) for 12 to 15 minutes. Freezing: Sliced turkey breast freezes beautifully for up to 3 months when packed tightly in freezer-safe bags with pan drippings. Thaw overnight in the refrigerator before reheating. Frequently Asked Questions Can I use a boneless turkey breast?Yes! A 3 to 4 lb boneless turkey breast will roast slightly faster (approx. 45 to 55 minutes). Monitor temperature closely and pull at 162°F. What if