
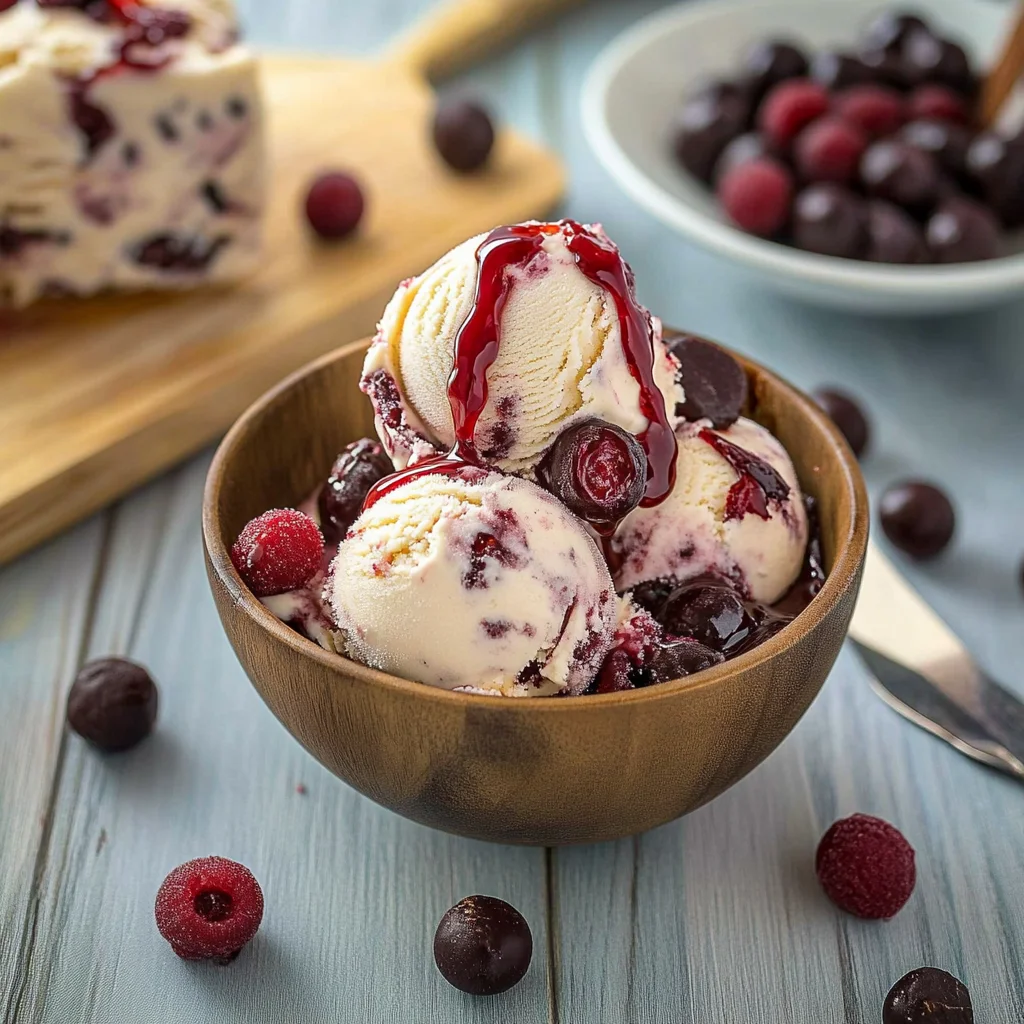
Imagine the moment you scoop into a velvety swirl of Cherry Garcia Ice Cream, where luscious cherry flavor dances with rich chocolate chunks, creating a symphony of taste that teases your senses. The sweet aroma wafts up, igniting memories of summer picnics and lazy afternoons, as each bite melts into pure bliss, leaving you craving more.
This delightful treat is not just an indulgence; it’s a nostalgic journey that transports you back to carefree days spent under the sun. Whether you’re hosting a backyard barbecue or simply treating yourself after a long day, this homemade cherry ice cream promises an unforgettable flavor experience that will have everyone coming back for seconds—and thirds!
Why Is Cherry Garcia Ice Cream So Irresistibly Good?
Indulge in the creamy richness of our homemade Cherry Garcia Ice Cream, made with 2 cups of heavy cream for a luscious texture. Fresh cherries, pitted and chopped, bring a burst of fruity flavor, while dark chocolate chips add delightful bites of decadence. Enjoy the simplicity of a 15-minute prep time that delights everyone, making it the perfect treat for any occasion!
Cherry Garcia Ice Cream Ingredient List
- For the Ice Cream Base
- 2 cups heavy cream – This rich cream creates a smooth and decadent base for your ice cream.
- 1 cup whole milk – Whole milk adds creaminess and balances out the richness of the heavy cream.
- 3/4 cup granulated sugar – Sweetens your ice cream while enhancing the natural flavors of cherries and chocolate.
- 1 teaspoon vanilla extract – A classic flavor that complements the cherry and chocolate beautifully.
- 1 tablespoon cherry extract (optional) – Use this for an extra burst of cherry flavor in your Cherry Garcia Ice Cream.
- For the Add-ins
- 1 cup fresh cherries (pitted and chopped) – Fresh cherries provide a delightful tartness and texture in every scoop.
- 1/2 cup dark chocolate chips – Rich, dark chocolate chips add a lovely contrast to the sweetness of the ice cream.
Step-by-Step Cherry Garcia Ice Cream
1. Whisk Ingredients: In a mixing bowl, whisk together 2 cups heavy cream, 1 cup whole milk, 3/4 cup granulated sugar, 1 teaspoon vanilla extract, and 1 tablespoon cherry extract until the sugar is fully dissolved. This creamy base sets the perfect foundation.
2. Chill Mixture: Cover the bowl and refrigerate the mixture for at least 2 hours or until thoroughly chilled. A colder base helps achieve that delightful texture when churning.
3. Churn Ice Cream: Pour the chilled mixture into the ice cream maker and churn according to the manufacturer’s instructions until it reaches a soft-serve consistency. You’ll notice it thickening beautifully!
4. Add Cherries and Chocolate: During the last few minutes of churning, add in 1 cup fresh cherries (pitted and chopped) and 1/2 cup dark chocolate chips. Watch as they swirl into your Cherry Garcia Ice Cream!
5. Freeze: Transfer the ice cream to a freezer-safe container and freeze for at least 2 hours to firm up before serving. Patience pays off for that perfect scoop.
Optional: Top with extra chopped cherries for a vibrant garnish.
Exact quantities are listed in the recipe card below.
Secrets to Perfect Cherry Garcia Ice Cream
- Chill the Base Well: Ensure your ice cream base is thoroughly chilled for at least 2 hours; this helps achieve a smoother texture and better flavor.
- Use Fresh Cherries: Opt for ripe, in-season cherries for the best taste. Frozen cherries can lead to excess water, affecting creaminess.
- Avoid Over-churning: Stop the ice cream maker once it reaches a soft-serve consistency. Over-churning can make the final product icy rather than creamy.
- Mix Carefully: When adding the chopped cherries and chocolate chips, do so gently during the last few minutes of churning to maintain their integrity in your Cherry Garcia Ice Cream.
- Seal It Right: Store your homemade ice cream in an airtight container to prevent freezer burn and maintain that delicious cherry flavor.
How to Store and Freeze Cherry Garcia Ice Cream

- Fridge: Enjoy any leftover Cherry Garcia Ice Cream within 3 days for optimal freshness. Store it in an airtight container to prevent ice crystals from forming.
- Freezer: For longer storage, keep your ice cream in the freezer for up to 2 weeks. Ensure it’s tightly sealed to maintain its creamy texture and flavor.
- Serving: If your ice cream becomes too hard, let it sit at room temperature for about 5-10 minutes before scooping. This will make serving easier without compromising quality.
Cherry Garcia Ice Cream Your Way
Unleash your creativity in the kitchen and make this delightful treat truly yours with these exciting twists!
- Dairy-Free: Substitute coconut cream for heavy cream and almond milk for whole milk. This transforms the ice cream into a luscious, tropical delight. You’ll still enjoy that creamy texture but with a hint of coconut flavor.
- Sweetened with Honey: Replace granulated sugar with 3/4 cup of honey. This natural sweetener adds a floral note and can enhance the overall taste profile beautifully. Plus, it gives the ice cream a lovely golden hue.
- Vanilla Bean Bliss: Use one vanilla bean instead of vanilla extract for an intense, aromatic flavor. The tiny black specks will not only elevate the taste but also add visual appeal to your creamy concoction.
- Cherry-Lime Fusion: Add 1 tablespoon of freshly squeezed lime juice along with the cherries for a zesty kick. This twist brightens the flavor and creates a refreshing balance that’s perfect for summer days.
- Chunky Peanut Butter: Swirl in 1/2 cup of chunky peanut butter during the freezing process for added richness and crunch. The combination of cherry, chocolate, and peanut butter is simply irresistible!
- Spicy Chocolate: Mix in 1/4 teaspoon of cayenne pepper with the chocolate chips for a surprising heat boost. This unexpected twist adds an exciting layer to each bite, making your taste buds dance.
- Nutty Cherry Delight: Stir in 1/2 cup of toasted almonds or walnuts along with the add-ins for extra crunch. Nuts provide a satisfying texture contrast that complements the creamy base beautifully.
- Minty Freshness: Incorporate 1 teaspoon of peppermint extract instead of cherry extract for a refreshing mint-cherry combo. This variation is perfect for those who enjoy a cool, invigorating flavor!
Make Ahead Options
This Cherry Garcia Ice Cream recipe is perfect for meal prep, allowing you to indulge in a delightful treat without the last-minute rush. You can easily prepare the ice cream base ahead of time by whisking together 2 cups of heavy cream, 1 cup of whole milk, 3/4 cup of granulated sugar, 1 teaspoon of vanilla extract, and 1 tablespoon of cherry extract until the sugar dissolves. Chill this mixture in the refrigerator for at least 2 hours or up to 24 hours for optimal flavor. For the add-ins, you can pit and chop your 1 cup of fresh cherries and measure out the 1/2 cup of dark chocolate chips in advance, making it easier when you’re ready to churn. Just remember to churn your chilled mixture according to the manufacturer’s instructions until you reach a soft-serve consistency, then add the cherries and chocolate in the final minutes. After churning, transfer your Cherry Garcia Ice Cream to a freezer-safe container and let it firm up for at least 2 hours before serving. By preparing these components ahead of time, you’ll save precious minutes while still enjoying that delicious homemade flavor!
Cherry Garcia Ice Cream Recipe FAQs
What type of cherries should I use for this recipe?
Fresh sweet cherries are the best choice for this Cherry Garcia Ice Cream. They add a burst of flavor and natural sweetness that complements the creaminess perfectly. If fresh cherries aren’t available, you can also use frozen cherries; just make sure to thaw and drain them before adding to your ice cream.
Can I use a different type of milk instead of whole milk?
Absolutely! If you’re looking for a lighter option, you can substitute whole milk with 2% milk. For a dairy-free version, consider using almond milk or coconut milk; however, keep in mind that the texture may differ slightly from traditional ice cream.
How long can I store the Cherry Garcia Ice Cream in the freezer?
You can store your homemade Cherry Garcia Ice Cream in an airtight container in the freezer for up to two weeks. Just remember to let it sit at room temperature for about 5–10 minutes before scooping, as homemade ice cream tends to harden more than store-bought varieties.
What if my ice cream doesn’t churn properly?
If your ice cream base seems too soft after churning, it may need more time in the ice cream maker. Ensure you’re following the manufacturer’s instructions regarding churning times—typically around 20-30 minutes should work well. If it’s still not reaching a soft-serve consistency, check that your mixture was chilled adequately before starting.
Is there a way to reduce the sugar content in this recipe?
Certainly! You can reduce the granulated sugar by up to half without drastically affecting the flavor. Alternatively, try using a sugar substitute like agave syrup or honey, but adjust quantities since they may be sweeter than granulated sugar.
What’s a good serving size for this ice cream?
This recipe yields about four servings, with each serving containing approximately 300 calories. A perfect scoop is about half a cup, so grab your favorite bowl and enjoy this delightful treat!
Cherry Garcia Ice Cream
Ingredients
Method
- In a mixing bowl, whisk together the heavy cream, whole milk, granulated sugar, vanilla extract, and cherry extract until the sugar is dissolved.
- Cover the bowl and refrigerate the mixture for at least 2 hours or until thoroughly chilled.
- Pour the chilled mixture into the ice cream maker and churn according to the manufacturer's instructions until it reaches a soft-serve consistency.
- During the last few minutes of churning, add the chopped cherries and dark chocolate chips.
- Transfer the ice cream to a freezer-safe container and freeze for at least 2 hours to firm up before serving.