
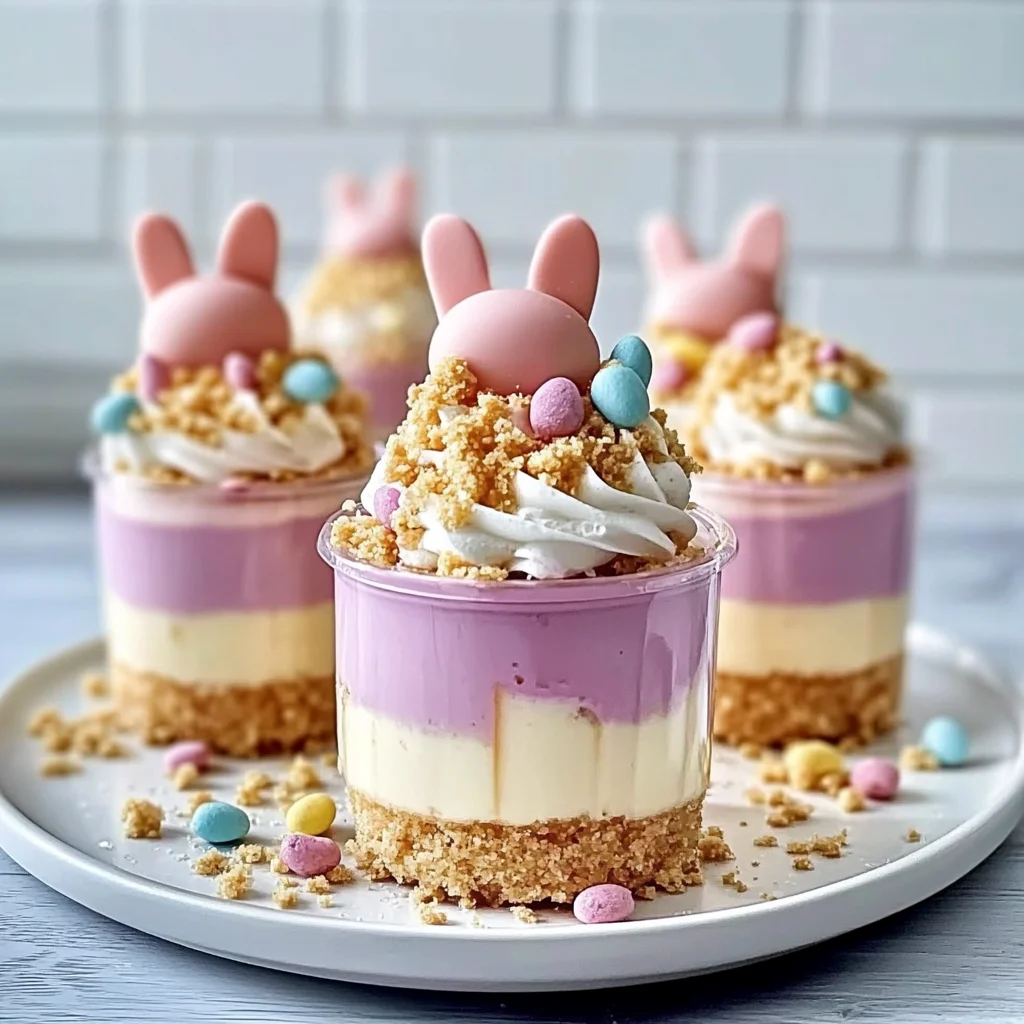
Imagine sinking your spoon into a fluffy, creamy delight that combines the rich flavors of cheesecake with the whimsical charm of Easter Bunny Cheesecake Cups. Each bite bursts with sweetness, while the playful bunny decorations make these treats an irresistible centerpiece for any spring celebration, instantly sparking joy and nostalgia.
Growing up, my family had a tradition of creating festive desserts for Easter, and these delightful cheesecake cups always stole the show. As we gathered around the table, laughter filled the air while we admired our edible bunnies before devouring them. These delightful creations not only satisfy your sweet tooth but also offer a unique way to celebrate the season with loved ones, promising an unforgettable flavor experience!
Why Is Easter Bunny Cheesecake Cups So Irresistibly Good?
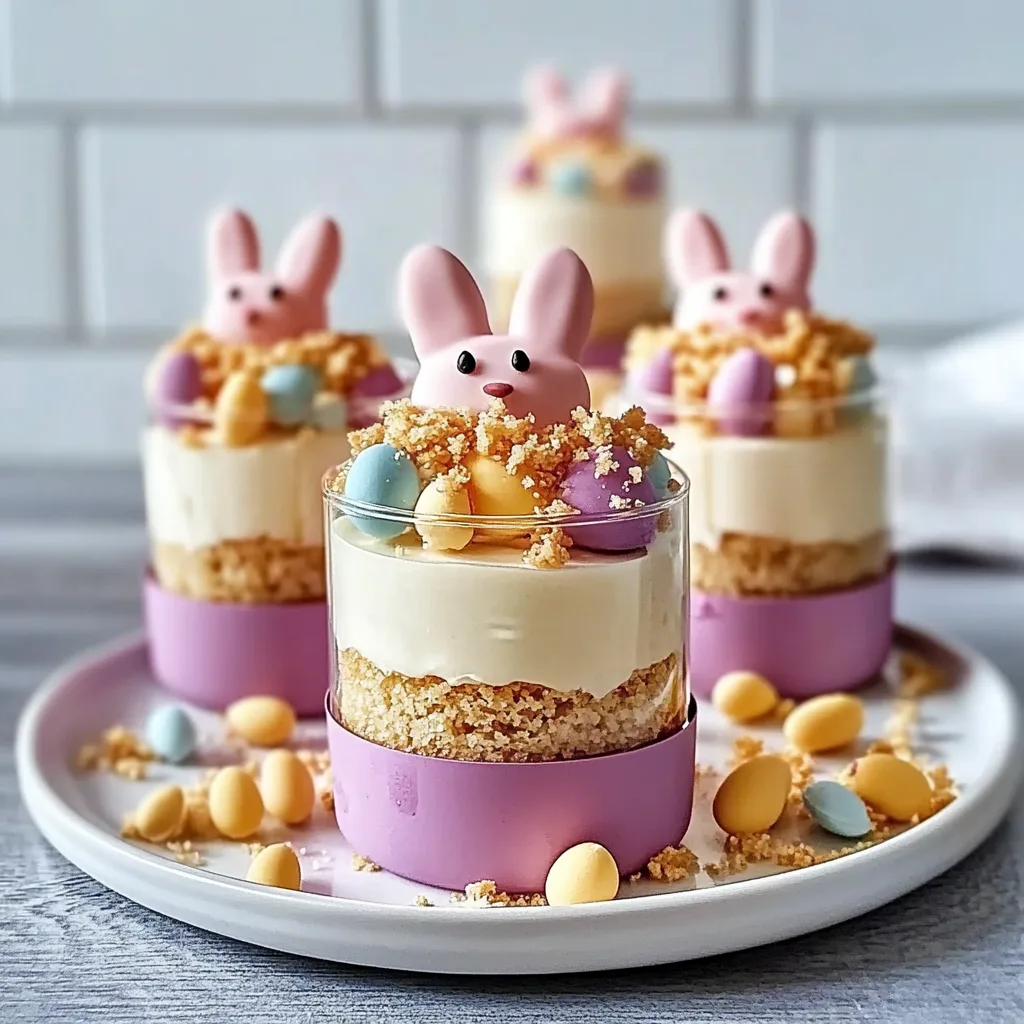
Delightful and adorable, these cheesecake cups bring a festive touch to your spring celebrations! Creamy cream cheese combines with sweet sugar and vanilla for an indulgent filling that melts in your mouth. Easy to make with no baking required, they’re a time-saver that’s perfect for busy holidays. Versatile enough to customize with your favorite toppings, they’re sure to impress both kids and adults alike. Fun decorations like mini marshmallow ears and chocolate chip eyes make them irresistible, ensuring they’re the highlight of any Easter gathering!
Easter Bunny Cheesecake Cups Ingredients
For the Cheesecake Filling
- 8 oz cream cheese (softened) – Make sure it’s at room temperature for easy mixing and a creamy texture.
- 1/2 cup sugar – This adds sweetness to balance the richness of the cream cheese.
- 1 tsp vanilla extract – A splash of vanilla enhances the overall flavor profile beautifully.
- 1 cup whipped cream (for topping) – Use freshly whipped cream for a light and airy finish.
For the Crust
- 1 cup graham cracker crumbs – These provide a sweet, crunchy base that complements the cheesecake filling perfectly.
- 1/4 cup butter (melted) – Melted butter helps bind the crumbs together for a sturdy crust.
- 2 tbsp sugar – A bit of sugar in the crust adds extra sweetness and flavor.
For Decoration
- 1 cup mini marshmallows (for bunny ears) – These fluffy treats will create adorable bunny ears on your cheesecake cups.
- 1/2 cup chocolate chips (for eyes) – Use semi-sweet or milk chocolate chips for cute, expressive eyes.
- 1 tbsp pink candy melts (for nose) – Melted candy melts make a sweet touch to form bunny noses on your festive treats.
How to Make Easter Bunny Cheesecake Cups
1. Combine Ingredients: In a mixing bowl, combine 1 cup of graham cracker crumbs, 1/4 cup of melted butter, and 2 tablespoons of sugar. Mix until well combined, creating a delightful crust.
2. Prepare Cups: Line your serving cups with cupcake liners and press the crumb mixture into the bottom of each cup. This will form the tasty base for your cheesecake.
3. Beat Cream Cheese: In another bowl, beat 8 oz of softened cream cheese with 1/2 cup of sugar and 1 teaspoon of vanilla extract until smooth and creamy. The texture should be rich and inviting!
4. Fold in Whipped Cream: Gently fold in 1 cup of whipped cream into the cream cheese mixture until fully incorporated. This adds a lightness to the filling that contrasts beautifully with the crust.
5. Spoon Filling: Spoon the cheesecake filling over the crust in each cup, smoothing the top with a spatula. This step will ensure your Easter Bunny Cheesecake Cups look as delightful as they taste!
6. Chill: Refrigerate for at least 30 minutes to set. This cooling period allows the flavors to meld together perfectly while firming up your cheesecake.
7. Decorate: Once set, decorate each cheesecake cup with mini marshmallows for bunny ears, chocolate chips for eyes, and a pink candy melt for the nose. Let your creativity shine!
Optional: For extra flair, add sprinkles on top after decorating!
Exact quantities are listed in the recipe card below.
Expert Tips
- Cream Cheese Consistency: Make sure your cream cheese is softened to room temperature for a smooth filling; cold cream cheese can lead to lumps.
- Whipped Cream Folding: Gently fold in the whipped cream to maintain its airy texture; over-mixing can deflate the lightness of your cheesecake filling.
- Crust Compression: Press the graham cracker crust firmly into the cups; a loose crust will crumble when you try to eat your delightful Easter Bunny Cheesecake Cups.
- Chilling Time: Don’t skip the refrigeration step! Allowing them to set for at least 30 minutes ensures they hold their shape during decoration and serving.
- Decorative Details: Use a little melted chocolate to secure the mini marshmallows as bunny ears; this prevents them from sliding off and enhances the festive look.
How to Store and Freeze Easter Bunny Cheesecake Cups
- Fridge: Store your Easter Bunny Cheesecake Cups in an airtight container for up to 3 days to keep them fresh and creamy.
- Freezer: For longer storage, place the cheesecake cups in a freezer-safe container without toppings for up to 2 months. Thaw in the fridge before serving.
- Decoration: If you plan on making these ahead of time, add mini marshmallows, chocolate chips, and pink candy melts just before serving for the best presentation.
- Serving: These delightful treats are best enjoyed chilled, so keep them refrigerated until it’s time to dig in!
Easter Bunny Cheesecake Cups Your Way
Feel free to let your creativity shine and customize these delightful treats to suit your taste!
- Gluten-Free: Substitute graham cracker crumbs with gluten-free cookie crumbs for a scrumptious crust. This way, everyone can enjoy them without worry about gluten.
- Fruit-Infused: Mix in 1/2 cup of pureed strawberries or raspberries into the cheesecake filling. This adds a refreshing fruity twist that brightens each bite.
- Chocolate Lovers: Replace half of the cream cheese with chocolate cream cheese for a rich and decadent version. The chocolate will harmonize beautifully with the sweet toppings.
- Nutty Crunch: Stir in 1/4 cup finely chopped nuts (like pecans or almonds) into the crust mixture. This will give your cheesecake cups a lovely crunch and earthy flavor contrast.
- Coconut Cream: Use coconut cream instead of whipped cream for topping, and add shredded coconut to the filling. It creates a tropical vibe that’s perfect for spring celebrations.
- Sugar-Free: Opt for a sugar substitute like stevia or erythritol in place of regular sugar. You can still achieve that sweet taste while keeping it lighter on calories.
- Spiced Up: Add 1/2 teaspoon of cinnamon or nutmeg to the cheesecake filling for a warm, cozy flavor profile. This subtle spice will elevate your dessert experience.
- Zesty Lemon: Incorporate the zest of one lemon into the cheesecake filling for a refreshing citrus kick. It brightens up the flavors and brings an extra layer of joy to your bunny cups!
Make Ahead Options
These delightful Easter Bunny Cheesecake Cups are perfect for meal prep, allowing you to enjoy more time with family during your spring celebrations. You can prepare the cheesecake filling by beating together 8 oz of softened cream cheese, 1/2 cup sugar, and 1 tsp vanilla extract until smooth, then gently folding in 1 cup of whipped cream. The crust is just as easy—combine 1 cup of graham cracker crumbs with 1/4 cup melted butter and 2 tbsp sugar, then press this mixture into lined cups. Both the crust and filling can be made up to 24 hours in advance. Simply assemble the cups and refrigerate to set for at least 30 minutes. When you’re ready to serve, decorate with mini marshmallows for bunny ears, chocolate chips for eyes, and a pink candy melt for the nose. For optimal quality, keep the decorations separate until serving time; this will ensure your Easter Bunny Cheesecake Cups look fresh and festive!
Easter Bunny Cheesecake Cups Recipe FAQs
Can I use a different type of cracker for the crust?
Absolutely! While graham crackers provide a classic flavor, you can experiment with digestive biscuits or even Oreo cookies for a chocolatey twist. Just make sure to adjust the sugar content if your chosen cookie is already sweet.
How should I store the cheesecake cups?
Store your Easter Bunny Cheesecake Cups in an airtight container in the refrigerator for up to 3 days. This will keep them fresh and creamy, perfect for serving at your spring celebrations. Just remember to add the decorations right before serving for the best presentation!
Can I freeze these cheesecake cups?
Yes, you can freeze the cheesecake filling without the toppings! Simply assemble the cups without decorations, cover them tightly with plastic wrap or foil, and freeze for up to 2 months. When you’re ready to enjoy them, thaw in the refrigerator overnight and add your bunny decorations just before serving.
What if my cheesecake filling is too thick?
If your cheesecake filling seems too thick after folding in the whipped cream, it may be due to overmixing or not allowing the cream cheese to soften enough. To fix it, you can gently fold in a splash of milk or heavy cream until you reach your desired consistency—smooth and fluffy!
What’s a good serving size for these cheesecake cups?
Each recipe makes 4 delightful servings, with each cup containing about 250 calories. These are perfect for sharing during festive gatherings or as a sweet treat for family dinners. Feel free to double the recipe if you’re expecting more guests!
Are there any dietary alternatives I can use?
Definitely! For a lighter option, consider using low-fat cream cheese and sugar substitutes like Stevia or erythritol. If you need gluten-free options, look for gluten-free graham crackers or alternative crusts made from nuts. Just make sure all decorative elements align with your dietary needs!
Easter Bunny Cheesecake Cups
Ingredients
Method
- In a mixing bowl, combine graham cracker crumbs, melted butter, and sugar. Mix until well combined.
- Line serving cups with cupcake liners and press the crumb mixture into the bottom of each cup.
- In another bowl, beat the softened cream cheese with sugar and vanilla extract until smooth.
- Fold in the whipped cream gently until fully incorporated.
- Spoon the cheesecake filling over the crust in each cup, smoothing the top.
- Refrigerate for at least 30 minutes to set.
- Once set, decorate each cheesecake cup with mini marshmallows for ears, chocolate chips for eyes, and a pink candy melt for the nose.