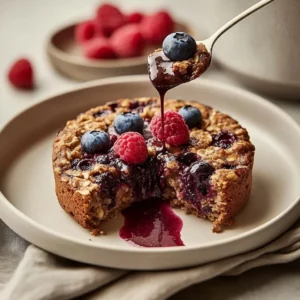

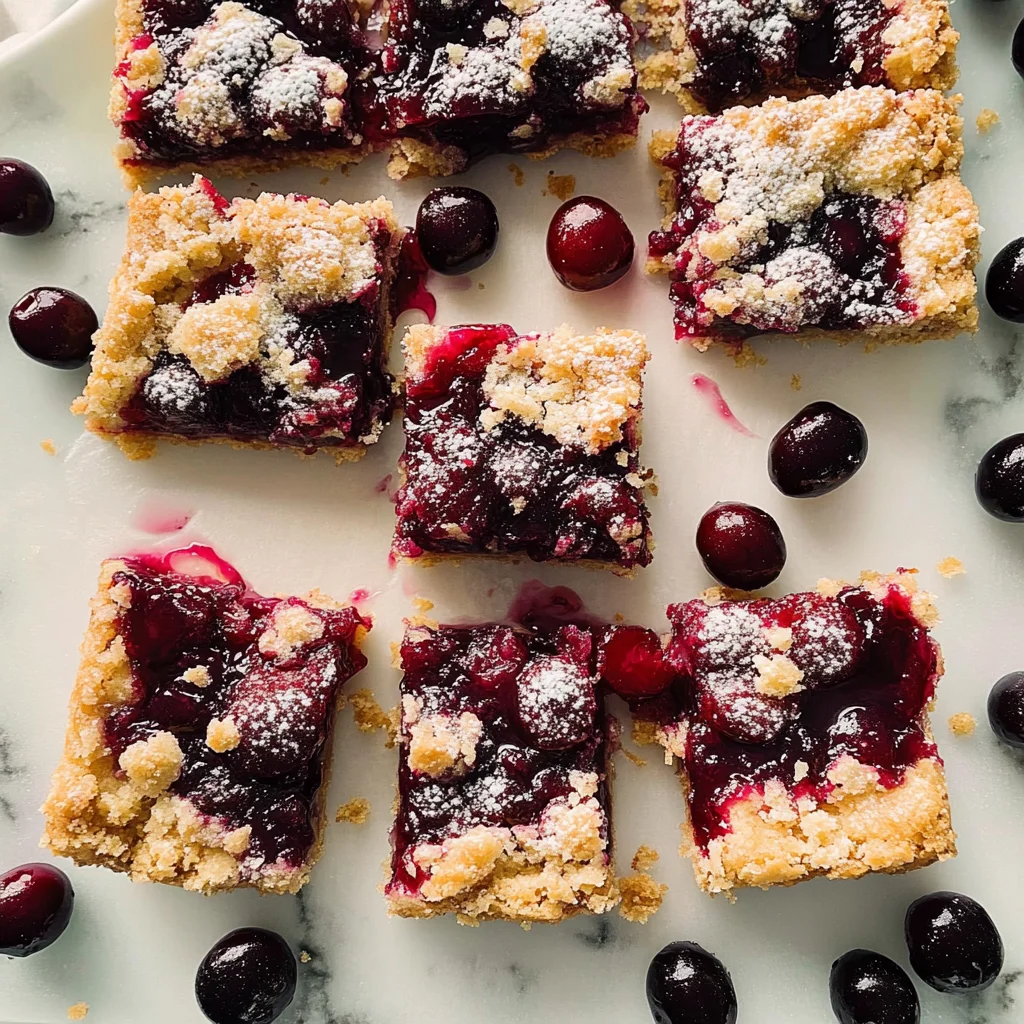
Imagine sinking your teeth into a warm cherry pie bar, where the buttery crust crumbles delightfully with each bite, releasing a sweet aroma that dances through the air. The vibrant cherries burst with flavor, their luscious sweetness mingling with a hint of tartness, creating a perfect harmony that makes your taste buds sing.
These cherry pie bars are not just a treat; they evoke cherished memories of family gatherings where laughter fills the room and dessert is the star of the show. Whether it’s a summer picnic or a cozy winter evening, these bars promise an unforgettable flavor experience that will have everyone asking for seconds.
Why Will You Keep Making cherry pie bars?
Delightful flavors of sweet cherries and buttery crust come together in these irresistible bars. Quick preparation means you can whip them up in just 15 minutes, making them perfect for a last-minute dessert. Versatile enough to serve at parties or enjoy as a snack, they cater to all occasions. Crowd-pleaser appeal ensures everyone will love each bite, whether using fresh or frozen cherries. Easy cleanup means you’ll spend more time savoring and less time washing dishes!
cherry pie bars Ingredients
For the Crust
- 1 cup all-purpose flour – This forms the base of your cherry pie bars, giving them a delicious structure.
- 1/2 cup unsalted butter (softened) – Use room temperature butter for a perfectly smooth and buttery crust.
- 1/4 cup granulated sugar – Adds sweetness and helps achieve that lovely golden color.
- 1/4 teaspoon salt – Enhances the flavors of the crust, balancing out the sweetness.
For the Filling
- 2 cups fresh or frozen cherries (pitted and halved) – The star of your cherry pie bars; fresh cherries provide vibrant flavor, while frozen ones work beautifully too.
- 1/2 cup granulated sugar – Sweetens the tartness of the cherries, creating a luscious filling.
- 2 tablespoons cornstarch – Acts as a thickener to give your filling a perfect consistency without being runny.
- 1 tablespoon lemon juice – Brightens the flavor profile of the filling, enhancing the cherry taste.
- 1/2 teaspoon vanilla extract – Adds warmth and depth to your cherry pie bars, making each bite irresistible.
How to Make cherry pie bars
1. Preheat the oven to 350°F (175°C). In a mixing bowl, combine 1 cup all-purpose flour, 1/2 cup softened unsalted butter, 1/4 cup granulated sugar, and 1/4 teaspoon salt. Mix until crumbly and slightly sticky.
2. Press the crumbly mixture into the bottom of a greased baking dish. Use your fingers or the back of a spoon to evenly form a lovely crust that hugs the edges.
3. Bake the crust for 15 minutes or until it turns lightly golden. This will set the foundation for your delicious cherry pie bars!
For the Filling:
4. Combine in a separate bowl, 2 cups of fresh or frozen cherries (pitted and halved), 1/2 cup granulated sugar, 2 tablespoons cornstarch, 1 tablespoon lemon juice, and 1/2 teaspoon vanilla extract. Mix well until everything is beautifully incorporated.
5. Pour the cherry mixture over the baked crust, spreading it evenly with a spatula. Ensure every corner gets that sweet cherry goodness for a perfect bite.
6. Return the baking dish to the oven and bake for an additional 15-20 minutes until the filling is bubbly and fragrant, creating an irresistible aroma throughout your kitchen.
7. Remove from the oven and let cool before cutting into bars. Patience is key here; letting them cool allows them to set perfectly!
Optional: Serve warm with a scoop of vanilla ice cream for a delightful treat!
Exact quantities are listed in the recipe card below.
Expert Tips
- Butter Temperature: Use softened butter for a flaky crust; cold butter can lead to a tough texture in your cherry pie bars.
- Flour Measurement: Spoon the flour into your measuring cup and level it off; packing can result in a denser crust.
- Cornstarch Role: Ensure you mix cornstarch thoroughly with the filling to prevent lumps, which can affect the consistency of your cherry pie bars.
- Cherries Choice: If using frozen cherries, thaw and drain them well to avoid excess moisture that could make the filling runny.
- Cooling Time: Allow the bars to cool completely before cutting; this helps them set properly, preventing messy slices.
How to Store and Freeze cherry pie bars

- Room Temperature: Keep your cherry pie bars in an airtight container for up to 3 days. They’ll remain deliciously soft and ready to enjoy!
- Fridge: If you want to extend their freshness, store the bars in the fridge for up to a week. Just make sure they are well-covered to prevent drying out.
- Freezer: For longer storage, freeze the cherry pie bars wrapped tightly in plastic wrap and then aluminum foil for up to 3 months. Thaw them overnight in the fridge before serving.
- Reheating: To bring back that fresh-baked taste, warm individual pieces in the microwave for 15-20 seconds or reheat in a 350°F (175°C) oven for about 10 minutes. Enjoy!
cherry pie bars Variations
Feel free to get creative with these delightful treats and make them truly your own!
- Gluten-Free: Substitute all-purpose flour with a 1:1 gluten-free flour blend for a deliciously tender crust. Your cherry pie bars will still have that lovely buttery flavor, making them perfect for everyone at the table.
- Brown Sugar: Replace granulated sugar in the crust with brown sugar for a deeper, caramel-like sweetness. This twist adds a lovely richness that pairs beautifully with the tart cherries, enhancing each bite.
- Almond Flour: Swap half of the all-purpose flour for almond flour to introduce a nutty flavor and extra moisture. This variation makes the bars wonderfully rich while still maintaining the classic cherry essence.
- Coconut Oil: Use melted coconut oil instead of butter for a dairy-free option that also imparts a subtle coconut flavor. The result will be an irresistible tropical twist on your traditional dessert!
- Zesty Boost: Add 1 teaspoon of lemon zest to the filling for a bright citrus kick. This refreshing element elevates the sweet cherry taste, making each bar burst with flavor.
- Spiced Filling: Incorporate 1/2 teaspoon of cinnamon or nutmeg into the filling for an aromatic warmth. This spice blend adds depth and complexity, transforming your cherry pie bars into a cozy treat perfect for chilly evenings.
- Nutty Crunch: Fold in 1/2 cup of chopped nuts like walnuts or pecans into the crust for added texture. The crunch complements the soft filling beautifully, creating a delightful contrast in every bite.
Make-Ahead Tips for cherry pie bars
These delightful cherry pie bars are perfect for meal prep, making them a fantastic choice for those busy days when you want a delicious treat without the hassle. You can prepare the crust by mixing 1 cup all-purpose flour, 1/2 cup softened unsalted butter, 1/4 cup granulated sugar, and 1/4 teaspoon salt in advance—just store it in the fridge for up to 24 hours before pressing it into your greased baking dish and baking until golden. As for the filling, you can mix together 2 cups of fresh or frozen pitted cherries, 1/2 cup granulated sugar, 2 tablespoons cornstarch, 1 tablespoon lemon juice, and 1/2 teaspoon vanilla extract and keep it covered in the fridge for up to 3 days. When you’re ready to enjoy your cherry pie bars, simply bake the crust and pour on the prepared filling before returning it to the oven for that bubbly finish. This way, you can savor the sweet goodness with minimal effort!
cherry pie bars Recipe FAQs
Can I use different types of cherries for the filling?
Absolutely! While fresh or frozen sweet cherries work beautifully, you can also experiment with tart cherries. Just keep in mind that tart varieties may require a bit more sugar to balance their acidity.
How should I store leftover cherry pie bars?
To keep your cherry pie bars fresh, store them in an airtight container at room temperature for up to 3 days. If you want to extend their shelf life, you can refrigerate them for about a week.
Can I freeze cherry pie bars?
Yes, these delicious treats freeze well! After cutting them into bars, wrap each piece tightly in plastic wrap and then place them in a freezer-safe container. They can be frozen for up to 3 months. When you’re ready to enjoy them, simply thaw at room temperature.
What if my crust doesn’t hold together?
If your crust mixture feels too crumbly, it might need a touch more softened butter. Aim for a texture that holds together when pressed firmly in the baking dish. If you find it still doesn’t stick, consider adding a teaspoon of cold water to help bind it.
How many servings does this recipe make?
This recipe yields about 4 generous servings. If you’re entertaining or have a larger family, feel free to double the recipe and use a larger baking dish to ensure everyone gets a taste of these delightful cherry pie bars!
Can I make this recipe gluten-free?
Yes! You can substitute the all-purpose flour with a gluten-free blend that measures cup-for-cup. Just ensure that your corn starch is also gluten-free if you’re sensitive to gluten—many brands are!
Cherry Pie Bars
Ingredients
Method
- Preheat the oven to 350°F (175°C). In a mixing bowl, combine flour, butter, sugar, and salt. Mix until crumbly.
- Press the mixture into the bottom of a greased baking dish to form the crust.
- Bake the crust for 15 minutes or until lightly golden.
- In a separate bowl, combine cherries, sugar, cornstarch, lemon juice, and vanilla extract. Mix well.
- Pour the cherry mixture over the baked crust, spreading it evenly.
- Return the baking dish to the oven and bake for an additional 15-20 minutes until the filling is bubbly.
- Remove from the oven and let cool before cutting into bars.