
Creamy Spiced Pumpkin Cheesecake with Gingersnap Crust and Salted Caramel
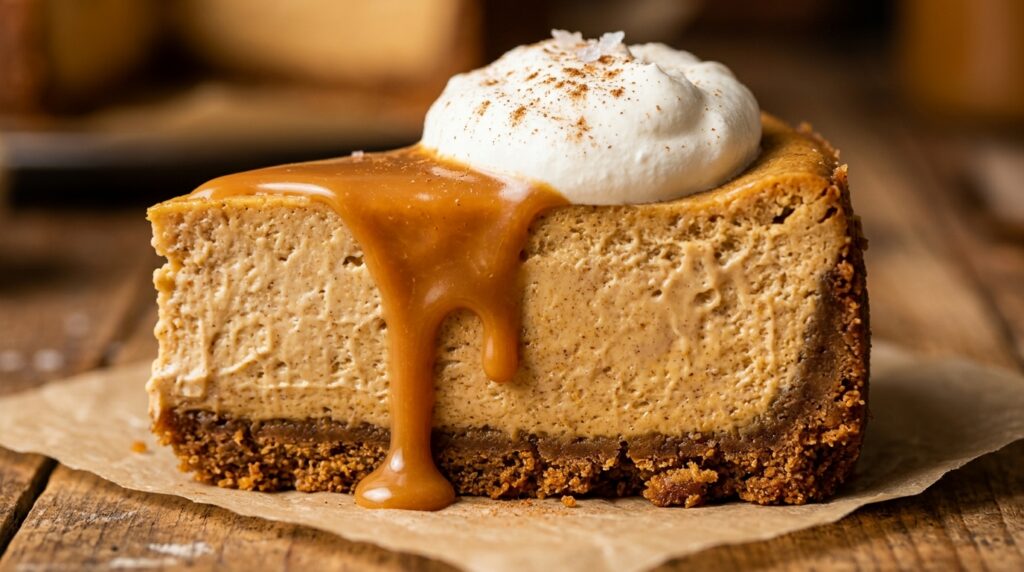
If there is one showstopping holiday centerpiece destined to outshine every traditional pumpkin pie on your autumn table, it is this magnificent Creamy Spiced Pumpkin Cheesecake with Gingersnap Crust and Salted Caramel. Nestled atop a spicy, buttery crushed gingersnap cookie crust, the ultra-velvety pumpkin cheesecake filling is enriched with real pumpkin puree, pure vanilla bean, and a harmonious medley of warm fall spices. Crowned with billowy rosettes of chantilly cream and a lavish cascade of warm homemade salted caramel drizzle, every decadent forkful is pure autumnal bliss. The culinary secret to baking a cheesecake that is impossibly creamy, silky-smooth, and completely free of cracks lies in two essential techniques: using full-fat cultured sour cream in the batter and baking gently in a hot water bath (bain-marie). The acidity of the sour cream cuts through the dense cream cheese fat, yielding a melt-in-your-mouth custard texture, while the ambient steam from the water bath maintains gentle, uniform heat that protects the delicate egg proteins from curdling or splitting. Why You’ll Love This Recipe Bold Gingersnap Crust: Replacing standard graham crackers with spicy gingersnap cookies infuses every bite with snappy ginger, molasses, and cinnamon that perfectly balances the creamy filling. Flawlessly Smooth & Crack-Free: Our foolproof gentle water bath and slow oven cooling method guarantee a glossy, perfectly flat top every single bake. Lush Salted Caramel Drizzle: The homemade warm sea salt caramel cuts the rich pumpkin spice with buttery, toffee sweetness. 100% Halal Wholesome: Made with pure cream cheese, real butter, fresh eggs, natural pumpkin, and organic spices—zero gelatin, zero alcohol extracts, zero lard. Key Ingredients & Smart Swaps Baking essentials: block cream cheese, pure pumpkin puree, crisp gingersnap cookies, farm eggs, and warm autumn spices. Full-Fat Brick Cream Cheese: Always use brick Philadelphia-style cream cheese (not spreadable tub cheese) softened completely to room temperature for a lump-free emulsion. Crisp Gingersnap Cookies: Crushed into fine crumbs and tossed with melted butter, they form a fragrant, crispy crust with warm ginger kick. 100% Pure Canned Pumpkin: Use pure pumpkin puree (such as Libby’s), not pre-spiced pie filling, allowing full control over sweetness and spice balance. Cultured Sour Cream: Tenderizes the rich cream cheese and provides a subtle tang that keeps the cheesecake light and luscious. Warm Autumn Spice Blend: High-grade ground cinnamon, ground ginger, freshly grated nutmeg, and a pinch of ground cloves create rich holiday warmth. Step-by-Step Cooking Walkthrough 1. Press & Par-Bake Gingersnap Crust: Pulse gingersnap cookies in a food processor into fine crumbs. Mix with 5 tablespoons melted butter and 2 tablespoons brown sugar. Press firmly into the bottom and 1 inch up the sides of a 9-inch springform pan. Bake at 350°F (175°C) for 10 minutes, then let cool completely. Wrap the outside of the pan tightly in heavy-duty aluminum foil. 2. Beat Cheesecake Batter on Low Speed: Beat room-temperature cream cheese and brown sugar on medium-low speed for 2 minutes until completely smooth and creamy. Beat in pure pumpkin puree, sour cream, pure vanilla extract, flour, and spices just until combined. Add eggs one at a time, beating on lowest speed just until incorporated (do not incorporate excess air). Pouring and smoothing the silky pumpkin batter into the foil-wrapped springform pan before water bath baking. 3. Water Bath Baking: Pour batter over cooled crust and smooth top with an offset spatula. Place springform pan inside a large roasting pan. Pour boiling water into the roasting pan until it reaches halfway up the sides of the springform pan. Bake at 325°F (160°C) for 65–75 minutes until edges are set and the center has a gentle, subtle jiggle. 4. Slow Cool & Chill: Turn off oven, crack the oven door open 1 inch with a wooden spoon, and leave the cheesecake inside for 1 full hour. Transfer to a counter to cool to room temperature, then refrigerate uncovered for at least 6 hours (preferably overnight). Slice cleanly with a warm knife and drizzle with salted caramel and whipped cream! 3 Chef Secrets for Perfect Results 1. Room Temperature Everything: Cold cream cheese or eggs will create stubborn lumps that cannot be beaten smooth without over-whipping. Pull all dairy and eggs from the fridge 2 hours before baking. 2. Mix on the Lowest Speed: Whipping at high speeds forces air bubbles into the dense batter. In the oven, trapped air expands and then collapses, causing deep cracks across the surface. Low speed guarantees a dense, velvety custard. 3. The Warm Knife Slice Trick: To achieve picture-perfect bakery slices, run a long chef’s knife under hot tap water, wipe it clean with a kitchen towel between every single cut, and press straight down in one smooth stroke. What to Serve With Pumpkin Cheesecake Garnished with fresh chantilly whipped cream, toasted pecans, and a warm drizzle of salted caramel. Spiced Chai Latte: Steaming black tea brewed with crushed cardamom, cinnamon, and frothy steamed milk complements the rich pumpkin spices. Toasted Candied Pecans: Coarsely chopped pecans toasted in brown butter add an exquisite nutty crunch over the silky cream topping. Hot Fresh Espresso: A dark roast espresso cuts through the sweet, rich caramel and creamy cheese layers. Storage, Freezing & Reheating Instructions Refrigeration: Keep cheesecake loosely covered with foil or in a cake carrier in the refrigerator for up to 6 days. It tastes even better on day two! Freezing Whole or Slices: Cheesecake freezes like a dream. Wrap completely chilled whole cake or individual slices tightly in plastic wrap, then heavy aluminum foil. Freeze for up to 3 months. Thaw overnight in the refrigerator before serving. Serving Temperature: For the most luxurious, silky mouthfeel, remove slices from the refrigerator 20 minutes before serving to take the icy chill off the cream cheese fat. Frequently Asked Questions Can I make this without a water bath?While a water bath yields the most velvety texture and crack-free finish, you can place a 9×13-inch baking pan filled with boiling water on the bottom rack of your oven directly beneath the cheesecake rack to create steam. Can
Cozy Creamy Lemon Chicken Orzo Soup with Fresh Dill
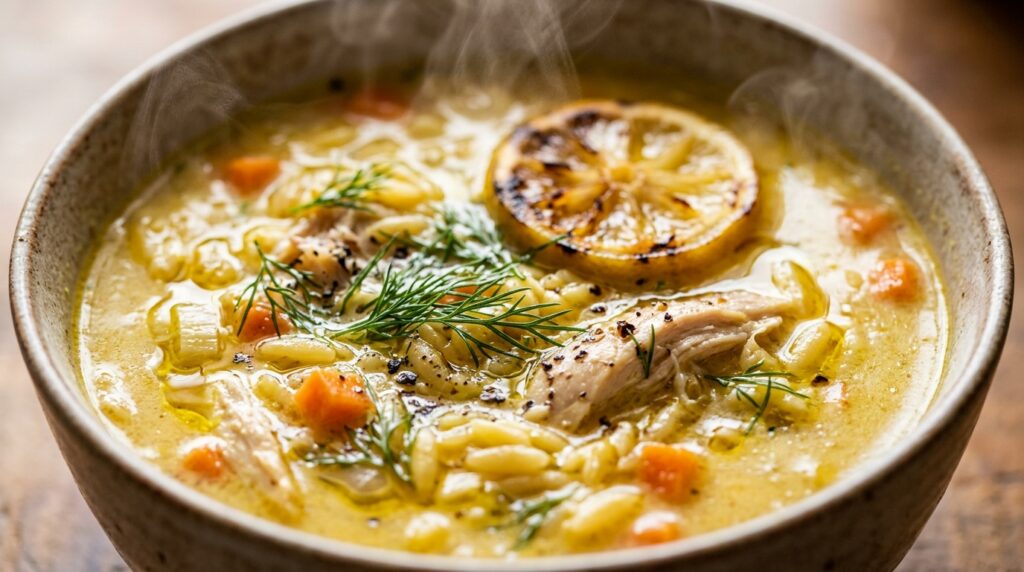
When brisk autumn breezes call for soul-warming comfort, nothing soothes quite like a steaming bowl of this Cozy Creamy Lemon Chicken Orzo Soup with Fresh Dill. Inspired by traditional Mediterranean avgolemono, this vibrant one-pot soup combines juicy shredded chicken, tender orzo pasta pearls, sweet leeks, and diced carrots suspended in a velvety golden chicken bone broth kissed with fresh lemon juice and fragrant dill. Rich yet remarkably bright, it delivers the ultimate immunity-boosting comfort in just 30 minutes. The culinary magic behind this soup lies in simmering the orzo directly within the seasoned chicken bone broth. As the small rice-shaped pasta cooks, it releases natural starches that naturally thicken the broth into a luxurious, silky texture without requiring heavy flour rous. Swirling in fresh lemon zest and juice off the heat preserves the bright essential citrus oils, balancing the savory richness with an irresistible, palate-cleansing freshness. Why You’ll Love This Recipe One-Pot 30-Minute Dinner: Everything simmers together in a single pot from sautéing the aromatics to cooking the chicken and pasta, making weeknight dinner and cleanup effortless. Bright & Nourishing: Packed with lean high-protein chicken, collagen-rich bone broth, fresh garlic, and vitamin C from freshly squeezed lemons, it is the ultimate wellness elixir. Velvety Silky Broth: The natural starches from the orzo create a luxurious, spoon-coating body complemented by a touch of cream. 100% Halal Wholesome: Crafted exclusively with pure halal chicken, pasture butter, extra virgin olive oil, and organic garden produce—zero alcohol, zero pork, zero additives. Key Ingredients & Smart Swaps Wholesome components: tender chicken, dry orzo pasta, sweet leeks, fresh lemons, garlic, and garden dill. Boneless Chicken Breasts: Poached directly in the simmering broth until tender and easily shredded into succulent bites. Boneless chicken thighs also work wonderfully. Dry Orzo Pasta: Tender tiny pasta grains that cook quickly and create a hearty, comforting spoon-feel in every mouthful. Fresh Lemons (Zest & Juice): Always use fresh lemons! Bottled lemon juice lacks the vibrant floral zest and essential citrus oils that define this Greek classic. Rich Chicken Bone Broth: High-quality, full-bodied chicken bone broth provides deep savory richness, golden color, and immune-supportive nutrients. Fresh Garden Dill: The signature herb that elevates this soup from ordinary chicken noodle to an unforgettable Mediterranean bistro classic. Step-by-Step Cooking Walkthrough 1. Sauté Aromatics: Heat 2 tablespoons olive oil and 1 tablespoon butter in a large Dutch oven over medium heat. Add diced carrots, celery, leeks, and a pinch of salt. Sauté for 5–6 minutes until vegetables soften. Stir in minced garlic and cook for 1 minute until fragrant. 2. Simmer Chicken: Pour in 6 cups of chicken bone broth. Add raw chicken breasts, bay leaves, and dried oregano. Bring to a gentle boil, then reduce heat to low, cover, and simmer for 15 minutes until chicken registers 165°F (74°C). Remove chicken to a cutting board and shred with two forks. Ladlefuls of tender chicken, orzo, and vibrant vegetables simmer to silky perfection on active heat. 3. Cook Orzo: Stir dry orzo pasta into the simmering pot. Cook uncovered for 9–10 minutes, stirring occasionally, until orzo is al dente and broth has thickened naturally. 4. Finish with Lemon & Cream: Return shredded chicken to the pot. Stir in fresh lemon zest, 1/3 cup fresh lemon juice, heavy cream, and chopped fresh dill. Simmer on low for 2 minutes to meld flavors. Season to taste with salt and cracked pepper. Ladle into bowls and serve! 3 Chef Secrets for Perfect Results 1. Add Lemon Juice Off Active Boil: Boiling fresh lemon juice vigorously can make it taste bitter. Stir the citrus juice in during the final minutes off high heat to keep its bright, sweet-tart essence intact. 2. Don’t Overcook the Orzo: Orzo continues to absorb broth even after taking the pot off the stove. Cook just until al dente (firm to the bite) to prevent the pasta from turning mushy. 3. Use Fresh Dill Liberally: Dried dill lacks the punchy, anise-like herbal brightness of fresh sprigs. Stir half in at the end and scatter the rest generously over each plated bowl as a garnish. What to Serve With Lemon Chicken Orzo Soup Serve piping hot with crusty country sourdough bread, warm butter, and fresh lemon wedges. Warm Crusty Sourdough Bread: Thick slices of artisan sourdough toasted with salted butter for dunking into the creamy lemon broth. Crisp Greek Village Salad: Chopped cucumbers, ripe tomatoes, Kalamata olives, and crumbled feta tossed with oregano and olive oil. Garlic Parmesan Pita Chips: Warm seasoned pita wedges baked until golden and crunchy. Storage, Freezing & Reheating Instructions Refrigeration: Store leftover soup in an airtight glass container in the refrigerator for up to 4 days. Gentle Reheating: The orzo will absorb broth as it chills. When reheating in a saucepan, splash in 1/2 cup extra chicken broth or water to restore its silky soup consistency. Freezing Guidelines: If meal-prepping for the freezer, make the soup base without adding the orzo. Freeze for up to 3 months, thaw, reheat, and cook fresh orzo directly in the simmering broth. Frequently Asked Questions Can I use leftover rotisserie chicken?Yes! Shred 2 to 3 cups of cooked rotisserie chicken and stir it in during the last 5 minutes of cooking along with the orzo and lemon juice for an even faster 20-minute dinner. Can I make this dairy-free?Easily! Omit the heavy cream or replace it with full-fat coconut milk or a tempered egg mixture (classic Greek avgolemono) for a silky, rich finish without dairy. Can I use gluten-free orzo?Yes, gluten-free orzo (such as Jovial cassava orzo) works well. Be sure to check pasta cooking time, as gluten-free varieties often cook slightly faster. Pin This Recipe for Later Love this cozy Greek soup? Save this pin to your favorite Pinterest soup or healthy dinner board so you have the ultimate creamy lemon chicken orzo soup ready for every chilly evening! 📌 Click the Pin button or save this image to your favorite Pinterest board!
One-Pot Creamy French Onion Pasta with Melted Gruyère
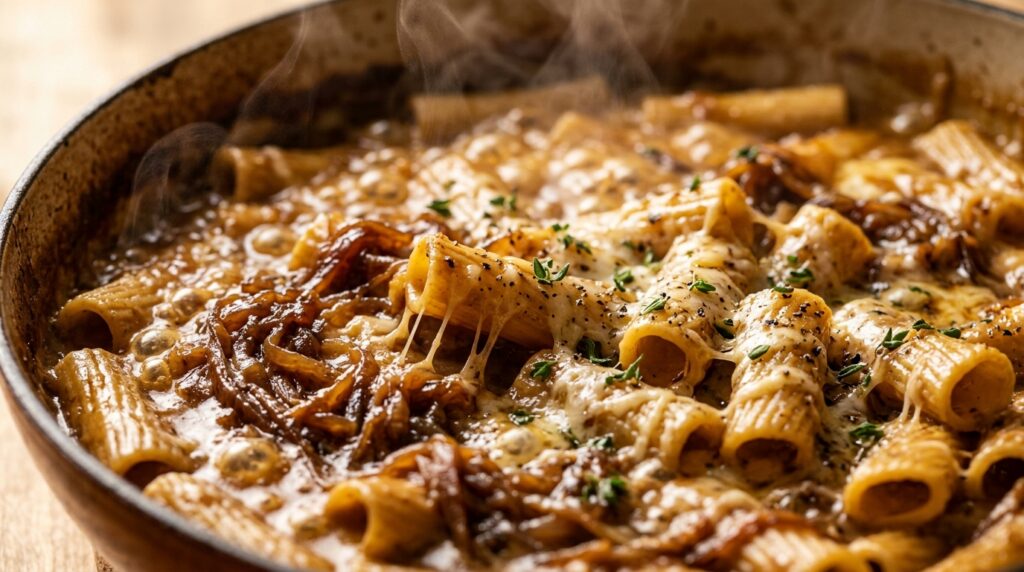
Few culinary creations rival the deep, comforting soul of slow-simmered French onion soup, and this One-Pot Creamy French Onion Pasta with Melted Gruyère marries all those iconic caramelized, savory flavors into the ultimate 30-minute weeknight pasta. Featuring tender rigatoni cooked directly in a rich, deeply savory onion broth until glossy and al dente, finished with a splash of cream and buried under a blanket of nutty, molten Gruyère and Parmigiano-Reggiano cheese, every forkful is pure comfort heaven. It delivers sophisticated French bistro richness with the effortless convenience of a single skillet. The culinary brilliance of this recipe is the one-pot starch reduction technique. As the dry rigatoni simmers directly within the caramelized onion beef broth, the pasta releases natural wheat starches into the liquid. Rather than being poured down the drain with pasta water, these starches emulsify with the broth, butter, and heavy cream to create a naturally glossy, clingy sauce that coats every single pasta ridge like liquid velvet. Why You’ll Love This Recipe One Pan, Minimal Cleanup: From caramelizing the sweet onions to boiling the pasta and melting the cheese, everything happens in a single Dutch oven or deep skillet. Intense Caramelized Flavor: Sweet yellow onions are slowly coaxed into deep golden, jammy sweetness, creating a rich savory foundation that permeates every noodle. Melted Gruyère Cheese Pull: Freshly shredded authentic Swiss Gruyère melts into stretchy, gooey strands with unmatched nutty, earthy complexity. 100% Halal Wholesome: Made with pure natural ingredients, halal rich beef bone broth, real butter, fresh herbs, and aged alpine cheeses—zero alcohol, zero wine deglazing, zero artificial flavorings. Key Ingredients & Smart Swaps Quality pantry staples: sweet yellow onions, dried rigatoni, Swiss Gruyère, fresh thyme, and rich savory broth. Sweet Yellow or Vidalia Onions: Sliced thinly so they break down into tender, silky ribbons. Yellow onions provide the perfect natural sugar balance for deep caramelization. Rigatoni Pasta: Thick tubular pasta with deep ridges grabs onto the jammy onions and creamy sauce. Shells, penne, or cavatappi also work wonderfully. Aged Swiss Gruyère: The heart of French onion flavor. Gruyère melts exceptionally smooth with a distinctive savory, nutty profile that sharp cheddar simply cannot match. Rich Halal Beef Bone Broth: Simmering the pasta in full-bodied beef broth infuses the core of the noodles with deep umami flavor. Vegetable broth can be substituted for a vegetarian version. Fresh Thyme & Worcestershire Sauce: Fresh woody thyme sprigs and a dash of Worcestershire sauce provide the classic aromatic backbone that mimics slow-simmered soup fond. Step-by-Step Cooking Walkthrough 1. Caramelize the Onions: Melt 3 tablespoons of butter with 1 tablespoon olive oil in a large Dutch oven over medium heat. Add thinly sliced onions and 1/2 teaspoon salt. Cook for 20–25 minutes, stirring occasionally, until deeply golden-brown, soft, and jammy. 2. Deglaze & Aromatics: Stir in minced garlic, fresh thyme leaves, Worcestershire sauce, and a splash of broth. Scrape up all the delicious browned bits (fond) stuck to the bottom of the pot. Deglazing the deeply caramelized onion fond with savory broth builds a sensational flavor foundation. 3. Simmer Pasta in Broth: Add dry rigatoni and pour in 4 cups of beef broth. Bring to a vigorous boil, then reduce heat to medium-low, cover, and simmer for 12–14 minutes, stirring every few minutes, until the pasta is al dente and most of the liquid is absorbed into a thick, glossy glaze. 4. Stir Cream & Melt Gruyère: Remove the lid and stir in heavy cream and grated Parmigiano-Reggiano until creamy. Sprinkle shredded Gruyère cheese over the top. Cover for 2 minutes (or slide under the oven broiler) until the Gruyère is completely melted, bubbling, and golden. Garnish with fresh thyme and cracked pepper. 3 Chef Secrets for Perfect Results 1. Don’t Rush the Caramelization: True caramelization requires patience. Keep the heat at medium or medium-low so the onions slowly release their natural sugars without scorching or drying out. Add a splash of broth if they begin browning too quickly. 2. Stir Frequently During the Simmer: Because the pasta is cooking in a concentrated broth rather than a huge pot of boiling water, stir every 2 to 3 minutes to prevent the rigatoni from sticking to the bottom of the pot. 3. Shred the Gruyère Yourself: Pre-bagged shredded cheeses are coated in potato starch and preservatives that prevent a smooth melt. Grating a fresh block of Gruyère ensures a silky, stringy, bakery-quality cheese pull. What to Serve With French Onion Pasta Serve piping hot with crunchy garlic sourdough toasts and a crisp green bistro salad. Toasted Garlic Sourdough: Thick, crusty slices of rustic French bread or sourdough toasted with garlic butter for dipping into the creamy onion sauce. Crisp Bistro Green Salad: Tender butterhead lettuce tossed with thinly sliced radishes, fresh chives, and a bright Dijon vinaigrette to balance the rich pasta. Roasted Green Beans or Broccolini: Blistered in olive oil with lemon zest and flaky sea salt for a vibrant green side. Storage, Freezing & Reheating Instructions Refrigeration: Store leftover pasta in an airtight container in the refrigerator for up to 4 days. Gentle Stovetop Reheating: The starch in the pasta will continue to absorb liquid as it cools. Reheat gently in a skillet over low heat, splashing in 2–3 tablespoons of beef broth or milk to loosen the velvety sauce back to its original silky consistency. Freezing Guidelines: Because of the dairy and pasta starches, one-pot creamy pastas are best enjoyed fresh. However, leftovers can be frozen in an airtight container for up to 1 month. Thaw in the fridge overnight and reheat on the stove with extra broth. Frequently Asked Questions Can I use a different pasta shape?Yes! Any sturdy, ridged pasta works wonderfully. Penne rigate, cavatappi, campenelle, or large shells trap the jammy onions and creamy sauce effectively. Can I make this vegetarian?Easily! Replace the beef broth with a rich roasted vegetable stock or mushroom broth, and ensure you use a vegetarian-friendly Worcestershire sauce and rennet-free Gruyère. Can I add protein to this dish?Absolutely. Sautéed sliced chicken breast,
Bakery-Style Cinnamon Roll Coffee Cake with Cream Cheese Swirl
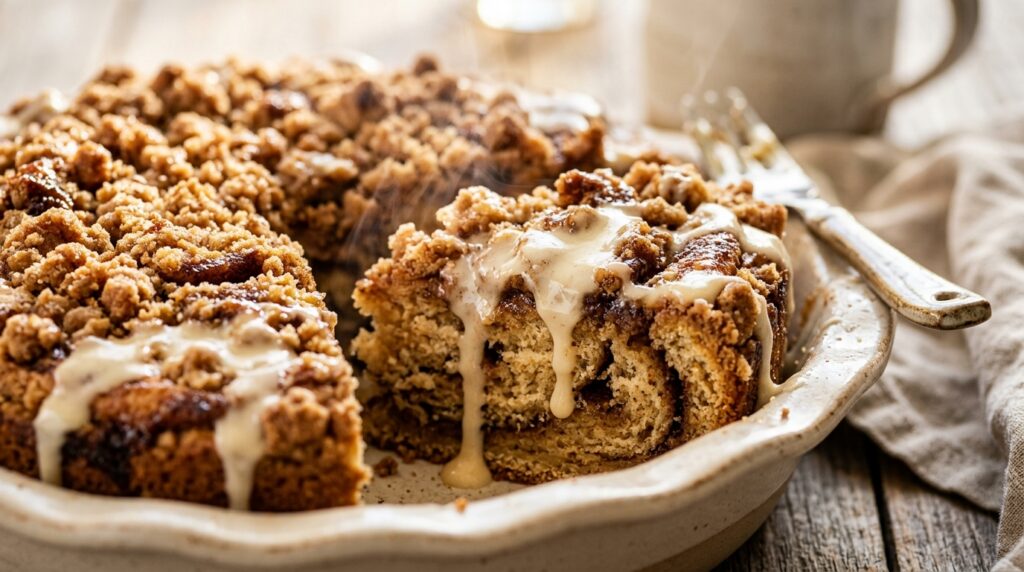
Nothing fills the home on a slow Sunday morning with quite as much warmth and anticipation as this Bakery-Style Cinnamon Roll Coffee Cake with Cream Cheese Swirl. Featuring an extraordinarily tender, melt-in-your-mouth vanilla sour cream cake, deep marble ribbons of brown sugar and aromatic Ceylon cinnamon, and a crunchy brown sugar streusel crown, every bite delivers the decadent bliss of a freshly frosted bakery cinnamon roll—without the tedious yeast proofing, kneading, or rolling. Drizzled in warm, velvety cream cheese vanilla glaze, this cozy bake is destined to become your household’s signature weekend tradition. The culinary secret to achieving an intensely moist crumb that never dries out lies in using full-fat cultured sour cream alongside softened sweet cream butter. The natural lactic acidity of sour cream gently tenderizes the flour’s gluten strands, ensuring a velvety, pillowy crumb structure. Layering half the batter, distributing a dense ribbon of dark brown sugar, butter, and cinnamon, and swirling it through with a knife creates pocket after pocket of caramelized gooey cinnamon goodness baked right into the cake’s interior. Why You’ll Love This Recipe All the Flavor, Zero Yeast Fuss: Enjoy all the aromatic, gooey magic of classic handmade cinnamon rolls in a fast, foolproof one-bowl quick cake format. Ultra-Moist Velvety Texture: Cultured sour cream and pure European-style butter ensure the crumb remains extraordinarily soft and tender for days. Triple Cinnamon Sensation: Cinnamon is layered inside the batter swirls, toasted into the golden crumb streusel, and delicately dusted on the warm icing. 100% Halal Wholesome: Crafted strictly with clean, pure baking ingredients: unbleached flour, fresh farm eggs, dairy cream cheese, and natural spices—zero gelatin, zero alcohol extracts. Key Ingredients & Smart Swaps Baking essentials: cultured sour cream, unbleached flour, dark brown sugar, Ceylon cinnamon, and velvety cream cheese. Full-Fat Sour Cream: Adds rich moisture, fat, and mild acidity that guarantees a bakery-soft texture. Plain whole-milk Greek yogurt is an excellent 1:1 substitute. Dark Brown Sugar: Contains higher molasses content than light brown sugar, creating deep toffee-like caramelization throughout the ribbon swirls. High-Grade Ceylon Cinnamon: Offers sweet, fragrant warmth without harsh bitterness, creating that signature Cinnabon-style bakery flavor. Pure Vanilla Bean Extract: Rounds out the cake batter and infuses the warm cream cheese glaze with luxurious floral aroma. Block Cream Cheese: Use brick cream cheese (not tub spread) softened to room temperature for a luscious, silky frosting that drips enticingly into the warm crumb. Step-by-Step Cooking Walkthrough 1. Prepare the Cinnamon Ribbon & Streusel: In a small bowl, mix dark brown sugar, ground cinnamon, and melted butter into a thick, fragrant paste for the swirl. In a second bowl, combine flour, brown sugar, cinnamon, and cold cubed butter with a fork until crumbly pea-sized streusel forms. 2. Mix the Sour Cream Cake Batter: Cream softened butter and granulated sugar in a large bowl until pale and fluffy (about 3 minutes). Beat in room-temperature eggs one at a time, followed by sour cream and pure vanilla. Gently fold in flour, baking powder, baking soda, and fine sea salt just until a thick, luxurious batter comes together. Marbling the cinnamon brown sugar filling deep into the batter creates gorgeous, gooey ribbons in every slice. 3. Layer, Swirl & Bake: Spread half the thick batter into a greased and parchment-lined 9×9-inch ceramic baking dish. Spoon half the cinnamon mixture across the batter. Spread the remaining batter on top, dot with remaining cinnamon paste, and use a butter knife or wooden skewer to swirl in figure-eight patterns. Scatter crumbly streusel across the top. Bake at 350°F (175°C) for 38–42 minutes until a toothpick inserted into the center comes out clean. 4. Glaze with Cream Cheese Icing: Whisk softened cream cheese, powdered sugar, vanilla extract, and 2 tablespoons of warm milk until smooth and pourable. Drizzle generously over the warm coffee cake, allowing the glaze to melt slightly into the crackly streusel crevices. 3 Chef Secrets for Perfect Results 1. Use Room Temperature Ingredients: Ensure butter, eggs, and sour cream are at room temperature before beating. This creates a stable emulsion that traps microscopic air pockets, resulting in a cake that rises tall and light. 2. Don’t Over-Swirl the Batter: When marbling the cinnamon ribbon, make only 4 or 5 gentle figure-eight strokes. Over-mixing blends the cinnamon paste completely into the batter, losing those distinct gooey pockets of caramelized cinnamon roll flavor. 3. Glaze in Two Stages: Drizzle half the cream cheese glaze while the cake is still warm (15 minutes out of the oven) so it seeps deep into the crumb. Drizzle the remaining glaze after 10 more minutes to create stunning, opaque white bakery lines on top. What to Serve With Cinnamon Roll Coffee Cake Enjoy warm from the oven alongside freshly brewed espresso, cappuccino, or spiced chai tea. Fresh Artisan Cappuccino: A steaming cup of espresso topped with silky microfoam cut with a dusting of cinnamon balances the sweet, rich cake. Savory Farmhouse Scramble: Soft scrambled eggs with fresh chives provide a wonderful high-protein savory counterpoint to sweet brunch baking. Fresh Berry Salad: Fresh blackberries, raspberries, and strawberries tossed with fresh mint and a squeeze of orange juice. Storage, Freezing & Reheating Instructions Room Temperature & Fridge: Because of the cream cheese glaze, keep covered in an airtight container at room temperature for up to 2 days, or refrigerate for up to 6 days. Warming Before Serving: To recapture that fresh-from-the-bakery taste, warm individual slices in the microwave for 12–15 seconds until the glaze glistens and the cinnamon center turns molten. Freezing Instructions: Wrap individual unglazed or glazed slices tightly in plastic wrap and heavy foil, then freeze for up to 3 months. Thaw overnight in the refrigerator or warm directly in a toaster oven at 300°F for 8 minutes. Frequently Asked Questions Can I bake this coffee cake in a 9×13-inch pan?Yes! To bake in a standard 9×13-inch baking dish, double all ingredients. Reduce baking time slightly to 32–36 minutes since the cake will be slightly thinner, and test with a toothpick in the center. Can
Crispy Parmesan Crusted Lemon Butter Chicken Cutlets with Fresh Basil
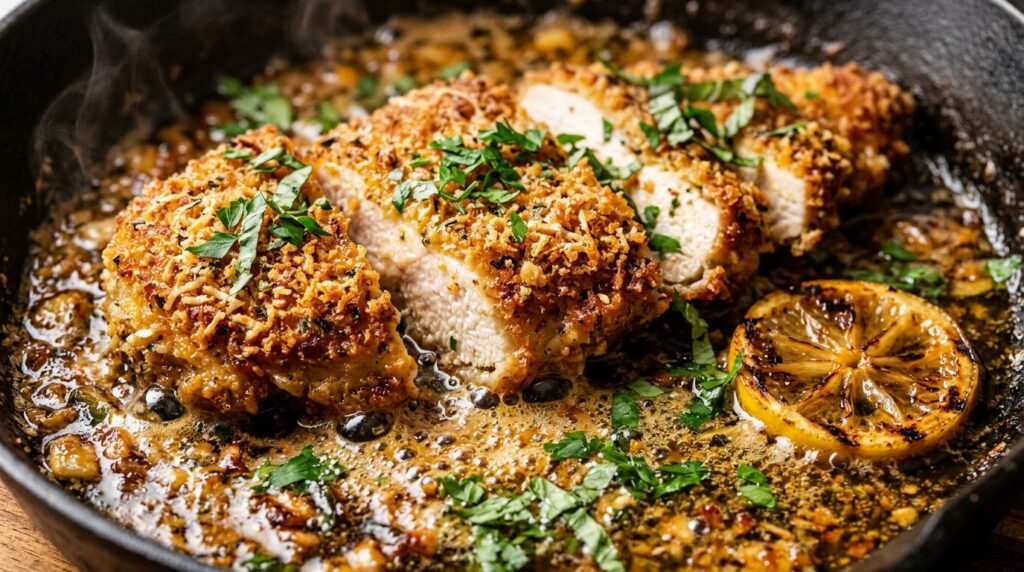
There is nothing quite as deeply satisfying as slicing through a golden, shatteringly crisp chicken cutlet, and these Crispy Parmesan Crusted Lemon Butter Chicken Cutlets with Fresh Basil take weeknight dining straight to fine-dining Italian bistro levels. Coated in a crunchy parmesan and seasoned panko crust, pan-seared to sizzling perfection, and bathed in a silky, bright garlic lemon butter pan sauce, every single forkful delivers the ultimate contrast of crunch and succulent, tender chicken. Best of all, this restaurant-quality masterpiece comes together in just 25 minutes using simple, wholesome ingredients. The culinary brilliance of this recipe lies in the dual-action breading technique. By blending finely grated aged Parmigiano-Reggiano directly with Japanese panko breadcrumbs, the cheese melts and toasts against the hot skillet to form a caramelized savory lace, while the panko stays featherlight and supremely crisp. Searing in a 50/50 combination of extra virgin olive oil and unsalted butter provides high-heat capability without scorching, yielding juicy, tender cutlets that never get dry or greasy. Why You’ll Love This Recipe Supreme Crunch Factor: The harmonious combination of aged parmesan and airy panko breadcrumbs creates a durable crust that stays delightfully crisp even under luscious lemon butter sauce. Ready in 25 Minutes: Thinly pounded chicken cutlets cook through in just 3 to 4 minutes per side, making this an effortless gourmet dinner for busy weeknights. Velvety Lemon Butter Sauce: A rapid pan sauce made right in the same skillet with browned garlic, rich chicken broth, fresh lemon juice, and cold butter emulsifies into pure silk. 100% Halal Wholesome: Made with lean halal chicken breast, clarified butter, rich homemade chicken stock, and fresh garden herbs—zero alcohol, zero wine, zero artificial additives. Key Ingredients & Smart Swaps Wholesome components: thin chicken cutlets, freshly grated Parmigiano-Reggiano, panko breadcrumbs, garlic, and fresh lemons. Thin Chicken Breast Cutlets: Slice plump chicken breasts horizontally into cutlets and pound gently to 1/3-inch thickness for lightning-fast, ultra-even cooking and maximum juiciness. Aged Parmigiano-Reggiano: Use freshly microplaned or finely grated real parmesan. Pre-shredded cheese coated in cellulose anti-caking agents will not melt or adhere smoothly. Japanese Panko Breadcrumbs: Panko’s large, airy flakes absorb significantly less oil than standard breadcrumbs, ensuring a light, shatteringly crispy coating. Fresh Lemon Juice & Zest: Freshly squeezed lemon juice brightens the rich pan sauce with vibrant acidity, while the zest adds aromatic citrus oils. Rich Chicken Bone Broth: Provides deep savory complexity to deglaze the skillet and form the velvety lemon butter emulsion without needing white wine. Step-by-Step Cooking Walkthrough 1. Prep & Season Cutlets: Pat chicken cutlets thoroughly dry with paper towels. Season both sides generously with kosher salt, cracked black pepper, garlic powder, and dried Italian herbs. 2. Dredge in Three Stations: Set up three shallow bowls: one with all-purpose flour; one with beaten eggs and a splash of milk; and one with the panko, grated parmesan, and lemon zest. Dredge each cutlet in flour (shake off excess), dip in egg wash, and press firmly into the parmesan-panko mixture to coat evenly. Pan-searing in hot olive oil and butter yields an irresistible golden-brown crunch in under 4 minutes per side. 3. Sear to Golden Perfection: Heat 2 tablespoons olive oil and 1 tablespoon butter in a large heavy skillet over medium-high heat. Once shimmering, add cutlets in a single layer without crowding. Fry for 3–4 minutes per side until deeply golden-brown and cooked to an internal temperature of 165°F (74°C). Transfer to a warm wire rack. 4. Swirl the Velvety Lemon Butter Sauce: Lower heat to medium. Add minced garlic to the skillet drippings and sauté for 30 seconds until fragrant. Pour in chicken broth and fresh lemon juice, scraping up all browned fond from the pan bottom. Simmer for 2 minutes until reduced by half, then remove from heat and swirl in cold cubed butter until glossy and emulsified. Stir in fresh chopped basil. 3 Chef Secrets for Perfect Results 1. Rest on a Wire Rack, Never a Plate: Placing freshly fried crispy cutlets directly on a flat plate traps steam beneath the breading, turning that glorious crunch soggy. Resting them on an elevated wire rack allows airflow, keeping both sides crispy. 2. Swirl Cold Butter Off the Heat: When mounting the lemon butter sauce (known as *monter au beurre*), take the skillet completely off the burner and whisk in chilled butter cubes. Gentle residual heat emulsifies the fats into a velvety cream rather than separating into greasy melted oil. 3. Press the Breading Firmly: When dredging in the parmesan-panko mixture, use the palm of your hand to firmly press the crumb into the meat on both sides. This creates a solid bonded crust that won’t flake off when flipped in the skillet. What to Serve With Lemon Butter Chicken Cutlets Served restaurant-style with herb-buttered angel hair pasta, crisp lemon arugula salad, and toasted artisan bread. Buttered Herb Angel Hair Pasta: Delicate capellini pasta tossed in garlic herb butter and extra pan sauce makes the ultimate comforting accompaniment. Crisp Lemon Arugula Salad: Peppery baby arugula tossed with shaved parmesan, cherry tomatoes, and a light extra virgin olive oil vinaigrette cuts through the rich butter sauce. Garlic Butter Roasted Asparagus: Tender-crisp roasted asparagus spears or green beans blistered with garlic and lemon zest. Storage, Freezing & Reheating Instructions Refrigeration: Store leftover cooked chicken cutlets and lemon butter sauce in separate airtight glass containers in the refrigerator for up to 4 days. Crispy Oven / Air Fryer Reheating: Never microwave crispy breaded chicken! Reheat cutlets in an air fryer at 375°F (190°C) for 3–4 minutes or in a 400°F oven on a baking sheet for 6–8 minutes until sizzling and crunchy. Gently warm sauce separately on low heat. Freezing Cooked Cutlets: Freeze completely cooled breaded cutlets flat on a parchment-lined baking sheet for 2 hours, then transfer to a heavy-duty freezer bag for up to 3 months. Reheat directly from frozen in the oven at 400°F for 12–15 minutes. Frequently Asked Questions Can I bake these chicken cutlets instead of pan-frying?Yes! Place breaded cutlets
Chewy Brown Butter Pumpkin Snickerdoodles with Spiced Cinnamon Sugar

When crisp October air settles over the kitchen and cozy cravings take over, nothing matches the magic of these Chewy Brown Butter Pumpkin Snickerdoodles with Spiced Cinnamon Sugar. Infused with nutty caramelized brown butter, real pumpkin puree, and warm autumn spices, each thick cookie boasts crinkly cracked tops generously blanketed in sparkling cinnamon sugar crystals. With soft, pillowy, ultra-chewy centers and delightfully crisp edges, this viral fall dessert is guaranteed to become your family’s favorite October baking tradition. The culinary secret to baking truly chewy pumpkin cookies—rather than disappointing cakey ones—comes down to controlling moisture and utilizing brown butter. Pure pumpkin puree is naturally laden with water, which creates a sponge-like cake texture if folded directly into dough. By blotting the pumpkin puree dry with paper towels to extract excess liquid, and replacing standard melted butter with simmered browned butter, you concentrate rich toffee flavor while guaranteeing that coveted melt-in-your-mouth chewy cookie interior. Why You’ll Love This Recipe Unbeatable Chewy Texture: Unlike standard pumpkin cookies that bake up fluffy and cake-like, our moisture-blotting method produces exceptionally chewy, dense, buttery centers. Nutty Brown Butter Flavor: Simmering butter until the milk solids turn amber brown imparts an aromatic, toffee-like richness that pairs heavenly with pumpkin spices. Signature Cinnamon Sugar Crackle: Rolling chilled dough balls in a generous blend of coarse sugar and cinnamon creates a shimmering, crisp exterior that crackles with every bite. 100% Halal Wholesome: Made with pure natural spices, unbleached flour, fresh pasture butter, and organic pumpkin puree—zero artificial flavorings, zero gelatin, zero alcohol extracts. Key Ingredients & Smart Swaps Baking essentials: pure pumpkin puree, golden browned butter, unbleached flour, cream of tartar, and fragrant cinnamon sugar. Pure Canned Pumpkin Puree: Use 100% pure pumpkin puree (such as Libby’s), not pre-sweetened pumpkin pie mix. Blotting it with paper towels before measuring removes excess water. Unsalted Butter (Browned): Melting and browning butter over medium heat creates toasted milk solids that lend deep, nutty butterscotch aroma. Cream of Tartar: The essential signature ingredient in classic snickerdoodles. It provides the subtle, pleasant tang and reacts with baking soda to yield a tender, crinkled chew. Brown & Granulated Sugar: A blend of dark brown sugar (for moisture and chewiness) and white granulated sugar (for crisp edges and rolling). Warm Autumn Spices: High-grade ground Ceylon cinnamon, ginger, nutmeg, and allspice deliver vibrant, aromatic warmth in every bite. Step-by-Step Cooking Walkthrough 1. Brown the Butter: Melt 1 cup (2 sticks) of unsalted butter in a light-colored saucepan over medium heat. Swirl occasionally as it foams and sizzles. After 5–6 minutes, golden specks will form on the bottom and a nutty aroma will arise. Immediately pour into a bowl and let cool for 15 minutes. 2. Blot the Pumpkin Puree: Spread 1/2 cup of pure pumpkin puree across a triple layer of paper towels on a plate. Press gently with another paper towel to absorb excess moisture. Repeat once until the puree is thick, dense, and concentrated. Generously rolling each portioned dough ball in spiced cinnamon sugar ensures a sparkling, crispy exterior. 3. Mix Dough & Chill: Whisk cooled brown butter with brown sugar and granulated sugar until glossy. Whisk in the blotted pumpkin puree, egg yolk, and pure vanilla. Fold in flour, cream of tartar, baking soda, and pumpkin pie spice until a soft dough forms. Chill dough in the refrigerator for 45 minutes. 4. Roll in Cinnamon Sugar & Bake: Preheat oven to 350°F (175°C). Scoop 2-tablespoon balls of chilled dough and roll generously in cinnamon sugar. Place 2 inches apart on parchment-lined baking sheets. Bake for 10–12 minutes until edges are set and tops are crinkled. Bang the pan once on the counter for extra crinkly chew! 3 Chef Secrets for Perfect Results 1. Never Skip Blotting the Pumpkin: This is the single most important technique. Unblotted pumpkin turns cookies into spongy mini cakes. Removing the moisture guarantees a chewy bakery-style crumb. 2. Use Only the Egg Yolk: Omitting the egg white reduces water content while the rich yolk fat adds luxurious chewiness and prevents excessive spreading. 3. The Counter Pan-Bang Hack: The second you pull the baking sheet from the oven, tap it firmly against the counter once or twice. This collapses any air pockets, creating gorgeous rustic crinkles and ultra-dense chewy centers. What to Serve With Pumpkin Snickerdoodles Enjoy warm from the oven paired with hot spiced cider, chai tea, or a creamy espresso latte. Hot Spiced Chai Latte: Steaming black tea brewed with cardamom, cinnamon, and frothy steamed oat milk or whole milk. Warm Mulled Apple Cider: Simmered with cinnamon sticks, orange slices, and whole cloves for quintessential fall coziness. Vanilla Bean Ice Cream: Sandwich a generous scoop of artisanal vanilla bean ice cream between two warm cookies for an unforgettable dessert sandwich. Storage, Freezing & Reheating Instructions Room Temperature: Store baked cookies in an airtight container with a small slice of plain bread (which keeps cookies miraculously soft and chewy) for up to 6 days. Freezing Baked Cookies: Freeze completely cooled cookies in freezer bags separated by parchment paper for up to 3 months. Thaw at room temperature for 20 minutes before serving. Freezing Cookie Dough: Scoop and roll dough balls in cinnamon sugar, freeze solid on a baking sheet, then transfer to a freezer bag. Bake directly from frozen at 350°F, adding just 2 extra minutes of baking time. Frequently Asked Questions Why are my pumpkin snickerdoodles cakey instead of chewy?Cakey cookies are caused by excess water in the pumpkin puree. Make sure to blot the pumpkin thoroughly with paper towels until it loses about 25% of its liquid volume before mixing into the dough. Can I make these without brown butter?Yes, regular melted unsalted butter works, but browning the butter adds an extraordinary layer of nutty caramel flavor that elevates these from good to bakery-exceptional. Do I have to chill the dough?Chilling for at least 45 minutes is highly recommended. Because brown butter is liquid when warm, chilling solidifies the fats, preventing the cookies from spreading too
Velvety Roasted Tomato Basil Soup with Garlic Herb Croutons
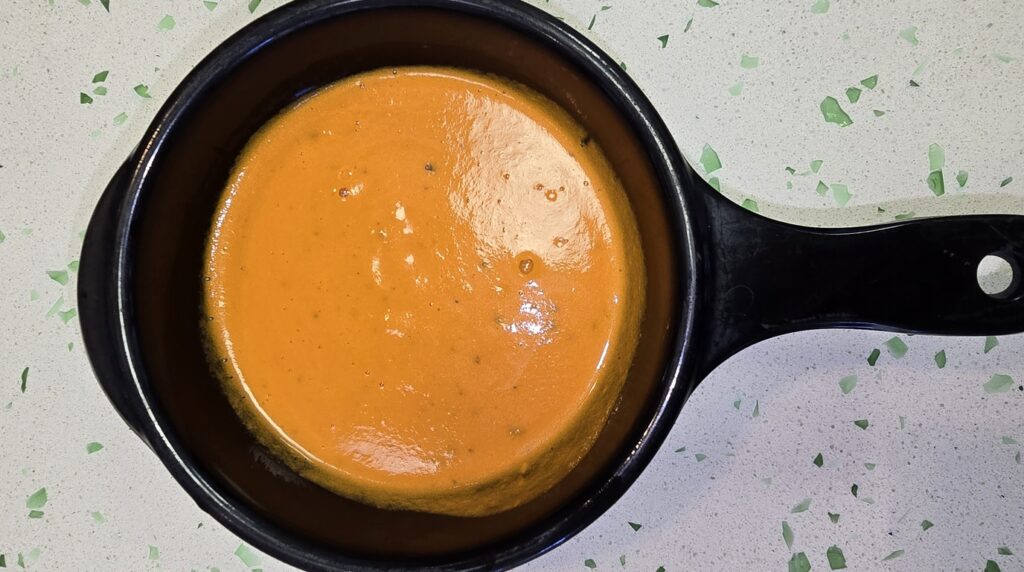
When brisk autumn afternoons demand effortless comfort in a steaming bowl, this Velvety Roasted Tomato Basil Soup with Garlic Herb Croutons answers the call. Fresh garden Roma tomatoes, sweet yellow onions, and whole heads of garlic are oven-roasted at high heat until blistered and caramelized, then simmered in rich vegetable broth and pureed into silky perfection with heavy cream and aromatic fresh basil. Paired with crispy golden sourdough croutons or a gooey grilled cheese sandwich, this timeless harvest recipe redefines homemade soup comfort. The secret to unforgettable tomato soup lies in caramelization rather than boiling alone. Simmering raw canned tomatoes often yields an overly acidic, flat broth that requires mounds of sugar to balance. In contrast, roasting fresh Roma tomatoes cut-side up at 400°F concentrates their natural sugars, mellows their sharpness, and creates deeply savory charred edges. When blended with softened roasted garlic cloves and steeped fresh basil leaves, the result is an intensely flavorful, naturally sweet soup with a velvety mouthfeel that outshines any store-bought can. Why You’ll Love This Recipe Intense Caramelized Flavor: High-heat sheet pan roasting caramelizes the tomatoes and garlic, unlocking deep, natural sweetness without artificial additives. Effortless Hands-Off Preparation: The oven does 85% of the work roasting the vegetables, leaving you with just a quick blend and gentle simmer. Silky Smooth Texture: An immersion blender whips the roasted ingredients, olive oil, and cream into a cloud-like, velvety texture without needing heavy flour starches. 100% Halal Wholesome: Crafted with orchard-fresh produce, cold-pressed olive oil, organic broth, and pure dairy—zero preservatives, zero pork, zero alcohol. Key Ingredients & Smart Swaps Fresh, wholesome harvest ingredients: ripe Roma plum tomatoes, whole garlic, extra virgin olive oil, and fresh garden basil. Ripe Roma or Plum Tomatoes: Dense with low water content and rich pectin, Roma tomatoes roast down into concentrated, sweet tomato pulp. You can also mix in sweet cherry or Campari tomatoes. Whole Head of Garlic: Roasting whole garlic cloves in their skins renders them mellow, sweet, and nutty, eliminating any harsh raw bite. Fresh Sweet Basil: A generous handful of fresh garden basil blended directly into the warm soup imparts signature Italian herbal fragrance. Avoid dried basil here, which lacks the vibrant essential oils. Heavy Cream or Coconut Cream: A splash of heavy cream softens the acidity and adds a luxurious finish. For a dairy-free or vegan option, unsweetened full-fat canned coconut milk works beautifully. Savory Vegetable Broth: Provides the liquid foundation to achieve the ideal soup consistency without diluting the roasted tomato essence. Step-by-Step Cooking Walkthrough 1. Prep & Roast the Vegetables: Preheat your oven to 400°F (200°C). Halve tomatoes and quarter onions, arranging them cut-side up on a rimmed baking sheet. Scatter peeled garlic cloves around them. Drizzle generously with olive oil and season with salt, pepper, and dried oregano. Roast for 30–35 minutes until tomatoes are collapsed and lightly blistered on top. 2. Transfer to Pot & Simmer: Transfer all roasted tomatoes, onions, garlic, and accumulated pan juices into a large Dutch oven or soup pot over medium heat. Pour in the vegetable broth and bring to a gentle simmer for 10 minutes to allow the flavors to marry. Simmering the roasted vegetables in fragrant broth extracts every nuance of caramelized sweetness. 3. Blend to Silky Perfection: Remove pot from heat. Add the fresh basil leaves. Use an immersion hand blender to puree the soup until completely smooth and velvety. If using a countertop blender, vent the lid slightly to allow steam to escape. 4. Finish with Cream & Seasoning: Return pot to low heat. Stir in the heavy whipping cream. Taste and adjust seasoning with kosher salt, freshly ground black pepper, and a pinch of red pepper flakes if desired. Keep warm on low until serving. 3 Chef Secrets for Perfect Results 1. Roast Cut-Side Up: Placing the tomatoes cut-side up on the baking sheet allows moisture to evaporate freely, concentrating sugars rather than stewing in their own pool of water. 2. Pour In the Pan Juices: Do not discard the flavorful liquid on the baking sheet! That pan residue contains concentrated roasted sugars and roasted garlic oil that provides deep savor. 3. Add Basil Off the Heat: Delicate fresh basil turns bitter and loses its bright green hue if boiled rapidly. Stirring it in right before pureeing preserves its fragrant sweetness and color. What to Serve With Roasted Tomato Basil Soup Ladle hot into bowls and serve alongside buttery artisan croutons or an ultra-cheesy grilled sandwich. Classic Sourdough Grilled Cheese: Crisp buttery sourdough slices oozing with sharp white cheddar and gruyere for the ultimate cozy dipping experience. Garlic Herb Croutons: Golden toasted cubes of ciabatta tossed in olive oil, garlic powder, and Italian herbs. Shaved Parmigiano & Basil Ribbons: Top each steaming bowl with freshly shaved aged parmesan flakes and a thread of extra virgin olive oil. Storage, Freezing & Reheating Instructions Refrigeration: Allow soup to cool completely before transferring to airtight glass containers. Store in the refrigerator for up to 5 days. Reheating: Warm gently on the stovetop over medium-low heat, stirring occasionally until heated through. Add a splash of broth or cream if it has thickened in the fridge. Freezing: If freezing, prepare the soup completely without adding the heavy cream. Freeze in airtight freezer bags for up to 3 months. Thaw overnight in the fridge, heat gently, and stir in the cream just before serving. Frequently Asked Questions Can I use canned tomatoes instead of fresh?Yes! You can use two 28-ounce cans of whole peeled San Marzano tomatoes. Drain them slightly, spread them on the baking sheet with the garlic and onions, and roast for 25 minutes to develop that essential caramelized flavor. Is tomato soup acidic? How do I fix it?Roasting tomatoes naturally mellows their acidity. If your tomatoes are particularly tart, stir in 1/2 teaspoon of brown sugar or honey, or add 1/4 teaspoon of baking soda to naturally neutralize acidity without altering taste. Can I make this soup vegan?Easily! Simply substitute the heavy whipping cream with
Creamy Garlic Parmesan Wild Mushroom Rigatoni with Fresh Thyme
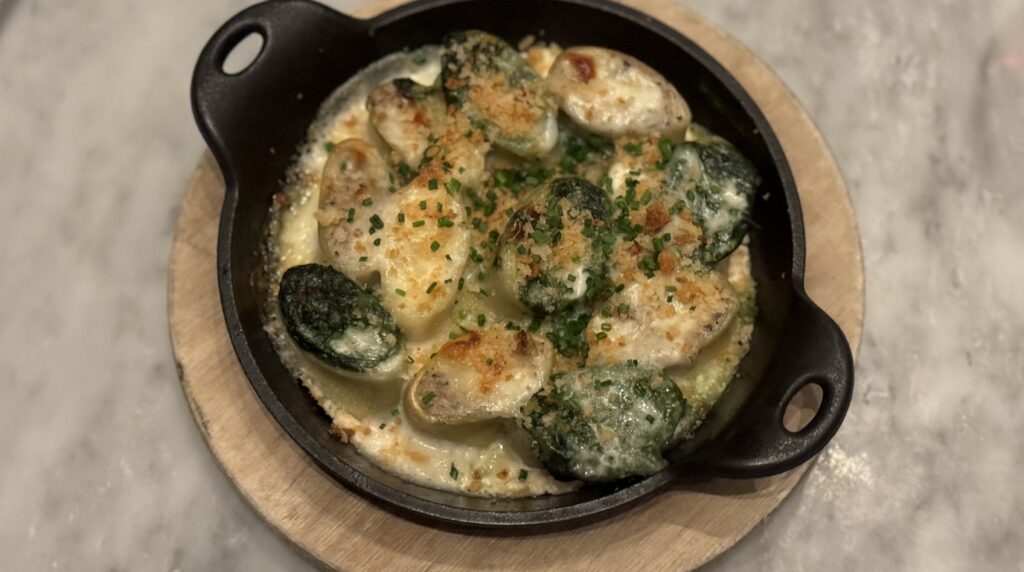
When chilly evenings call for an elegant restaurant-worthy dinner in under 30 minutes, this luxurious Creamy Garlic Parmesan Wild Mushroom Rigatoni with Fresh Thyme delivers pure comfort. Al dente ridged rigatoni pasta tubes are tossed in a velvety garlic-infused heavy cream sauce, folded with deeply caramelized mixed wild mushrooms, aged Parmigiano Reggiano, and fragrant sprigs of fresh garden thyme. Rich, earthy, and satisfyingly decadent, this Italian bistro classic transforms everyday pantry staples into a memorable culinary experience. The culinary magic of this dish lies in the caramelization of the mushrooms and the gentle emulsification of starchy pasta water with freshly grated cheese. Rather than steaming the mushrooms in a crowded skillet, sautéing them over medium-high heat in a combination of extra virgin olive oil and unsalted butter allows their natural juices to evaporate, producing intensely savory golden edges. Folding that concentrated umami essence into warm cream and melted parmesan creates a velvety sauce that clings tenaciously to every ridge of the rigatoni. Why You’ll Love This Recipe Quick 25-Minute Weeknight Magic: Prepared and cooked entirely in the time it takes to boil a pot of pasta, giving you gourmet Italian comfort with minimal cleanup. Incredible Depth of Umami: Sautéing mixed wild mushrooms—cremini, shiitake, and chanterelles—unlocks deep, savory layers that rival high-end trattorias. Velvety Sauce That Truly Clings: Starchy rigatoni water binds the garlic parmesan cream sauce directly to the ridges of each noodle, preventing sauce separation. 100% Halal Wholesome: Made with pure natural ingredients, aromatic vegetable broth, fresh cream, and rich dairy butter—zero alcohol, zero wine, and zero artificial flavorings. Key Ingredients & Smart Swaps Quality culinary ingredients: ridged rigatoni, assorted wild mushrooms, fresh garlic, heavy cream, and aged parmesan. Rigatoni Pasta: The wide tubular shape and pronounced ridges catch the velvety cream sauce and mushroom pieces inside and out. You can also swap with penne rigate or fettuccine. Assorted Wild Mushrooms: A medley of cremini (baby bella), sliced shiitake, and chanterelle or oyster mushrooms delivers diverse textures and concentrated earthy savor. Fresh Garlic & Garden Thyme: Four finely minced garlic cloves and fresh thyme leaves build the aromatic foundation of the dish. Fresh thyme is superior to dried for a bright herbal finish. Heavy Whipping Cream & Vegetable Broth: Rich heavy cream paired with a splash of savory vegetable broth creates a luscious sauce that thickens naturally without needing heavy flour roux. Parmigiano Reggiano: Freshly grated aged parmesan melts smoothly into the sauce, lending salty, nutty depth. Avoid pre-shredded bottled cheese which contains anti-caking agents that cause clumping. Step-by-Step Cooking Walkthrough 1. Boil the Pasta: Bring a large pot of generously salted water to a rolling boil. Drop in the rigatoni and cook until just shy of al dente (about 1–2 minutes less than package directions). Reserve 1/2 cup of starchy pasta water before draining. 2. Sear the Mushrooms: Heat 2 tablespoons of olive oil and 1 tablespoon of butter in a large deep skillet over medium-high heat. Add sliced mushrooms in a single layer. Let them sear undisturbed for 3–4 minutes until deeply browned, then stir and sauté for another 3 minutes until caramelized. Deeply searing wild mushrooms over medium-high heat unlocks concentrated umami savor and golden edges. 3. Build the Garlic Cream Sauce: Reduce heat to medium. Add minced garlic and fresh thyme leaves to the skillet, stirring constantly for 60 seconds until fragrant. Pour in the vegetable broth to deglaze the skillet bottom, scraping up any browned bits. Pour in the heavy cream and simmer gently for 3–4 minutes until slightly reduced. 4. Toss & Emulsify: Add the drained rigatoni directly to the simmering cream sauce. Stir in the freshly grated parmesan cheese and 2 tablespoons of reserved pasta water. Toss vigorously for 1–2 minutes over low heat until the sauce turns glossy, thick, and coats every noodle. 3 Chef Secrets for Perfect Results 1. Do Not Crowd the Mushrooms: If your skillet is too small, sear the mushrooms in two batches. Crowding traps steam in the pan, causing the mushrooms to become rubbery rather than developing deep golden caramelized flavor. 2. Always Reserve Starchy Pasta Water: The salty, starch-laden water from boiling pasta is liquid gold. It naturally emulsifies the heavy cream and melted parmesan cheese, ensuring a silky, cohesive sauce that never turns greasy. 3. Turn Off Heat Before Adding Cheese: Excessive heat can cause parmesan proteins to break and become stringy or grainy. Remove the skillet from direct high heat right as you stir in the cheese for a mirror-smooth finish. What to Serve With Creamy Mushroom Rigatoni Served restaurant-style with freshly cracked black pepper, extra shaved parmesan, and warm crusty artisan bread. Warm Garlic Bread: Crisp toasted garlic ciabatta or sourdough baguettes to mop up every drop of velvety garlic parmesan cream sauce. Crisp Italian House Salad: Fresh peppery arugula, mixed greens, and shaved fennel tossed in a zesty lemon vinaigrette to cut through the rich creamy sauce. Chilled Sparkling Beverage: Sparkling mineral water infused with fresh lemon wedges or a glass of chilled sparkling apple cider. Storage, Freezing & Reheating Instructions Refrigeration: Allow leftover pasta to cool completely. Store in an airtight glass container in the refrigerator for up to 4 days. Gentle Reheating: Reheat leftovers gently in a skillet over medium-low heat with a splash of milk, broth, or cream. Stir continuously for 3–4 minutes until silky again. Avoid microwave overheating which can separate dairy fats. Freezing: Because heavy cream and cooked pasta can soften and separate upon thawing, freezing is not recommended for this cream-based pasta dish. Best enjoyed fresh! Frequently Asked Questions What mushrooms work best for creamy pasta?A combination of cremini (baby bella), shiitake, and oyster or chanterelle mushrooms provides the best texture and depth of flavor. Standard white button mushrooms can also be used, but mixing wild varieties elevates the dish significantly. Can I add protein like chicken or steak?Yes! Sautéed sliced chicken breast or grilled steak strips complement the garlic parmesan mushroom sauce wonderfully. Cook the protein first, set aside, and fold it back
Savory Roasted Stuffed Butternut Squash with Sausage, Cranberries, and Pecans
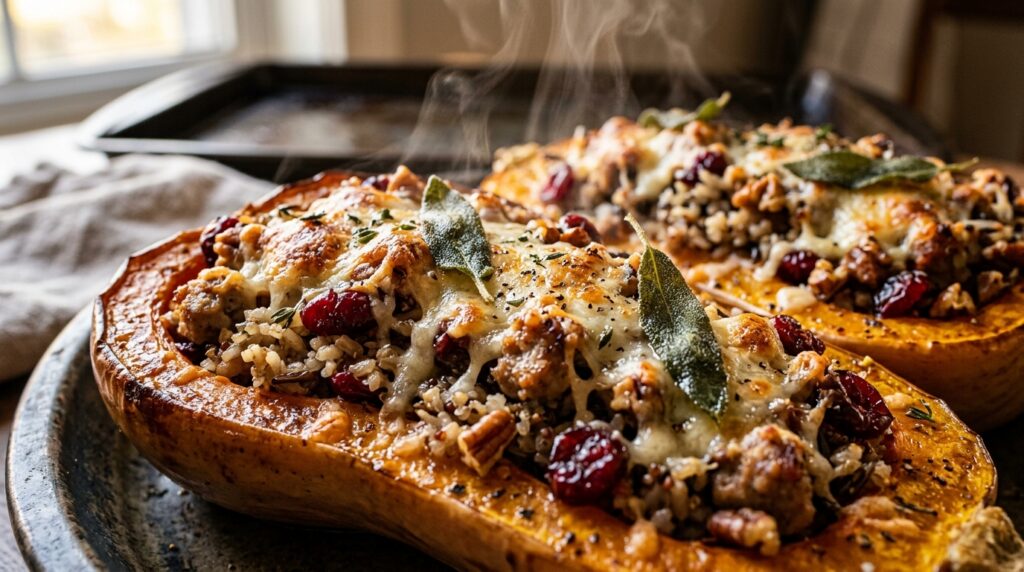
When the autumn table calls for a showstopping centerpiece that is as stunning to behold as it is comforting to savor, this Savory Roasted Stuffed Butternut Squash with Sausage, Cranberries, and Pecans takes center stage. Halved butternut squashes are roasted cut-side down until tender and caramelized, then brimming with a deeply savory stuffing of seasoned halal Italian sausage, fluffy wild rice, sweet tart cranberries, crisp apples, and toasted pecans. Topped with bubbling melted parmesan and crispy fresh sage, each forkful delivers the quintessential taste of harvest season. The culinary triumph of this dish comes down to balanced flavor layering. Butternut squash is naturally sweet with deep buttery notes when roasted at high heat. To contrast that luscious sweetness, our hearty filling combines savory Italian herbs—fennel, garlic, and cracked pepper—with lean ground halal sausage, tart ruby cranberries, and earthy wild rice. Scooping just a spoonful of the tender roasted squash flesh and folding it right into the warm stuffing binds the flavors together seamlessly before the squash boats return to the oven for a final golden broil. Why You’ll Love This Recipe Complete All-in-One Meal: Provides wholesome complex carbohydrates, high-quality lean protein, healthy fats, and vibrant autumnal produce in one gorgeous edible bowl. Holiday Table Showstopper: Elegant enough to serve as the main attraction for Thanksgiving or festive family gatherings, yet easy enough for weeknight meal prep. Make-Ahead Friendly: Both the roasted squash boats and the savory stuffing can be prepared a day in advance, assembled in minutes, and baked fresh when guests arrive. 100% Halal Wholesome: Made with premium halal ground sausage (or seasoned lean ground turkey), organic wild rice, orchard-fresh apples, and pure olive oil—zero pork, zero wine. Key Ingredients & Smart Swaps Harvest-fresh ingredients arranged on a clean quartz workstation. Butternut Squash: Two medium, uniform squashes (about 2.5 to 3 lbs each). Look for straight, sturdy necks to provide generous filling cavities. Halal Italian Sausage: 1 pound of lean halal beef or turkey Italian sausage with fennel and garlic seasonings. For a vegetarian variation, seasoned brown lentils or crumbled tempeh work beautifully. Wild Rice Blend: 1.5 cups of cooked long-grain wild rice blend. Quinoa, farro, or nutty brown jasmine rice make fantastic alternatives. Dried Ruby Cranberries: Add delightful pops of tart sweetness that cut through the richness of the sausage and cheese. Honeycrisp or Gala Apple: One medium apple, finely diced, offering crisp juicy sweetness and textural contrast. Toasted Pecans or Walnuts: 1/2 cup roughly chopped and lightly toasted for a buttery crunch in every mouthful. Fresh Aromatic Herbs: Minced fresh sage leaves and fresh thyme sprigs bring authentic holiday aroma. Parmesan or Gruyère Cheese: Freshly grated over the stuffed squash for a bubbling, golden-brown crust. Step-by-Step Cooking Walkthrough 1. Roast the Squash Halves: Preheat oven to 400°F (200°C). Slice squashes in half lengthwise and scoop out the seeds and stringy pulp. Brush cut sides with olive oil, season with salt and pepper, and place cut-side down on a parchment-lined baking sheet. Roast for 35 to 40 minutes until tender and easily pierced with a fork. 2. Brown the Savory Filling: While the squash roasts, heat a large skillet over medium-high heat. Add the halal Italian sausage, breaking it apart with a wooden spatula until browned and cooked through (about 6–8 minutes). Stir in diced onion, celery, minced garlic, diced apple, fresh sage, and thyme, cooking for 4 more minutes until tender. Packing the warm wild rice and sausage stuffing generously into roasted squash cavities ensures maximum flavor in every bite. 3. Fold in Rice, Fruit & Nuts: Remove skillet from heat. Stir in the cooked wild rice blend, dried cranberries, and chopped toasted pecans. Scoop out a small spoonful of roasted squash flesh from each half to enlarge the boat, and fold that squash meat right into the skillet mixture. 4. Mound & Top with Cheese: Flip the roasted squash halves cut-side up in a baking dish. Spoon the stuffing generously into each cavity, mounding it high. Sprinkle with freshly grated parmesan or gruyère cheese. 5. Golden Bake: Return the stuffed squashes to the 400°F oven for 10 to 12 minutes until the cheese is completely melted, bubbling, and golden brown around the edges. Garnish with fresh sage leaves and serve warm. 3 Chef Secrets for Perfect Results 1. Roast Cut-Side Down First: Roasting the squash halves cut-side down on the hot baking sheet traps steam inside while caramelizing the natural sugars in direct contact with the pan. This gives you sweet, fork-tender squash in less time without drying out. 2. Shave a Slivers off the Bottom: If your squash halves wobble or tilt when flipped over, slice a razor-thin piece off the curved skin on the back. This creates a flat bottom so they sit level and sturdy like natural bowls. 3. Toast Your Pecans Separately: Raw pecans will absorb moisture from the hot rice and soften. Toasting them in a dry skillet for 3 minutes before folding into the stuffing keeps them delightfully crunchy even after baking. What to Serve With Stuffed Butternut Squash Served restaurant-style with artisan crusty sourdough and festive seasonal beverages. Warm Artisan Sourdough: Thick toasted slices of sourdough or brioche dinner rolls with whipped honey herb butter. Crisp Seasonal Slaw or Salad: Shaved Brussels sprouts or massaged kale with pomegranate seeds and citrus vinaigrette. Holiday Beverages: Steaming hot spiced apple cider, iced cranberry spritzers, or sparkling pear punch. Storage, Freezing & Reheating Instructions Refrigeration: Allow leftover stuffed squash halves to cool to room temperature. Wrap securely in foil or store in airtight containers in the refrigerator for up to 4 days. Reheating: Reheat in a 350°F (175°C) oven covered with foil for 15–20 minutes until piping hot throughout. Uncover during the final 3 minutes to restore the crispy cheese topping. Freezing: Fully assembled unbaked squashes freeze well. Wrap tightly in plastic wrap and aluminum foil, and freeze for up to 2 months. Thaw overnight in the refrigerator before baking as instructed. Frequently Asked Questions Can I make this vegetarian or
Crispy Chicken Bacon Ranch Tater Tot Casserole with Melted Cheddar
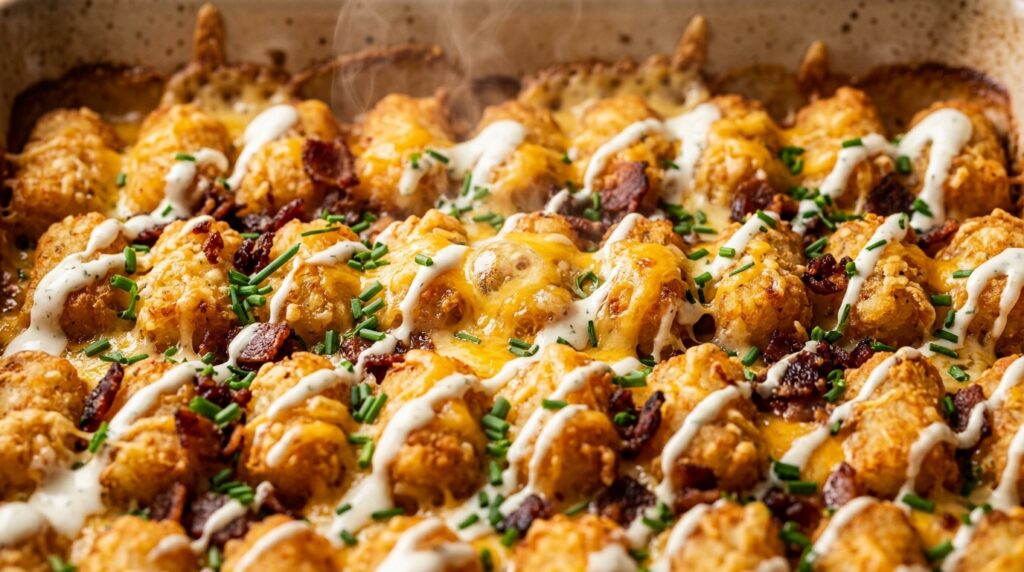
When you need an intensely satisfying comfort food dinner that delivers roaring cheers from the entire table, this Crispy Chicken Bacon Ranch Tater Tot Casserole with Melted Cheddar is the ultimate crowd-pleasing triumph. Tender shreds of seasoned chicken breast are folded into a velvety garlic-herb ranch sauce loaded with melted sharp cheddar and crispy smoky halal beef bacon, then crowned with a neat blanket of golden, deep-crisped tater tots. Every spoonful brings the addictive crunch of sizzling tots followed by a rich, gooey, savory cheese pull. The culinary brilliance of this casserole lies in temperature contrast and smart layering. Rather than drowning the tater tots inside a watery soup base—which turns them soggy and mushy—we build a sturdy, luxurious foundation using softened cream cheese, rich sour cream, and freshly grated sharp cheddar seasoned with garlic, dill, and black pepper. By keeping the frozen tater tots strictly on the surface in tight, uniform rows and baking uncovered at high heat, the tops shatter with golden crispness while the underside absorbs just enough savory ranch juices to stay tender and flavorful. Why You’ll Love This Recipe Maximum Crunch Guarantee: Arranging frozen tots on top and finishing with a 3-minute high broil guarantees shatteringly crisp potato perfection. Effortless 15-Minute Assembly: Use leftover roasted chicken, rotisserie chicken, or quick-poached breasts for a fast weeknight dinner ready to bake in minutes. Ultimate Flavor Trio: Savory shredded chicken, cool tangy garlic ranch, and smoky cured beef bacon create the gold standard of comfort food pairings. 100% Halal Wholesome: Crafted with crisp halal beef bacon (or turkey bacon), all-natural cultured sour cream, real cheeses, and zero artificial soup concentrates. Key Ingredients & Smart Swaps Wholesome culinary ingredients arranged on a clean quartz workstation. Shredded Cooked Chicken: 4 cups of juicy shredded chicken breast or thighs. Rotisserie chicken or poached seasoned chicken breasts work flawlessly. Crispy Halal Beef Bacon: 8 thick strips cooked until deeply crisp and chopped into savory bite-sized crumbles. Smoked turkey bacon is an excellent lighter alternative. Golden Tater Tots: One 28-to-32-ounce bag of frozen cylindrical potato tots. Keep them frozen until the exact moment they go onto the casserole! Dual Cheese Blend: Freshly shredded sharp yellow cheddar for bold flavor and low-moisture whole milk mozzarella for incredible melty stretch. Creamy Ranch Base: A combination of softened cream cheese, full-fat cultured sour cream, and chicken bone broth for luscious body. Herb Ranch Seasoning: Dried dill weed, dried chives, onion powder, garlic powder, kosher salt, and freshly cracked black pepper. Step-by-Step Cooking Walkthrough 1. Preheat & Prepare Dish: Heat your oven to 400°F (200°C). Lightly grease a 9×13-inch ceramic casserole dish with olive oil or butter. 2. Whisk the Creamy Ranch Foundation: In a large mixing bowl, whisk together the softened cream cheese, sour cream, chicken broth, dried dill, garlic powder, onion powder, salt, and black pepper until completely smooth and velvety. Arranging frozen tater tots in tight, uniform rows ensures optimal heat circulation and ultra-crisp edges. 3. Fold Chicken & Cheeses: Stir the shredded chicken, half of the crispy beef bacon, 1 cup of sharp cheddar, and 1 cup of mozzarella into the ranch mixture until evenly coated. Spread the chicken mixture evenly across the prepared baking dish. 4. Arrange Tater Tots: Place the frozen tater tots in neat, tight rows across the entire surface of the chicken base, covering the filling completely. 5. Golden Bake & Broil: Bake uncovered at 400°F for 35 to 40 minutes until the casserole is bubbling hot. Sprinkle the remaining cheddar, mozzarella, and reserved beef bacon over the tots, then bake for an additional 5 minutes until the cheese is melted and bubbling. Optional: Broil on HIGH for 2 minutes for extra-crisp potato edges! 3 Chef Secrets for Perfect Results 1. Never Thaw the Tater Tots: Keep your tater tots frozen solid in the freezer until the exact second you arrange them in the dish. Placing frozen tots directly into a hot 400°F oven creates instant steam evaporation, resulting in a shatteringly crispy shell rather than a mushy center. 2. Shred Cheese from Whole Blocks: Pre-shredded bagged cheeses contain cellulose anti-caking starches that mute flavor and create a greasy film when baked. Grating your sharp cheddar and mozzarella fresh produces a silkier, creamier sauce and superior cheese pulls. 3. Rest 8 Minutes Before Slicing: Pulling the casserole straight from the oven and scooping immediately causes the creamy sauce to pool at the bottom. Letting it settle for 8 to 10 minutes allows the cheese and starches to set, yielding clean, gorgeous bakery-style squares. What to Serve With Chicken Bacon Ranch Tater Tot Casserole Served restaurant-style with crisp side greens and artisanal chilled beverages. Crisp Garden Salad: Romaine lettuce, cherry tomatoes, English cucumbers, and shaved radishes tossed with a light lemon vinaigrette to cut through the rich cheesy decadent casserole. Roasted Green Vegetables: Charred garlic parmesan broccoli, steamed sweet green peas, or roasted asparagus spears. Warm Artisan Garlic Bread: Fluffy dinner rolls or crusty sourdough baguettes toasted with garlic butter for scooping up every drop of ranch sauce. Storage, Freezing & Reheating Instructions Refrigeration: Allow leftover casserole to cool completely. Cover the baking dish tightly with aluminum foil or transfer portions to airtight glass containers. Store in the refrigerator for up to 4 days. Reheating in the Oven (Recommended): Place portions on a baking sheet and bake at 375°F (190°C) for 10–12 minutes. This restores the signature crunch to the tater tots that microwaves soften. Air Fryer Reheating (Fastest & Crispiest): Pop a slice into your air fryer basket at 360°F (180°C) for 4 to 5 minutes for bubbly cheese and ultra-crisp tots. Freezing Guidelines: Assemble the casserole fully without baking, wrap tightly in 2 layers of plastic wrap and 1 layer of heavy foil, and freeze for up to 3 months. Bake straight from frozen at 375°F for 55–65 minutes. Frequently Asked Questions Can I make chicken bacon ranch tater tot casserole ahead of time?Yes! You can mix the chicken, ranch sauce, and cheese together in the baking