
Warm Salted Caramel Apple Dump Cake with Vanilla Ice Cream
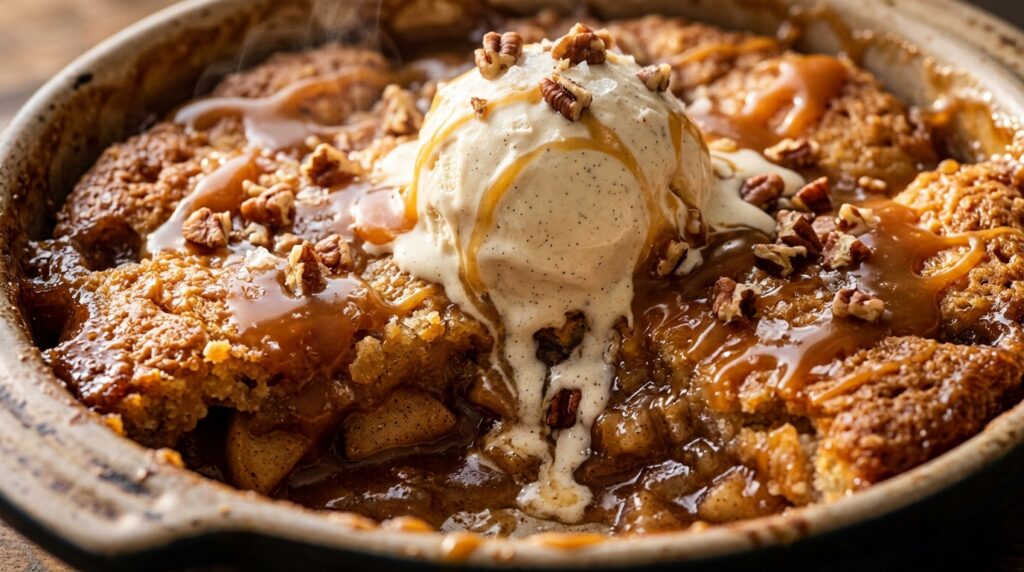
When crisp autumn air calls for effortless comfort baking, nothing delivers faster than this Warm Salted Caramel Apple Dump Cake with Vanilla Ice Cream. Tender, cinnamon-spiced apple slices bubble beneath a golden, buttery crackly cake topping that tastes just like homestyle cobbler, drenched in luscious ribbons of rich sea salted caramel. With only 10 minutes of hands-on prep and simple pantry staples, you get all the nostalgic warmth of deep-dish apple pie without rolling a single shred of dough. The magic of a classic dump cake relies on a simple yet brilliant culinary principle: layering moist fruit fillings underneath dry cake mix, then blanketing the surface with thin, cold pats of unsalted butter. As the casserole bakes at high heat, the butter melts slowly downward through the cake flour, creating a dual-textured marvel—crisp and crumbly on top, yet soft and custardy where it meets the bubbling spiced fruit. A swirl of rich amber caramel adds deep buttery molasses notes that balance the tart apple acidity to utter perfection. Why You’ll Love This Recipe 10-Minute Hands-Off Prep: No pastry rolling, no chilling dough, and no stand mixer required—simply layer the ingredients directly in your baking dish and slide into the oven. Irresistible Texture Contrast: Enjoy crunchy, buttery cobbler-like topping over thick, molten cinnamon apples and velvety melting vanilla ice cream. Crowd-Pleasing Holiday Dessert: Fills your entire kitchen with the intoxicating aroma of spiced apples, brown sugar, and toasted pecans. 100% Halal Wholesome: Made with pure cream butter, real vanilla, crisp orchard apples, and zero artificial extracts or shortcuts. Key Ingredients & Smart Swaps High-quality baking essentials arranged on a clean quartz workstation. Spiced Apple Filling: Two 21-ounce cans of premium apple pie filling, or 6 cups of freshly peeled Honeycrisp apples tossed with brown sugar, lemon juice, and cinnamon. Yellow or Spice Cake Mix: A standard 15.25-ounce box provides the perfect balance of sweetness and golden-brown crumble. Spice cake mix or butter pecan mix makes a fantastic cozy seasonal alternative. Unsalted Pure Butter: 1 cup (2 sticks) thinly sliced into uniform cold pats. High-fat European butter yields the crispiest, richest crust. Sea Salted Caramel Sauce: Thick jarred artisan caramel or homemade salted caramel drizzled between layers and over the finished cake. Warm Autumn Spices: Ground cinnamon, a pinch of freshly grated nutmeg, and flaky sea salt to cut through the sweetness. Toasted Pecans: Chopped roughly and scattered over the cake during the final 10 minutes for nutty, buttery crunch. Step-by-Step Cooking Walkthrough 1. Oven & Dish Preparation: Preheat your oven to 350°F (175°C). Lightly grease a 9×13-inch ceramic or glass baking dish with non-stick spray or softened butter. 2. Layer Fruit & Caramel: Spread the spiced apple pie filling evenly across the bottom of the dish. Drizzle 1/3 cup of rich salted caramel sauce directly across the apples and dust lightly with ground cinnamon. Arranging cold pats of butter in uniform rows guarantees complete coverage and zero dry flour pockets. 3. Distribute Cake Mix: Sprinkle the dry yellow cake mix evenly over the apple layer using a spoon, gently smoothing it into an even blanket. Do not stir or mix the layers together! 4. Blanket with Cold Butter: Arrange the thinly sliced butter pats in tight, overlapping rows across the entire surface so nearly every inch of dry mix is covered. 5. Golden Bake: Bake for 45 minutes until bubbling around the edges. Scatter chopped pecans over the top and bake for an additional 10 minutes until deeply golden and fragrant. 3 Chef Secrets for Perfect Results 1. Slice Butter Thinly Instead of Melting: While some recipes pour melted butter over the top, thin cold pats melt gradually across the entire surface during baking. This prevents dry flour pockets while creating a signature crackly, caramelized crust. 2. Flaky Sea Salt Balances Sweetness: Rich cake mix and sweet apples can taste overly sweet without balance. A pinch of flaky Maldon sea salt sprinkled right over the bubbling caramel enhances the caramelized apple nuances dramatically. 3. Let Rest for 10 Minutes Before Scooping: Allow the dump cake to rest on a wire rack for 10 to 15 minutes fresh out of the oven. The molten fruit filling will set slightly into a luxurious custard texture rather than running liquid across the plate. What to Serve With Salted Caramel Apple Dump Cake Plated dessert bistro-style with velvety vanilla bean ice cream and steaming artisan espresso. Velvety Vanilla Bean Ice Cream: The cold, creamy ice cream melting into the piping hot caramel apple crust creates the ultimate hot-cold contrast. Fresh Whipped Cream: Soft peaks of homemade whipped cream lightly sweetened with real maple syrup and a dash of cinnamon. Steaming Warm Beverages: Pair with fresh dark roast espresso, spiced hot apple cider, or a cozy chai tea latte. Storage, Freezing & Reheating Instructions Refrigeration: Cover leftovers tightly with foil or transfer to an airtight container. Store in the refrigerator for up to 4 days. Reheating: Warm individual portions in the microwave for 25–30 seconds, or pop the baking dish back into a 325°F (165°C) oven for 12–15 minutes to re-crisp the buttery crust. Freezing: Baked dump cake freezes remarkably well. Cool completely, wrap securely in heavy-duty plastic wrap and aluminum foil, and freeze for up to 3 months. Thaw overnight in the fridge before warming. Frequently Asked Questions Can I use fresh apples instead of canned apple pie filling?Yes! Thinly peel and slice 6 large crisp baking apples (such as Honeycrisp or Granny Smith). Toss them with 1/3 cup brown sugar, 1 tablespoon cornstarch, 1 teaspoon ground cinnamon, and 1 tablespoon fresh lemon juice before layering into the dish. Why are there dry powdery spots on my dump cake?Dry spots happen if butter coverage is uneven. Make sure to slice cold butter into very thin, wide pats and arrange them closely together across the cake mix. If you spot a dry pocket at the 35-minute mark, simply dab a tiny sliver of butter onto it. Can I use spice cake mix instead of yellow
Crispy Cast-Iron Lemon Herb Chicken Thighs: 30-Minute Dinner
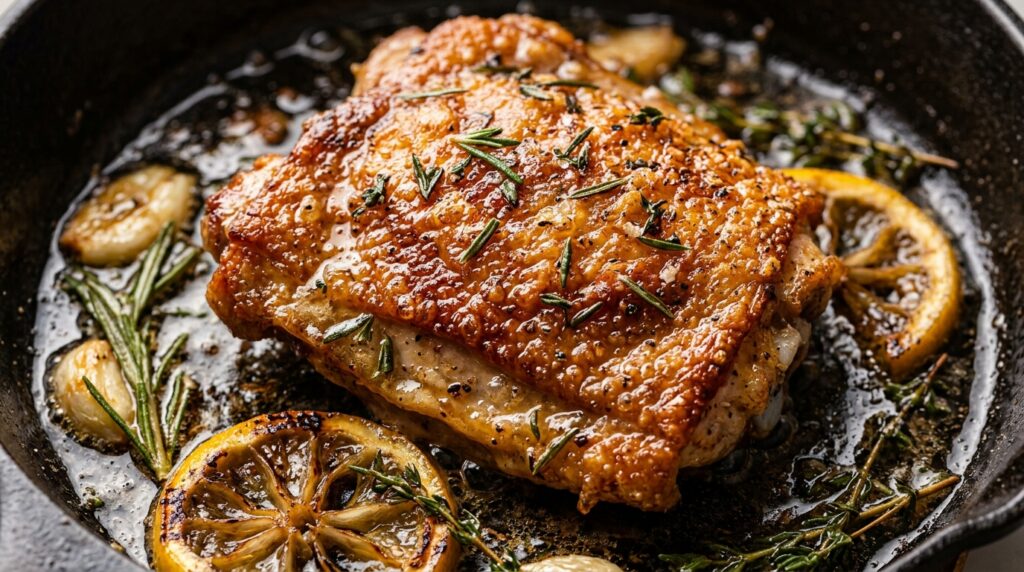
There is nothing quite as deeply satisfying at the dinner table as chicken skin rendered to a shatteringly crisp, golden crackle. These Crispy Cast-Iron Lemon Herb Chicken Thighs deliver restaurant-caliber perfection in just 30 minutes, featuring juicy, succulent bone-in chicken basted in a fragrant pan sauce of melted garlic butter, freshly picked rosemary, earthy thyme, and caramelized lemon slices. The secret to transforming everyday chicken thighs into a showstopping weeknight feast lies in mastering heat conduction and fat rendering. By beginning skin-side down in a heavy cast-iron skillet over steady medium heat, the chicken’s subcutaneous fat gently liquefies and renders out, naturally frying the skin in its own drippings until paper-thin and blistered. Once flipped, deglazing the golden pan fond with rich chicken bone broth, fresh lemon juice, and cold butter creates an instant pan glaze that enriches the meat while keeping that glorious top crust completely crispy. Why You’ll Love This Recipe Effortless 30-Minute Stovetop Dinner: Cooks entirely in a single skillet on the stovetop with zero oven preheating or complicated equipment required. Unbeatable Texture Contrast: Shatteringly crisp, blistered skin on the exterior with tender, meltingly juicy dark meat beneath. 100% Halal Wholesome: Completely alcohol-free pan sauce made from rich chicken bone broth, freshly squeezed citrus, garlic, and fresh herbs. Built-In Pan Reduction: The rendered pan juices and browned fond emulsify with butter into a savory, citrus-infused spooning sauce for vegetables and starches. Key Ingredients & Smart Swaps Fresh bone-in chicken thighs, vibrant lemons, whole garlic, fresh rosemary, and bone broth prepped on our quartz workstation. Bone-In, Skin-On Chicken Thighs: The absolute hero cut for high-heat skillet searing. Bone-in thighs stay extraordinarily juicy and resist drying out, while the skin crisps into golden crackling. Smart Swap: Bone-in chicken drumsticks also work brilliantly with an extra 4 minutes of cooking time. Fresh Lemon (Juice & Slices): Freshly squeezed lemon juice cuts the rich rendered poultry fat, while seared lemon wheels caramelize in the pan to release fragrant citrus oils. Whole Garlic Cloves: Smashed and cooked gently in the bubbling butter to infuse aromatic sweetness without burning. Fresh Rosemary & Thyme Sprigs: Woodsy herbs withstand hot skillet heat and perfume the basting butter with earthy aroma. Low-Sodium Chicken Bone Broth: Provides clean savory depth to deglaze the skillet fond without adding excessive salt. Unsalted Butter & Olive Oil: Olive oil prevents initial sticking during the sear, while cold butter swirled into the simmering broth at the end creates a silky, glossy pan emulsion. Step-by-Step Cooking Walkthrough 1. Prep & Dry Thoroughly: Remove the chicken thighs from refrigeration 15 minutes before cooking. Use paper towels to pat the skin thoroughly dry—moisture is the enemy of crisp skin. Season both sides generously with kosher salt, freshly cracked black pepper, and garlic powder. 2. Render the Skin to Crisp Perfection: Heat 1 tablespoon of olive oil in a 12-inch cast-iron skillet over medium heat. Place the chicken thighs skin-side down into the hot skillet. Do not move or flip them for 12 to 14 minutes. Let the steady heat slowly render the fat until the skin turns deep golden bronze and naturally releases from the iron. TECHNIQUE CUE: Basting the flipped chicken with hot bubbling garlic-lemon butter infuses flavor while preserving that crisp top crust. 3. Flip & Aromatics: Flip the thighs over so the crispy skin faces up. Spoon out all but 2 tablespoons of rendered fat. Scatter the smashed garlic cloves, fresh rosemary, thyme sprigs, and lemon slices around the chicken. Cook for another 6 to 8 minutes until the internal temperature registers 170°F (77°C). 4. Deglaze & Baste: Pour 1/3 cup of chicken bone broth and 2 tablespoons of fresh lemon juice into the pan around the chicken (do not pour directly over the crispy skin). Add 2 tablespoons of cold butter cubes. As the sauce simmers and thickens into a glossy glaze, spoon the bubbling lemon butter around the meat. Remove from heat and rest 5 minutes before serving. 3 Chef Secrets for Perfect Results 1. Patience Is Key (Never Move the Chicken Early): When you place the chicken skin-side down, resist the urge to peek or shift it around. The skin will initially stick to the cast iron; as the fat renders out and the skin dehydrates into a crisp crust, it will release freely on its own. 2. Keep the Skin Above the Simmering Liquid: When adding your bone broth, lemon juice, and butter to build the pan sauce, always pour the liquid into the spaces between the thighs. Submerging the crispy skin will turn it soft and rubbery. 3. Aim for 170°F to 175°F Internal Temperature: Unlike lean chicken breasts that dry out past 165°F, dark meat thighs are packed with connective collagen that softens and becomes extraordinarily tender between 170°F and 175°F. What to Serve With Crispy Lemon Herb Chicken Thighs Plated restaurant-style with crisp-tender green beans, roasted baby gold potatoes, and warm artisan sourdough bread. Roasted Garlic Baby Potatoes: Halved baby Yukon golds roasted until crisp on the outside and fluffy inside, perfect for mopping up warm lemon herb pan juices. Sautéed French Green Beans or Broccolini: Lightly blistered green beans tossed with sea salt and a squeeze of fresh lemon provide a vibrant, crunchy green contrast. Crusty Artisan Sourdough: Thick warm slices of country bread to dip directly into the garlicky pan drippings. Iced Rosemary Lemon Water or Mint Tea: A tall chilled glass of lemon-infused sparkling water garnished with fresh rosemary sprigs makes an invigorating beverage pairing. Storage, Freezing & Reheating Instructions Refrigeration: Store leftover chicken thighs and pan sauce in separate airtight glass containers in the refrigerator for up to 4 days. Keeping the sauce separate prevents the crispy skin from softening during storage. Air Fryer or Oven Reheating (Crucial for Crispness): To restore that crackling crust, reheat thighs skin-side up in an air fryer at 375°F (190°C) for 4 to 5 minutes, or in a preheated oven at 400°F (200°C) for 8 to 10 minutes. Avoid the microwave, which will
Skillet Apple Cider Glazed Chicken Breasts: 25-Minute Dinner
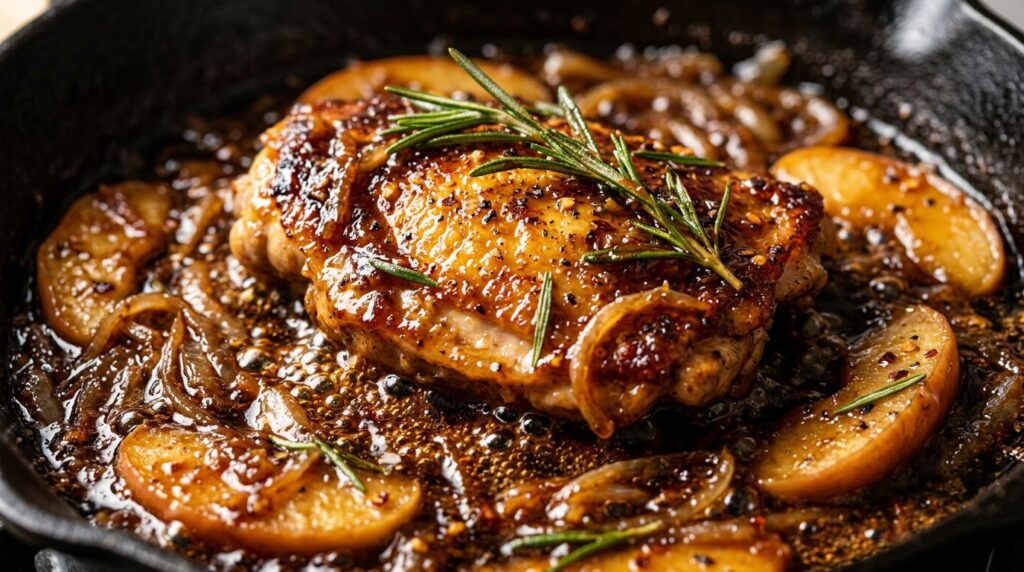
When the crisp autumn harvest arrives, dinner calls for rich, caramelized flavors that celebrate the season. These Skillet Apple Cider Glazed Chicken Breasts come together in just 25 minutes in a single pan, featuring golden seared chicken cutlets bathed in a sweet, tangy spiced apple cider reduction with caramelized shallots, tender Honeycrisp apples, and fragrant fresh rosemary. The secret to achieving an intensely savory, restaurant-quality glaze without heavy creams or wine lies in the magic of reduction. By simmering pure, unfiltered spiced apple cider with low-sodium chicken bone broth, stone-ground Dijon mustard, and minced garlic, the natural fruit sugars concentrate into a glossy mahogany glaze. Searing the chicken cutlets first creates deep, golden-brown fond on the bottom of the cast-iron skillet, which dissolves into the bubbling reduction to build layers of savory warmth. Why You’ll Love This Recipe Fast 25-Minute Skillet Dinner: Lean chicken cutlets cook through in minutes, making this elegant autumn meal easy enough for busy weeknights. One-Pan Easy Cleanup: The chicken, caramelized fruit, aromatics, and reduction glaze all cook in a single heavy skillet. 100% Halal Wholesome: Completely alcohol-free, relying on authentic spiced apple cider and rich chicken bone broth for luscious body and natural sweetness. Autumn Flavor Harmony: The perfect sweet-and-savory balance between crisp tart apples, pungent Dijon, herbal rosemary, and juicy seared poultry. Key Ingredients & Smart Swaps Boneless chicken cutlets, fresh Honeycrisp apples, sweet onions, and pure cider assembled on our prep workstation. Chicken Cutlets: Boneless, skinless chicken breasts sliced horizontally into thin cutlets sear quickly and absorb the sticky cider glaze evenly. Pro Swap: Boneless chicken thighs also work wonderfully with a 2-minute longer sear. Pure Unfiltered Apple Cider: Look for fresh, cloudy refrigerated cider rather than filtered clear apple juice. True cider has natural tannins and pectin that reduce into a sticky, glossy glaze. Honeycrisp or Gala Apples: Sliced into 1/2-inch wedges. Firm varieties hold their shape and won’t turn to mush while simmering in the pan. Yellow Onion or Shallots: Thinly sliced and sautéed in butter until translucent and sweet. Stone-Ground Dijon Mustard: Adds essential tangy acidity that cuts through the natural sweetness of the concentrated cider. Fresh Rosemary & Thyme: Earthy, piney fresh herbs balance the fruitiness and elevate the dish into five-star autumn comfort. Step-by-Step Cooking Walkthrough 1. Sear the Chicken: Season chicken cutlets on both sides with kosher salt, black pepper, and garlic powder. Heat 1 tablespoon of olive oil and 1 tablespoon of butter in a 12-inch skillet over medium-high heat. Sear chicken for 4 to 5 minutes per side until golden brown and cooked through (165°F). Transfer to a plate and loosely cover. 2. Caramelize Apples & Aromatics: In the same skillet, melt an additional tablespoon of butter over medium heat. Add the sliced onions and apple wedges. Sauté for 4 to 5 minutes, stirring occasionally, until the onions soften and the apples develop light golden caramelized edges. TECHNIQUE CUE: Basting the seared cutlets continuously in the reducing cider glaze infuses every bite with sweet-savory caramelization. 3. Reduce the Cider Glaze: Stir in 2 cloves of minced garlic and cook for 60 seconds. Pour in 1 cup of pure apple cider, 1/2 cup of chicken bone broth, and 1 tablespoon of Dijon mustard, scraping up all browned fond from the pan bottom. Add a sprig of fresh rosemary and thyme. Bring to a rapid simmer for 5 to 7 minutes until the liquid reduces by half and turns syrupy. 4. Return & Glaze: Return the seared chicken cutlets and any resting juices back to the skillet. Spoon the bubbling cider glaze generously over the chicken for 2 minutes until glossy and heated through. Remove from heat and discard herb stems. 3 Chef Secrets for Perfect Results 1. Use Real Unfiltered Cider (Not Apple Juice): Clear shelf-stable apple juice is excessively sweet and lacks the tart acidity and natural pectin required to thicken a savory pan glaze. Fresh cloudy cider reduces into syrup effortlessly. 2. Don’t Slice Apples Too Thinly: Cut apple wedges at least 1/2-inch thick. Paper-thin slices will collapse into applesauce in the hot skillet, whereas thicker wedges maintain a delightful tender-crisp bite. 3. Dijon Mustard Is Your Secret Weapon: Even if you aren’t a mustard lover, 1 tablespoon of stone-ground Dijon is essential. The vinegar and mustard seed acidity cut the concentrated fruit sugars, keeping the sauce savory rather than dessert-like. What to Serve With Apple Cider Glazed Chicken Plated over warm creamy parmesan polenta with roasted broccolini and a glass of chilled sparkling cider. Creamy Parmesan Polenta or Mashed Potatoes: The rich, buttery base absorbs the extra spiced cider pan glaze like a dream. Roasted Garlic Broccolini or Green Beans: Charred green vegetables provide crisp textural balance against the tender chicken and caramelized fruit. Wild Rice Pilaf: Earthy, nutty grains tossed with toasted pecans and dried cranberries complement the harvest apple flavors. Chilled Sparkling Cider: A refreshing glass of chilled sparkling cider with a cinnamon stick garnish finishes the autumn table. Storage, Freezing & Reheating Instructions Refrigeration: Store leftover chicken, apples, and glaze in an airtight glass container in the refrigerator for up to 4 days. The flavors deepen overnight, making incredible lunch prep. Gentle Skillet Reheating: Reheat leftovers gently in a skillet over medium-low heat with a splash of chicken broth or cider, spooning the glaze over the chicken until warm. Avoid microwave high heat to prevent toughening the cutlets. Freezing: You can freeze the cooked chicken in the glaze for up to 2 months. Thaw in the refrigerator overnight and warm in a covered skillet. Frequently Asked Questions Can I use chicken thighs?Yes! Boneless skinless chicken thighs work brilliantly. Sear for 6 minutes per side before proceeding with the apple caramelization and reduction. What variety of apple works best?Honeycrisp, Pink Lady, Granny Smith, or Gala are ideal because they hold their structural shape under heat and offer a vibrant balance of tart and sweet. Can I make this dairy-free?Yes! Substitute the butter with extra virgin olive oil or plant-based butter;
Juicy Garlic Herb Butter Roasted Turkey Breast: Foolproof Recipe
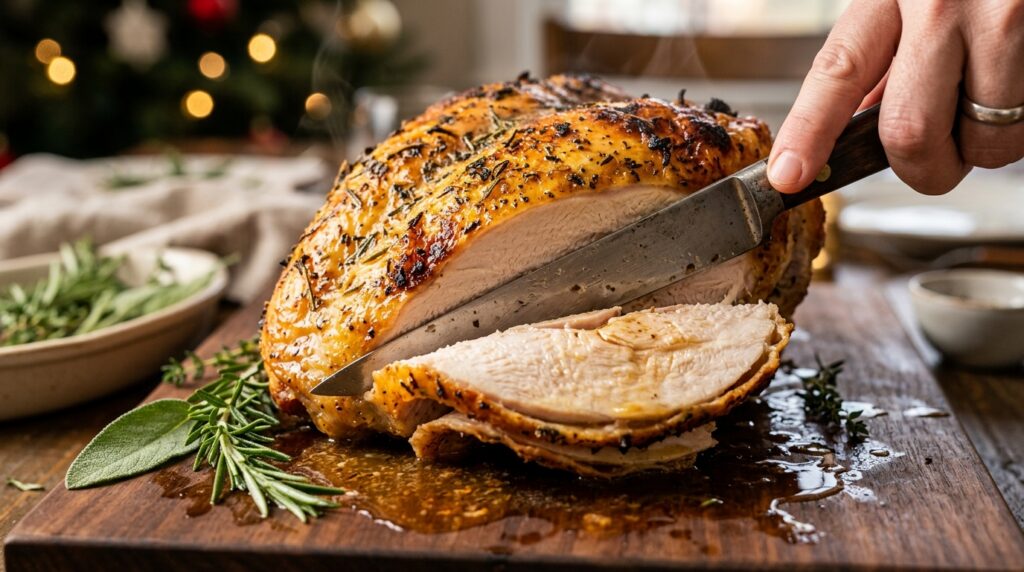
Roasting a showstopping holiday centerpiece does not require the stress of cooking an entire 15-pound bird. This Juicy Garlic Herb Butter Roasted Turkey Breast delivers shatteringly crisp, golden skin and exquisitely succulent, melt-in-your-mouth tender meat in just over an hour. Basted in fragrant garlic-herb compound butter and resting on a bed of sweet roasted aromatics, it yields rich, velvety pan drippings that create the most luxurious homemade turkey gravy you will ever taste. The secret to eliminating dry, chalky turkey meat lies in two essential culinary techniques: compound butter application under the skin and temperature-monitored roasting. By gently loosening the skin and massaging seasoned garlic, rosemary, sage, and thyme butter directly onto the breast meat, the fats melt slowly inward during roasting, continuously basting the lean meat from within. Meanwhile, keeping the exterior skin dry and basting it during the final 15 minutes creates that coveted crackling, golden-bronze holiday crust. Why You’ll Love This Recipe Foolproof & Stress-Free: Roasts to juicy perfection in just 60 to 75 minutes without the complex logistics of cooking a whole turkey. Unmatched Flavor & Moisture: Double herb-butter treatment (underneath the skin and brushed over the surface) guarantees tender, succulent meat every time. 100% Halal Wholesome: Made with all-natural halal turkey, rich chicken or turkey bone broth, garlic, and fresh herbs; completely free of wine or pork derivatives. Built-In Rich Pan Gravy: The roasting pan juices combine with aromatic shallots, celery, and broth to produce extraordinary velvet gravy in 5 minutes. Key Ingredients & Smart Swaps Whole bone-in turkey breast, herb butter logs, fresh herbs, and aromatics prepped on our workstation. Bone-In, Skin-On Turkey Breast (5 to 6 lbs): Bone-in retains significantly more moisture and flavor than boneless cuts, while the skin provides a crispy barrier against oven heat. Unsalted Butter (Softened): Forms the base of our compound herb butter. Quality butter emulsifies with minced herbs and roasted garlic for deep richness. Fresh Poultry Herb Trio: Finely minced fresh rosemary, sage, and thyme deliver quintessential holiday warmth and aroma. Fresh Garlic: 6 cloves minced finely into the butter plus whole crushed cloves in the bottom of the roasting pan. Smoked Paprika: Imparts a subtle smoky undertone and gives the skin a rich, appetizing mahogany-gold color. Low-Sodium Turkey or Chicken Bone Broth: Poured into the roasting pan bottom to prevent drippings from scorching and provide base stock for gravy. Step-by-Step Cooking Walkthrough 1. Prep & Dry: Preheat your oven to 375°F (190°C). Remove the turkey breast from refrigeration 30 minutes prior to cooking. Pat the skin completely dry inside and out with paper towels—dry skin is the key to crackling crispness. 2. Mix Compound Herb Butter: In a medium bowl, blend 6 tablespoons of softened unsalted butter with minced garlic, chopped rosemary, sage, thyme, 1 teaspoon kosher salt, 1/2 teaspoon black pepper, and 1/2 teaspoon smoked paprika until smooth and fragrant. TECHNIQUE CUE: Rubbing herb butter directly onto the meat under the skin bastes the turkey from within as it roasts. 3. Butter Under & Over Skin: Using clean fingers, gently separate the skin from the meat, taking care not to tear it. Spread two-thirds of the compound butter directly over the breast meat under the skin. Smooth the skin back into place and massage the remaining butter all over the exterior skin. 4. Roast to Golden Perfection: Place sliced shallots, celery ribs, and 1 cup of broth in the bottom of a roasting pan. Set a roasting rack inside and place the turkey breast skin-side up on top. Roast for 60 to 75 minutes until an instant-read thermometer inserted into the thickest part of the breast registers 162°F (72°C). 5. Rest & Carve: Transfer the roasted turkey breast to a warm wooden carving board and tent loosely with foil for 15 to 20 minutes. Carryover heat will bring internal temperature to a food-safe 165°F (74°C) while meat juices redistribute throughout every slice. 3 Chef Secrets for Perfect Results 1. Always Bring Turkey to Room Temperature: Placing an ice-cold turkey breast into a hot oven causes the exterior meat to dry out before the center near the bone reaches temperature. Resting on the counter for 30 minutes ensures even, uniform roasting. 2. Pull at 162°F (Never 165°F): Due to carryover cooking, dense turkey breast continues to rise 3 to 5 degrees while resting on the cutting board. Pulling at 162°F guarantees extraordinarily juicy meat that never tastes dry or stringy. 3. Carve Horizontally Across the Grain: For the most tender bite, slice each breast half completely off the central breastbone in one whole piece, then slice horizontally across the grain into 1/2-inch thick tender rounds. What to Serve With Roasted Turkey Breast Carved and served with velvety brown butter sweet potatoes, fresh green beans, and rich pan gravy. Velvety Brown Butter Mashed Sweet Potatoes: Nutty browned butter and roasted garlic mashed sweet potatoes provide the ultimate holiday pairing. Skillet Garlic Herb Green Beans: Crisp-tender green beans sautéed in butter with toasted sliced almonds balance the meal with vibrant freshness. Homemade Cranberry Citrus Sauce: Tart ruby cranberries simmered with fresh orange zest and cinnamon offer bright acidity that complements rich roasted poultry. Fluffy Dinner Rolls: Warm honey-buttered brioche rolls for mopping up golden pan drippings and gravy. Storage, Freezing & Reheating Instructions Refrigeration: Carve leftover turkey and store with a spoonful of pan gravy in an airtight container for up to 4 days. The gravy keeps the meat wonderfully moist during storage. Gentle Oven Reheating: Place sliced turkey in a baking dish with 2 tablespoons of broth or gravy, cover tightly with foil, and warm at 325°F (165°C) for 12 to 15 minutes. Freezing: Sliced turkey breast freezes beautifully for up to 3 months when packed tightly in freezer-safe bags with pan drippings. Thaw overnight in the refrigerator before reheating. Frequently Asked Questions Can I use a boneless turkey breast?Yes! A 3 to 4 lb boneless turkey breast will roast slightly faster (approx. 45 to 55 minutes). Monitor temperature closely and pull at 162°F. What if
One-Pot Creamy Tomato Basil Tortellini Soup: 25-Minute Comfort
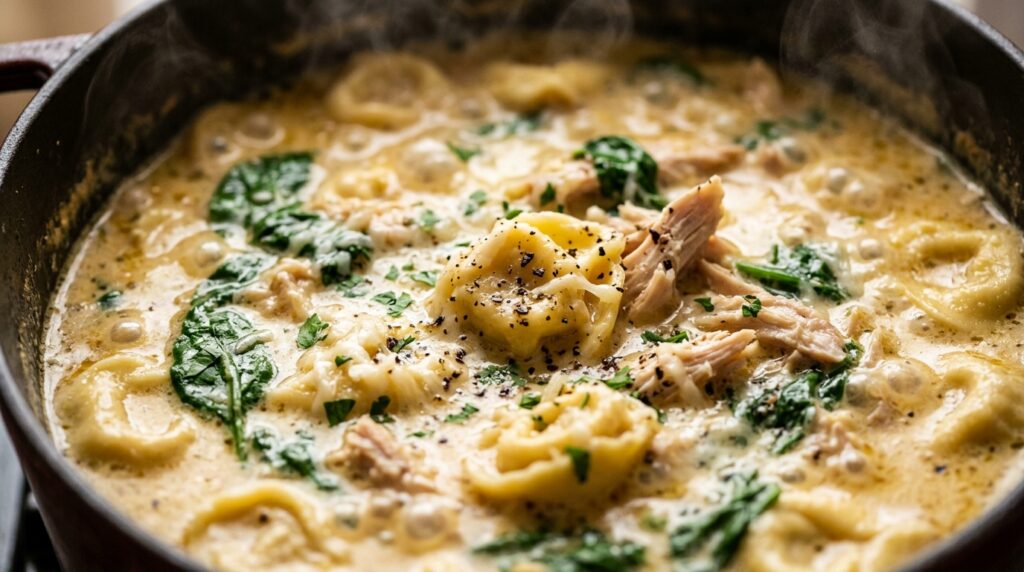
When the chill of autumn arrives, there is nothing more deeply restorative than a steaming bowl of rich, velvety tomato broth bubbling with tender, cheese-stuffed tortellini and fresh fragrant sweet basil. This One-Pot Creamy Tomato Basil Tortellini Soup comes together in just 25 minutes, harmonizing sun-ripened San Marzano tomatoes, roasted garlic, a splash of rich cream, and molten pockets of melted mozzarella for the ultimate cozy comfort dinner. Unlike traditional tomato soups that require hours of slow simmering to develop nuance, this recipe unlocks extraordinary depth in minutes by caramelizing Italian tomato paste directly in butter with minced garlic and shallots. Deglazing with rich low-sodium broth and simmering crushed plum tomatoes with a bundle of fresh basil leaves infuses every drop with authentic trattoria flavor. Simmering the pasta directly inside the broth allows the delicate three-cheese tortellini to absorb the savory seasonings while releasing just enough starch to naturally thicken the soup into satin perfection. Why You’ll Love This Recipe Quick 25-Minute Weeknight Winner: Effortless single-pot cooking from start to finish—no pre-boiling pasta or blending required. Velvety Without Being Heavy: Balanced beautifully with sweet crushed tomatoes, aromatic Italian herbs, and just enough cream to create a luxurious satin body. 100% Halal Wholesome: Completely vegetarian, zero wine or alcohol deglazing, packed with lycopene, antioxidants, and calcium. Cozy Crowd-Pleaser: Comfort food at its finest that kids and adults alike devour, especially served with warm crusty garlic bread. Key Ingredients & Smart Swaps Refrigerated cheese tortellini, San Marzano tomatoes, fresh basil, and cream arranged on our prep counter. Refrigerated Three-Cheese Tortellini: Fresh refrigerated pasta cooks tender in just 4 to 5 minutes without getting mushy. Pro Swap: Spinach & ricotta tortellini or shelf-stable dried tortellini work equally well (extend simmer time by 3-4 minutes for dried). Crushed San Marzano Tomatoes: Sweet, low-acidity Italian plum tomatoes provide the rich, ruby foundation of the soup. Tomato Paste: Sautéed with aromatics to unlock deep caramelized umami before liquid is added. Fresh Basil Leaves: Whole leaves simmered in the broth release fragrant essential oils, with fresh chiffonade stirred in right before serving. Low-Sodium Vegetable or Chicken Broth: Provides savory depth and balances the tomato acidity without masking delicate dairy notes. Heavy Whipping Cream: 1/2 cup creates a silky, bisque-like mouthfeel. Whole milk or half-and-half can be used for a lighter version. Parmigiano-Reggiano & Fresh Mozzarella: Grated parmesan melts seamlessly into the broth, while shredded mozzarella creates irresistible cheese pulls. Step-by-Step Cooking Walkthrough 1. Sauté Aromatics: Melt 2 tablespoons of unsalted butter with 1 tablespoon of olive oil in a heavy Dutch oven or large soup pot over medium heat. Add finely diced shallots and sauté for 3 minutes until translucent. Stir in 4 cloves of minced garlic and 2 tablespoons of tomato paste, cooking continuously for 90 seconds until the paste turns a deep brick-red and smells fragrant. 2. Simmer the Tomato Herb Broth: Pour in 4 cups of low-sodium broth and 1 can (28 oz) of crushed San Marzano tomatoes. Add 1 teaspoon dried oregano, 1/2 teaspoon kosher salt, 1/4 teaspoon black pepper, and a pinch of red pepper flakes. Bring to a gentle boil, reduce heat to low, drop in 6 whole fresh basil leaves, and simmer gently uncovered for 10 minutes to allow flavors to meld. TECHNIQUE CUE: Adding refrigerated tortellini directly into simmering broth cooks them tender while releasing starches that thicken the sauce. 3. Cook the Tortellini: Discard the whole basil leaves. Add the refrigerated cheese tortellini directly into the simmering soup. Cook for 4 to 5 minutes, stirring occasionally, until the tortellini float to the surface and are plump and tender. 4. Stir in Cream & Melted Cheese: Lower heat to medium-low. Pour in 1/2 cup of heavy whipping cream and 1/2 cup of freshly grated parmesan, stirring gently until smooth and velvety. Stir in 2 cups of fresh baby spinach (if desired) and let wilt for 60 seconds. Remove from heat and stir in fresh chopped basil. 3 Chef Secrets for Perfect Results 1. Brown the Tomato Paste First: Never dump raw tomato paste directly into cold broth. Sautéing it in hot butter for 90 seconds caramelizes natural sugars and removes raw metallic tang, giving your soup a 2-hour slow-cooked flavor profile in minutes. 2. Don’t Overcook Refrigerated Tortellini: Fresh tortellini are delicate. As soon as they float to the top of the pot, they are perfectly al dente. Overcooking will cause the pasta edges to tear and release their cheese filling into the broth. 3. Add Cream Off the Boil: Heavy cream should always be stirred in over gentle heat or off the burner completely. High rolling boils can cause dairy to break and lose its velvety silkiness. What to Serve With Tomato Tortellini Soup Ladle into ceramic bowls and serve with fresh basil chiffonade, shaved parm, and toasted garlic sourdough. Warm Garlic Herb Sourdough: Thick slices of toasted artisan sourdough rubbed with garlic butter are essential for dipping into the velvety tomato broth. Crisp Italian Chopped Salad: Romaine lettuce, kalamata olives, marinated artichoke hearts, and shaved parmesan dressed in a zesty red wine vinaigrette provide refreshing contrast. Optional Protein Additions: Sliced grilled chicken breast or cooked halal Italian turkey sausage coins turn this into an ultra-hearty dinner. Refreshing Beverages: Chilled sparkling mineral water with fresh lemon and cucumber slices. Storage, Freezing & Reheating Instructions Refrigeration: Store leftover soup in an airtight container in the refrigerator for up to 3 days. Keep in mind that tortellini will continue to absorb broth as it rests in the fridge. Skillet Reheating: Reheat leftovers over low heat on the stovetop with an extra 1/4 cup of broth or milk to restore its velvety, spoonable consistency. Meal Prep Freezing Tip: If planning to freeze, prepare the tomato cream broth completely without adding the tortellini and freeze for up to 3 months. When ready to eat, bring thawed soup to a simmer and cook fresh tortellini directly inside for 5 minutes! Frequently Asked Questions Can I use frozen tortellini?Yes! Add frozen tortellini directly
Sheet Pan Cajun Chicken and Turkey Sausage Skillet: Easy 25-Minute Dinner
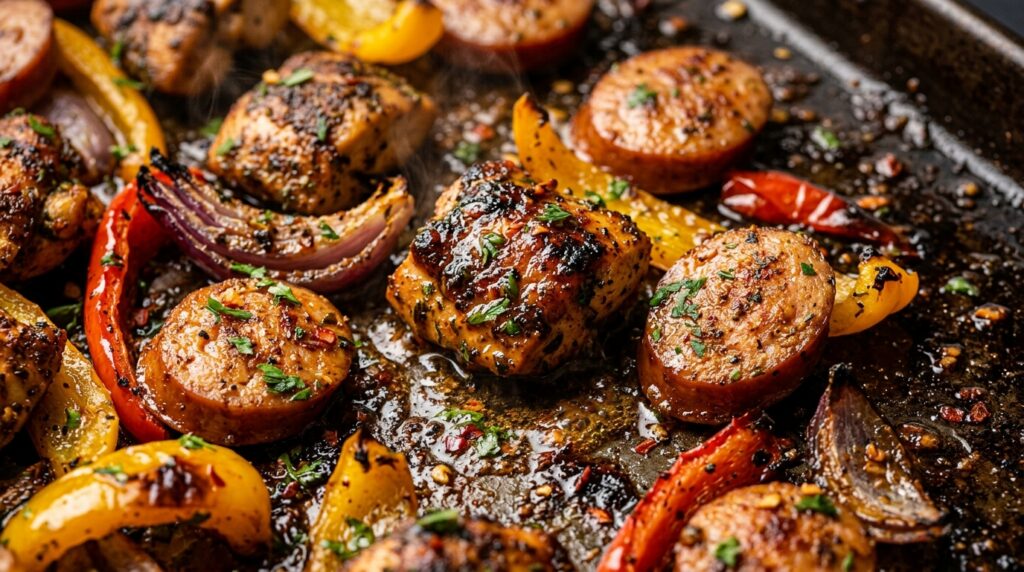
When busy weeknights demand bold, satisfying flavor with minimal cleanup, this Sheet Pan Cajun Chicken and Turkey Sausage Skillet delivers pure dinner perfection in just 25 minutes. Juicy chunks of Cajun-spiced chicken, smoky caramelized halal turkey sausage, sweet blistered bell peppers, and tender red onions roast together on a single pan, bathed in a zesty garlic-herb pan glaze that begs to be spooned over warm jasmine rice. The magic of an exceptional sheet pan dinner comes down to high-heat caramelization and spice blooming. By tossing lean chicken breast cubes and smoked sausage coins in extra virgin olive oil infused with smoked paprika, dried oregano, garlic, onion powder, and a gentle cayenne kick, the spices toast directly in the oven’s intense heat. The rendered juices from the turkey sausage mingle with the sweet juices of roasting bell peppers, creating a natural sauce on the baking sheet that coats every single bite with extraordinary smoky depth. Why You’ll Love This Recipe Effortless 25-Minute Meal: Quick 10-minute prep followed by a 15-minute high-heat roast means dinner is on the table faster than takeout. Virtually Zero Cleanup: One single sheet pan lined with parchment or foil handles all the cooking—no messy stove splatter or towering stacks of dishes. 100% Halal Wholesome: Made with premium halal smoked turkey sausage (zero pork or bacon) and zero wine/alcohol deglazing, relying on fresh lemon and herbs for bright balance. Lean, High-Protein Comfort: Packed with over 36 grams of lean protein per serving from chicken breast and turkey sausage, balanced with fiber-rich roasted vegetables. Key Ingredients & Smart Swaps Diced fresh chicken, sliced smoked turkey sausage, vibrant bell peppers, and Cajun spices assembled on our workstation. Chicken Breast or Thighs: Boneless, skinless chicken cut into uniform 1-inch bite-sized cubes so they cook through quickly without drying out. Halal Smoked Turkey Sausage: Sliced into 1/2-inch thick coins. Smoked turkey kielbasa or beef sausage provides smoky richness and crisps up beautifully along the edges. Bell Peppers (Red & Yellow): Sliced into thick strips. As they roast at high heat, their natural sugars caramelize to balance the spicy Cajun seasoning. Red Onion: Cut into thick wedges that sweeten and char slightly around the edges on the baking sheet. Homemade Cajun Spice Blend: A balanced mix of smoked paprika, garlic powder, onion powder, dried oregano, dried thyme, kosher salt, black pepper, and cayenne pepper allows you to control the exact sodium and spice levels. Extra Virgin Olive Oil: Helps distribute the spices evenly and creates golden, blistered edges on the vegetables and protein. Step-by-Step Cooking Walkthrough 1. Preheat & Prep Pan: Preheat your oven to 425°F (220°C). Line a large 18×13-inch rimmed half-sheet baking pan with parchment paper or heavy-duty foil, lightly misting with olive oil. 2. Season the Protein & Veggies: In a large mixing bowl, combine the diced chicken breast, sliced turkey sausage coins, bell pepper strips, and red onion wedges. Drizzle with 2 tablespoons of extra virgin olive oil. In a small ramekin, whisk together the smoked paprika, garlic powder, onion powder, oregano, thyme, kosher salt, black pepper, and cayenne pepper. Sprinkle evenly over the bowl and toss thoroughly until every piece is vibrantly coated. TECHNIQUE CUE: Spreading the ingredients in an uncrowded single layer ensures roasted caramelization rather than steaming. 3. Spread in Single Layer: Pour the seasoned mixture onto the prepared sheet pan. Spread everything out into an even single layer, making sure the chicken pieces and sausage coins have contact with the hot metal surface for optimal browning. 4. High-Heat Roast: Roast in the center rack for 15 to 18 minutes, tossing gently halfway through with a spatula. The chicken should reach an internal temperature of 165°F (74°C), the sausage edges should be crisped and browned, and the peppers tender-crisp. 5. Garnish & Serve: Remove from the oven, squeeze fresh lemon wedges over the hot pan, and scatter chopped fresh parsley and sliced green onions on top. 3 Chef Secrets for Perfect Results 1. Don’t Overcrowd the Sheet Pan: If your pan is piled too high, the trapped moisture will steam the chicken instead of roasting it. If cooking a double batch, always use two separate sheet pans on different oven racks. 2. Cut Uniform Bite Sizes: Keep your chicken cubes right around 1 inch and your sausage slices around 1/2 inch. This ensures both proteins reach peak juiciness and crispness at the exact same 15-minute mark. 3. Finish with Fresh Lemon Juice: A generous squeeze of fresh lemon right when the sheet pan exits the hot oven cuts through the savory smoked spices and elevates the entire dish from home-cooked to gourmet. What to Serve With Cajun Chicken & Sausage Served in an earthenware bowl over fragrant jasmine rice, garnished with green onions and fresh lemon. Fluffy Jasmine or Brown Rice: Steamed rice acts as the ultimate sponge to absorb all the savory, spiced pan drippings. Warm Buttermilk Cornbread: A slice of honey-sweetened golden cornbread provides a mouthwatering sweet contrast to the smoky Cajun heat. Crisp Cucumber Dill Salad: Cool, crunchy cucumbers tossed with dill and lemon sour cream dressing reset the palate between spicy bites. Southern Sweet Iced Tea: A tall chilled glass of brewed sweet iced tea with fresh lemon slices pairs effortlessly with Cajun comfort. Storage, Freezing & Reheating Instructions Refrigeration: Store leftover chicken, sausage, and peppers in an airtight container in the refrigerator for up to 4 days. This makes phenomenal high-protein meal prep! Quick Skillet Reheating: Warm leftovers in a hot skillet with a teaspoon of olive oil for 3-4 minutes to restore the crispy sausage edges and keep the chicken juicy. Freezing: Allow to cool completely, transfer to a freezer-safe zip-top bag, and freeze for up to 2 months. Thaw in the fridge overnight and reheat in a 375°F (190°C) oven for 10 minutes. Frequently Asked Questions Can I add potatoes to this sheet pan?Yes! Add diced baby potatoes; parboil them in salted water for 6 minutes before tossing with the chicken and sausage so they roast completely tender
Creamy Garlic Parmesan Chicken and Potatoes Skillet: 30-Minute Dinner
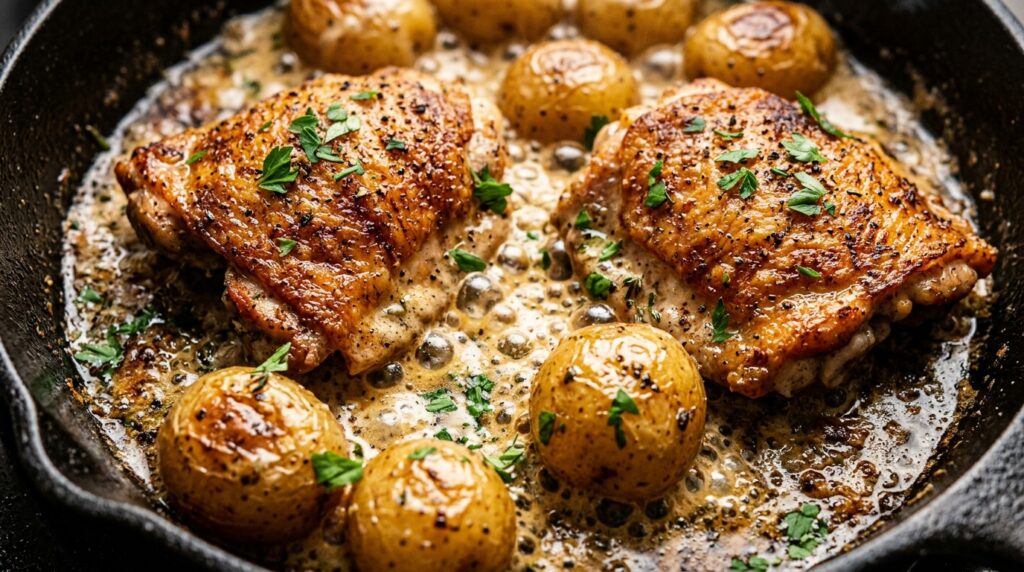
There is pure dinner magic in a single cast-iron skillet sizzling with golden crackling chicken and fork-tender baby potatoes bathed in a rich garlic parmesan cream. This Creamy Garlic Parmesan Chicken and Potatoes Skillet is the ultimate 30-minute weeknight comfort meal, locking in crispy skin, deep pan drippings, and a velvety herbal cream sauce loaded with freshly cracked pepper and melted Parmigiano-Reggiano. The secret to unforgettable skillet meals lies in building flavor layers directly inside one pan. By searing bone-in, skin-on chicken thighs until deeply bronzed, you render savory culinary fat that fries the parboiled baby gold potatoes to crispy perfection. Deglazing those golden browned bits (fond) with low-sodium chicken broth and reducing it with cream and minced garlic creates an emulsified sauce with extraordinary depth—without needing multiple pots or extensive cleanup. Why You’ll Love This Recipe Complete One-Skillet Meal: Protein, starch, and a decadent sauce all come together in one pan, making cleanup practically effortless. Restaurant-Crispy Skin & Tender Meat: High-heat cast-iron searing locks in natural juices while yielding shatteringly crisp chicken skin. 100% Halal Wholesome: Strictly zero pork/bacon and zero wine deglazing; relies on concentrated roasted chicken bone broth and fresh lemon for exquisite balance. Budget-Friendly Comfort: Readily available pantry staples (potatoes, garlic, parmesan, cream) elevated into a five-star dining experience. Key Ingredients & Smart Swaps Fresh chicken thighs, halved baby golds, fresh herbs, and aged parmesan assembled on our prep station. Chicken Thighs: Bone-in, skin-on thighs stay remarkably juicy under high heat and render delicious pan drippings. Pro Swap: Boneless skinless chicken breasts or tenderloins can be used; sear for 4-5 minutes per side to prevent drying out. Baby Gold Potatoes: Halved Yukon golds or red creamer potatoes hold their shape beautifully and soak up the garlic cream. Parboiling for 7 minutes ensures they turn creamy inside and crispy outside. Fresh Garlic Cloves: 6 to 8 cloves of freshly minced garlic provide pungent, sweet aromatics when gently sautéed in the butter fond. Parmigiano-Reggiano: Freshly grated parmesan from the block melts smoothly into the sauce. Avoid pre-shredded tubs containing cellulose which causes clumping. Low-Sodium Chicken Broth: Concentrated roasted bone broth deglazes the pan, adding savory foundation and lifting every speck of caramelized chicken flavor. Heavy Whipping Cream: Creates a silky, luxurious body that thickens naturally in minutes without needing flour or cornstarch. Step-by-Step Cooking Walkthrough 1. Parboil the Baby Potatoes: Place halved baby potatoes in a pot of cold salted water. Bring to a rolling boil and simmer for 7 to 8 minutes until barely fork-tender. Drain thoroughly and pat dry with paper towels to ensure peak browning in the skillet. 2. Sear the Chicken Thighs: Season chicken thighs generously on all sides with kosher salt, black pepper, garlic powder, and smoked paprika. Heat 1 tablespoon of olive oil in a heavy 12-inch cast-iron skillet over medium-high heat. Place chicken thighs skin-side down and sear undisturbed for 7 to 8 minutes until deeply golden and crisp. Flip and cook 4 minutes on the reverse side. Transfer chicken to a clean plate. TECHNIQUE CUE: Tossing parboiled potatoes in the rendered chicken fat develops irresistible golden caramelized edges. 3. Crisp the Potatoes: In the rendered pan drippings, add the halved baby potatoes cut-side down. Sauté over medium heat for 5 to 6 minutes, stirring occasionally until edges are crackly and golden-brown. Push potatoes to the sides of the skillet. 4. Build the Garlic Parmesan Cream: Reduce heat to medium-low. Add 2 tablespoons of unsalted butter, minced garlic, chopped fresh rosemary, and thyme directly into the center. Sauté for 60 seconds until fragrant. Pour in the chicken broth, scraping up all browned bits from the bottom. Stir in the heavy cream and grated parmesan, simmering gently for 2 to 3 minutes until smooth and thickened. 5. Nest & Finish: Return the seared chicken thighs to the skillet, keeping the crispy skin above the sauce line so it stays crunch-crisp. Simmer uncovered for 4 to 5 minutes until internal chicken temperature registers 165°F (74°C). Garnish with chopped fresh parsley and fresh lemon wedges. 3 Chef Secrets for Perfect Results 1. Dry Chicken Skin Is Mandatory: Moisture is the enemy of crispiness. Always pat your chicken thighs completely dry with paper towels before seasoning. This ensures the skin fries immediately upon hitting the hot cast iron instead of steaming. 2. Parboil Before You Sauté: Raw potato halves take over 20 minutes to cook through in a skillet and often burn on the outside before softening inside. A 7-minute parboil ensures melt-in-your-mouth interior texture with a quick golden crust. 3. Protect the Crispy Skin: When returning chicken to the sauce, spoon cream strictly around the potatoes and meat base. Never submerge the crispy top skin into the liquid, preserving that satisfying restaurant crunch. What to Serve With Garlic Parmesan Chicken & Potatoes Plated with tender baby potatoes spooned in garlic cream, crisp arugula salad, and iced citrus water. Crisp Lemon Herb Arugula Salad: Peppery greens tossed in a bright lemon-shallot vinaigrette cut through the luxurious garlic cream sauce perfectly. Steamed or Roasted Green Vegetables: Tender crisp asparagus spears, roasted broccolini, or sautéed green beans balance out the rich starches. Warm Crusty Bread: A slice of French baguette or warm garlic sourdough bread is ideal for mopping up every drop of skillet sauce. Refreshing Beverages: Chilled sparkling water with crushed lemon slices and fresh mint or crisp unsweetened iced tea. Storage, Freezing & Reheating Instructions Refrigeration: Store leftover chicken, potatoes, and sauce in an airtight container in the refrigerator for up to 4 days. Oven Reheating for Crispiness: To restore skin crispiness, reheat in an oven or toaster oven at 375°F (190°C) for 10-12 minutes until sizzling. Reheating in a skillet with a splash of broth also works wonderfully. Freezing: Because cream-based sauces can separate slightly upon thawing, we recommend freezing the cooked chicken and potatoes separately without the cream sauce for up to 2 months. Whip up a fresh 3-minute garlic cream when ready to serve. Frequently Asked Questions Can I make this
Creamy Butternut Squash and Sage Penne Pasta: Cozy 30-Minute Dinner
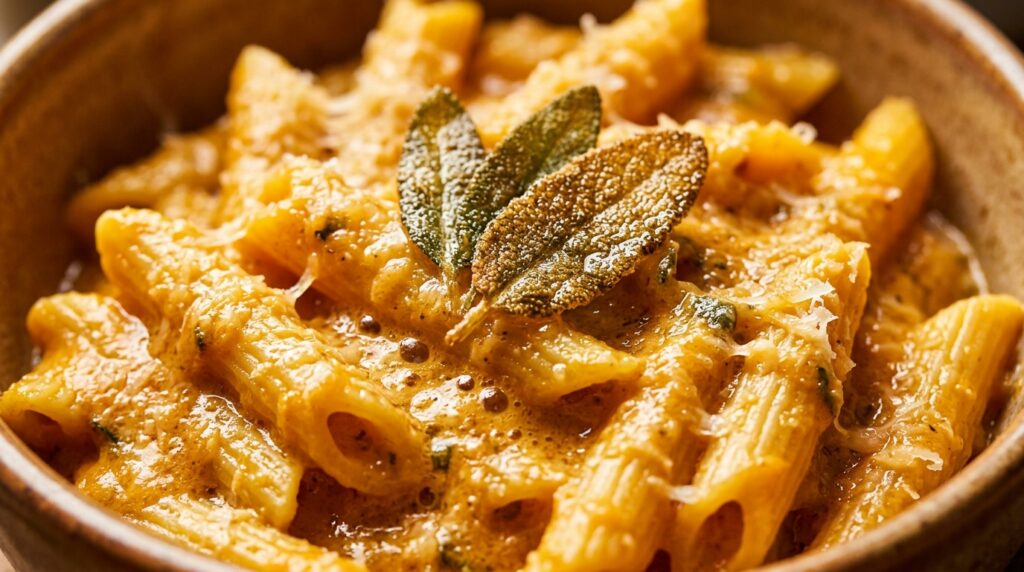
When brisk autumn air sets in, nothing comforts the soul quite like a bowl of silky, golden pasta coated in velvety roasted garlic squash sauce. This Creamy Butternut Squash and Sage Penne Pasta transforms simple seasonal produce into restaurant-worthy luxury in just 30 minutes, delivering nutty browned butter notes, earthy crisped sage, and a fragrant cloud of fresh Parmigiano-Reggiano that clings effortlessly to every ridge. Unlike heavy cream-laden sauces that can feel overwhelming, this dish achieves its signature velvet body through the natural starch and sweetness of slow-simmered butternut squash whipped with vegetable broth, a touch of rich cream, and savory roasted aromatics. Frying the fresh sage leaves in pure butter first establishes an aromatic foundation, leaving behind fragrant browned butter that infuses the entire sauce with deep, toasted hazelnut undertones. Why You’ll Love This Recipe Effortless 30-Minute Weeknight Dinner: Uses a quick pan-simmer and high-speed blender technique that eliminates lengthy 50-minute oven roasting times. Naturally Velvety & Light: The luscious body comes predominantly from nutrient-dense squash puree, creating maximum creaminess without feeling heavy. 100% Halal & Wholesome: Completely vegetarian, zero wine or alcohol deglazing, and packed with vitamins A, C, potassium, and dietary fiber. Cozy Autumn Flavor Profile: A flawless balance of sweet caramelized squash, savory garlic, nutty browned butter, and herbal crispy sage leaves. Key Ingredients & Smart Swaps Fresh seasonal produce, penne rigate, and aromatics prepped on our workstation. Butternut Squash: Peel and cut into small 1/2-inch uniform cubes so they soften rapidly in 10 minutes. Pro Swap: Frozen pre-diced squash or canned pure pumpkin puree works seamlessly in a pinch. Penne Rigate: Sturdy pasta with deep exterior ridges captures every drop of the luxurious velvet sauce. Rigatoni, cavatappi, or fettuccine are fantastic alternatives. Fresh Sage Leaves: Whole fresh sage leaves crisped in hot butter provide dramatic textural contrast and authentic Tuscan aroma. Avoid dried rubbed sage here as it can taste medicinal. Garlic & Shallots: Sautéed gently until sweet and translucent to balance the natural sugars of the squash. Low-Sodium Vegetable Broth: Used to simmer the squash tender and adjust puree consistency without masking delicate autumn flavors. Heavy Cream & Parmigiano-Reggiano: Just 1/3 cup of heavy cream adds satin mouthfeel, while freshly grated parmesan introduces salty umami depth. Step-by-Step Cooking Walkthrough 1. Crisp the Fresh Sage: Melt 2 tablespoons of unsalted butter with 1 tablespoon of olive oil in a wide 12-inch skillet over medium heat. Add 10-12 whole fresh sage leaves in a single layer. Fry for 45 to 60 seconds until crackly and fragrant. Immediately transfer leaves with a slotted spoon to a paper towel-lined plate, reserving the nutty infused butter in the pan. 2. Simmer & Soften Squash: In the same fragrant skillet, add the diced shallots and minced garlic, sautéing for 2 minutes until aromatic. Add the cubed butternut squash, 1 1/2 cups of vegetable broth, 1/2 teaspoon kosher salt, and a pinch of ground nutmeg. Bring to a gentle boil, cover with a lid, and simmer over medium-low heat for 10-12 minutes until the squash pierces effortlessly with a fork. TECHNIQUE CUE: Stirring warm butternut puree with hot pasta water creates a glossy, emulsified velvet coating. 3. Blend Until Silky: Transfer the softened squash and pan liquids into a high-speed blender. Pour in the heavy cream and 1/2 cup of freshly grated parmesan. Blend on high speed for 60 seconds until completely smooth, glossy, and radiant gold. Taste and adjust with a squeeze of fresh lemon juice and black pepper. 4. Toss & Emulsify: Cook your penne rigate in generously salted water until 1 minute shy of al dente; reserve 1 cup of starchy cooking water before draining. Pour the warm blended squash velvet back into the skillet, add the drained pasta, and toss continuously over low heat for 2 minutes, drizzling in 1/4 to 1/2 cup of pasta water until the sauce glazes every tube. 3 Chef Secrets for Perfect Results 1. Never Skip the Starchy Pasta Water: Pureed squash alone can tighten up quickly once off the heat. Starchy pasta water contains gelatinized starches that bond the squash puree and parmesan into an ultra-glossy, clinging emulsion that never separates. 2. Micro-Plane Fresh Nutmeg: A tiny pinch (barely 1/8 teaspoon) of freshly grated nutmeg elevates squash sauces from basic to world-class. It doesn’t taste spiced; instead, it cuts the natural sweetness and bridges the rich parmesan cheese. 3. Flash-Fry Sage at Exact Heat: Sage leaves burn within seconds if heat is too high. Keep butter at medium-low; the moment the leaves stop foaming and stiffen, pull them out immediately to preserve their vibrant emerald hue. What to Serve With Butternut Squash Pasta Served in artisan earthenware garnished with toasted pecans, parmesan, and crusty bread. Crispy Artisan Bread: Warm toasted sourdough or garlic herb focaccia is essential for scooping up every last drop of golden velvet sauce. Shaved Fennel & Arugula Salad: Crisp peppery baby arugula dressed with fresh lemon juice, extra virgin olive oil, and shaved honeycrisp apples cuts through the sauce’s richness beautifully. Optional Halal Protein Additions: Sliced pan-seared chicken cutlets, garlic herb turkey meatballs, or crispy spiced chickpeas make this an ultra-filling dinner. Refreshing Beverages: Sparkling water infused with fresh lemon and rosemary sprigs or chilled sparkling apple cider. Storage, Freezing & Reheating Instructions Refrigeration: Store leftover pasta in an airtight glass container in the refrigerator for up to 4 days. Because the sauce is naturally vegetable-based, it stays flavorful and fresh. Gentle Reheating: Reheat leftovers gently in a skillet over medium-low heat with a splash of warm broth or milk, stirring continuously until silky again. Avoid microwave high heat which can break dairy. Freezing Squash Puree: While cooked pasta does not freeze well, the blended butternut squash sauce freezes impeccably for up to 3 months! Thaw overnight in the fridge and toss directly with fresh boiled pasta. Frequently Asked Questions Can I make this dairy-free or vegan?Yes! Replace the butter with good olive oil, substitute heavy cream with unsweetened full-fat coconut milk or cashew cream, and