
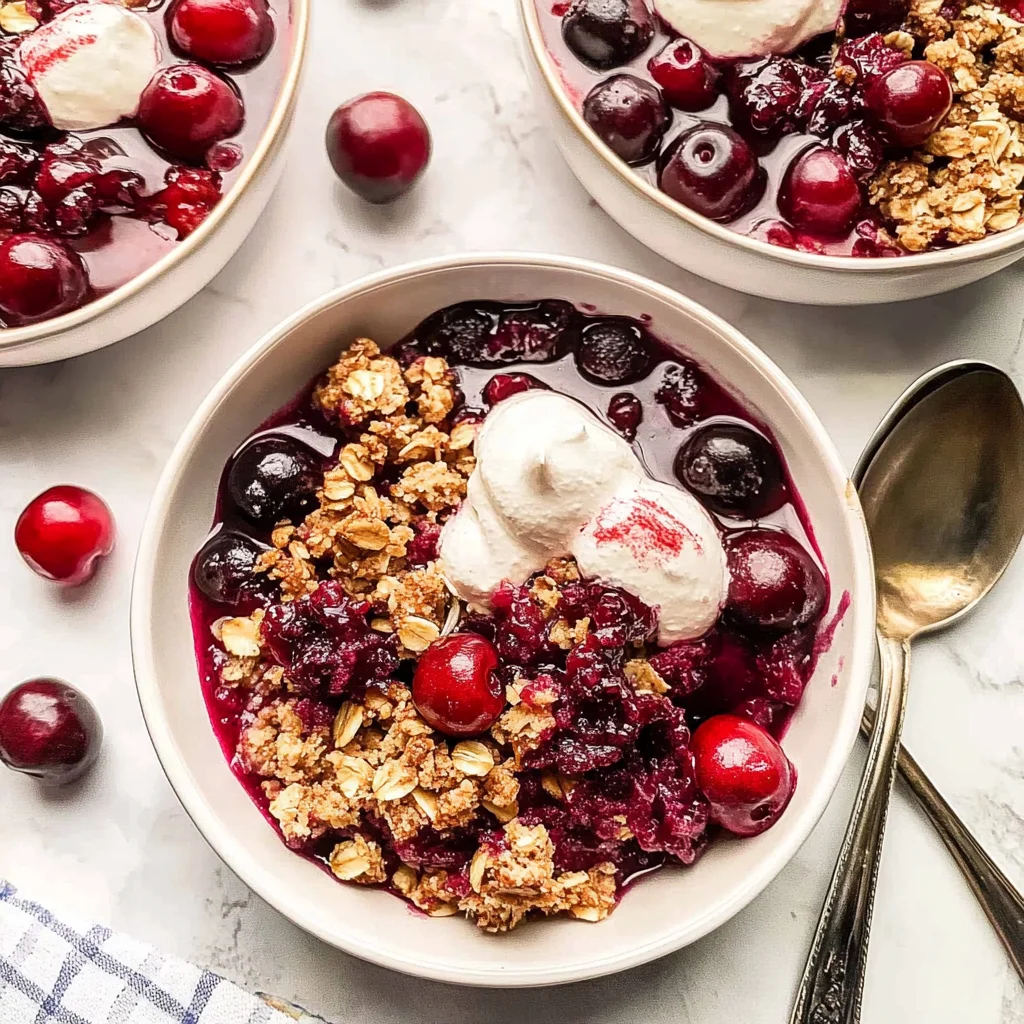
Imagine sinking your spoon into a warm bowl of Cherry Crisp, where the sweet, juicy cherries burst with flavor beneath a golden, crunchy oat topping. The aroma wafts through the kitchen, coaxing everyone to gather and indulge in this timeless dessert that feels like a warm hug on a chilly evening.
Reflecting on family gatherings, I remember how this Cherry Crisp always stole the show, evoking laughter and stories shared over scoops of vanilla ice cream melting into its fruity goodness. Whether it’s a summer barbecue or a cozy holiday feast, this delightful treat promises an unforgettable flavor experience that will have everyone coming back for seconds.
Why Does Everyone Love Cherry Crisp?
Sweet cherries shine in this dessert, offering a burst of flavor that’s simply irresistible. Simple ingredients like cornstarch and vanilla extract create a luscious filling that perfectly complements the crunchy oat topping. Quick prep time of just 15 minutes means you can whip it up for any gathering! Versatile enough to be served warm or cold, it appeals to both fruit lovers and dessert enthusiasts alike. Enjoying a bowl of Cherry Crisp is like wrapping yourself in a delicious hug!
Cherry Crisp Ingredients
- For the Filling
- 4 cups fresh cherries, pitted – Use ripe cherries for a naturally sweet flavor that balances perfectly with the crunchy topping.
- 1 cup granulated sugar – Adjust based on the sweetness of your cherries for the perfect balance in your Cherry Crisp.
- 2 tablespoons cornstarch – This helps thicken the cherry filling, giving it a lovely, cohesive texture.
- 1 teaspoon vanilla extract – Adds a warm, comforting aroma that enhances the overall dessert experience.
- 1 tablespoon lemon juice – Brightens the flavor of the cherries and adds a touch of acidity.
- For the Topping
- 1 cup old-fashioned oats – Provides a hearty texture and nutty flavor that complements the sweet filling beautifully.
- 1 cup all-purpose flour – Helps create a lovely, crumbly texture for that irresistible topping crunch.
- 1/2 cup brown sugar (packed) – Imparts a rich sweetness with hints of caramel that pairs well with the tart cherries.
- 1/2 cup unsalted butter (melted) – Binds the topping ingredients together while adding richness and flavor.
- 1/2 teaspoon cinnamon – Offers a warm spice note that elevates the entire dessert.
- 1/4 teaspoon salt – Balances out sweetness and enhances all the flavors in your Cherry Crisp.
How to Make Cherry Crisp
1. Preheat the oven to 350°F (175°C). In a mixing bowl, combine 4 cups of pitted cherries, 1 cup of granulated sugar (adjust based on the sweetness of your cherries), 2 tablespoons of cornstarch, 1 teaspoon of vanilla extract, and 1 tablespoon of lemon juice. Mix well and set aside to let those flavors meld.
2. Mix the topping ingredients in another bowl. Combine 1 cup of old-fashioned oats, 1 cup of all-purpose flour, 1/2 cup of packed brown sugar, 1/2 cup of melted unsalted butter, 1/2 teaspoon of cinnamon, and 1/4 teaspoon of salt. Stir until the mixture is crumbly and resembles wet sand.
3. Assemble your dessert by pouring the cherry mixture into a baking dish and spreading it evenly across the bottom. Sprinkle the topping mixture generously over the cherries, ensuring every inch is covered for that delightful crunch. Bake for 30 minutes or until the topping is golden brown and the cherries are bubbling with joy.
4. Serve warm from the oven! Remove your Cherry Crisp from the oven and let it cool slightly before diving in. Enjoy it as is or top with a scoop of vanilla ice cream for an extra treat!
Optional: Top with whipped cream for added sweetness.
Exact quantities are listed in the recipe card below.
Secrets to Perfect Cherry Crisp
- Cherry Selection: Choose ripe, sweet cherries for the best flavor. If they’re tart, adjust sugar accordingly to balance sweetness.
- Thickening Agent: Ensure you mix cornstarch thoroughly with the cherries to prevent clumping and achieve a smooth filling in your Cherry Crisp.
- Golden Topping: Watch the topping closely while baking; remove it from the oven as soon as it turns golden brown to avoid burning.
- Cooling Time: Let your Cherry Crisp cool slightly before serving. This helps thicken the filling and makes it easier to scoop.
- Ice Cream Pairing: Serve with vanilla ice cream for a delightful contrast of warm and cold, enhancing the overall experience of your dessert.
How to Store and Freeze Cherry Crisp

- Room Temperature: Enjoy your Cherry Crisp within 2 hours of baking for optimal flavor and texture. If left out longer, cover it loosely with foil.
- Fridge: Store leftovers in an airtight container in the fridge for up to 3 days. Reheat individual portions in the microwave for a quick treat.
- Freezer: For long-term storage, freeze Cherry Crisp (without baking) wrapped tightly in plastic wrap and aluminum foil for up to 3 months. Bake from frozen, adding extra time as needed.
- Reheating: When ready to enjoy, reheat baked Cherry Crisp in a preheated oven at 350°F (175°C) for about 15 minutes, until warmed through.
Cherry Crisp Your Way
Feel free to unleash your creativity and personalize this delightful dessert with these easy variations!
- Berry Blend: Mix in 2 cups of blueberries or raspberries for a vibrant flavor combination. The tartness of the berries pairs beautifully with the sweetness of cherries, creating a delightful medley.
- Nutty Crunch: Add 1/2 cup chopped pecans or walnuts to the topping for an extra layer of texture. The nuts will toast beautifully in the oven, adding a rich, buttery flavor that complements the cherries perfectly.
- Spice it Up: Incorporate 1/4 teaspoon of nutmeg along with the cinnamon for a cozy twist. This warm spice will elevate the crisp, making each bite even more comforting.
- Gluten-Free: Substitute all-purpose flour with almond flour or a gluten-free blend for a safe option. The flavor and crunch remain intact, allowing everyone to enjoy this tasty treat without worry.
- Citrus Zing: Replace lemon juice with lime juice for a refreshing change. This bright twist will add an unexpected layer of zest that enhances the overall flavor profile.
- Chocolate Drizzle: Melt some dark chocolate and drizzle it over the top before serving. The rich chocolate adds decadence, turning your crisp into an indulgent dessert that’s sure to impress.
- Maple Sweetness: Swap granulated sugar for maple syrup in the filling for a deeper sweetness. It brings a lovely caramel note that works beautifully with the cherries.
- Heat Factor: Add a pinch of cayenne pepper to the filling for an unexpected kick. The warmth from pepper balances out the sweetness, creating a playful contrast that will surprise your taste buds.
Make Ahead Options
If you’re looking to simplify your dessert prep, this Cherry Crisp recipe is perfect for meal prep! You can prepare the filling up to 24 hours in advance by combining the pitted cherries, granulated sugar, cornstarch, vanilla extract, and lemon juice. Just mix well and store it in an airtight container in the fridge. Similarly, the topping can be made ahead as well; simply combine the oats, flour, brown sugar, melted butter, cinnamon, and salt until crumbly, and keep it covered at room temperature for up to 3 days. When you’re ready to serve this delightful Cherry Crisp, just pour the cherry mixture into a baking dish, sprinkle the topping over it, and bake at 350°F (175°C) for 30 minutes until golden brown and bubbly. Enjoy warm with a scoop of vanilla ice cream for an irresistibly sweet treat!
Cherry Crisp Questions Answered
What kind of cherries should I use for the filling?
Fresh, sweet cherries are ideal for this Cherry Crisp. Look for firm, plump cherries that are deep red in color. If you can’t find fresh cherries, frozen ones work well too—just be sure to thaw and drain them before mixing!
Can I adjust the sugar based on the sweetness of my cherries?
Absolutely! Start with 1 cup of granulated sugar, but feel free to taste your cherry mixture before baking. If your cherries are particularly sweet, you might reduce the sugar a bit. On the flip side, if they’re tart, add a little more to balance the flavors.
How should I store leftover Cherry Crisp?
To store leftovers, let the crisp cool completely before covering it with plastic wrap or aluminum foil. It can be stored in the refrigerator for up to 3 days. Just reheat in a 350°F (175°C) oven for about 10-15 minutes to restore its delightful texture.
Can I freeze Cherry Crisp?
Yes! You can freeze unbaked Cherry Crisp for up to 3 months. Simply prepare the filling and topping as directed, assemble them in your baking dish, cover tightly with plastic wrap and foil, and freeze. When you’re ready to bake it, you can pop it straight into the oven from the freezer; just add an additional 10-15 minutes to the baking time.
What if my topping is too dry or crumbly?
If your topping seems too dry after mixing, try adding a bit more melted butter—about a tablespoon at a time until you achieve that perfect crumbly texture. The oats and flour should bind together nicely without being overly wet.
Is this dessert suitable for dietary restrictions?
For a gluten-free option, swap out regular flour with a gluten-free all-purpose blend. You can also use coconut oil instead of unsalted butter if you’re looking for a dairy-free alternative. This Cherry Crisp is versatile enough to fit various dietary needs while still delivering delicious flavors!
Cherry Crisp
Ingredients
Method
- Preheat the oven to 350°F (175°C). In a mixing bowl, combine the pitted cherries, granulated sugar, cornstarch, vanilla extract, and lemon juice. Mix well and set aside.
- In another mixing bowl, combine the oats, flour, brown sugar, melted butter, cinnamon, and salt. Mix until crumbly.
- Pour the cherry mixture into a baking dish and spread evenly. Sprinkle the topping mixture over the cherries. Bake for 30 minutes or until the topping is golden brown and the cherries are bubbly.
- Remove from the oven and let cool slightly before serving. Enjoy warm, optionally with vanilla ice cream.