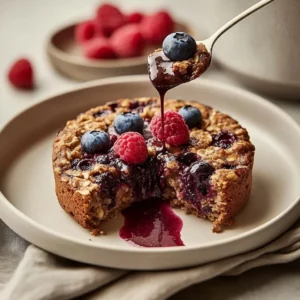

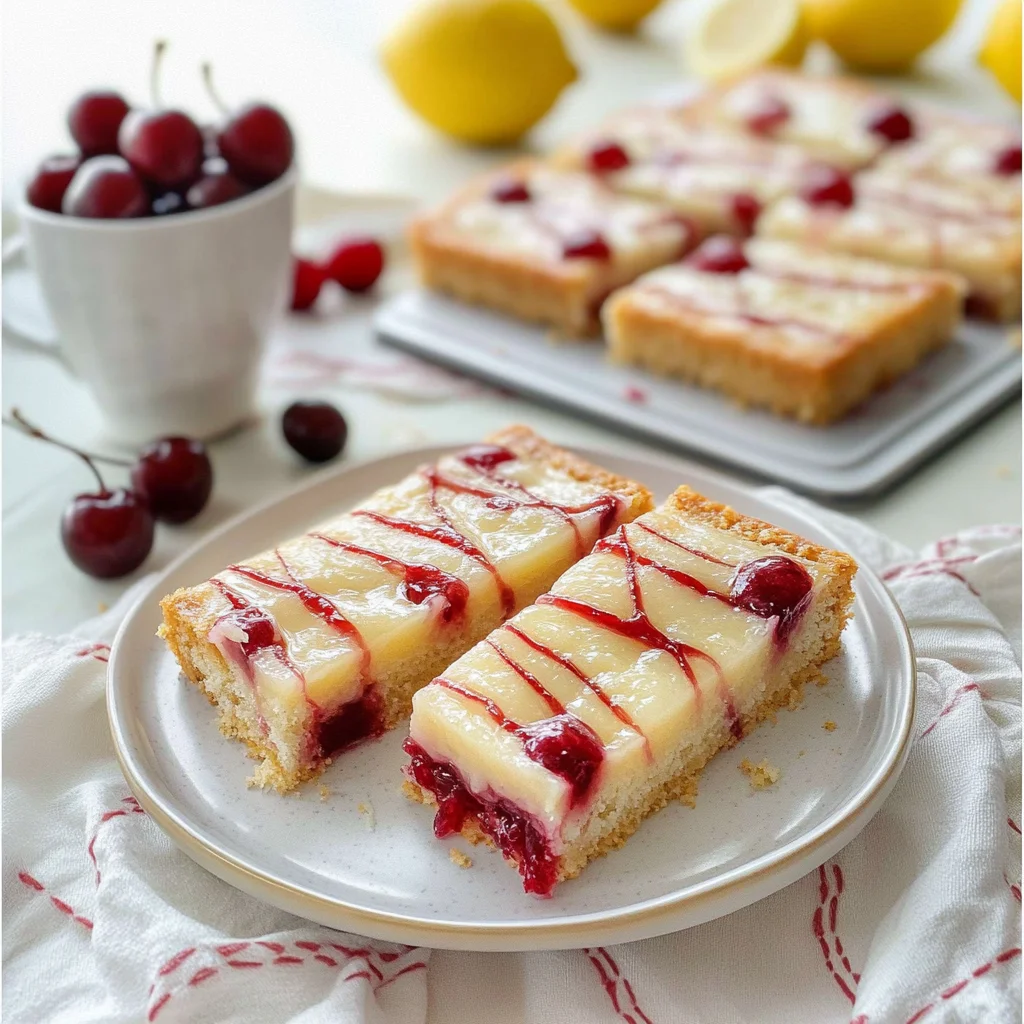
Picture sinking your teeth into a perfectly balanced bite of Lemon Cherry Bars, where the zesty lemon dances harmoniously with the sweet cherry topping, creating a symphony of flavors that bursts on your palate. The buttery crust crumbles delightfully, inviting you back for more while the tantalizing aroma wafts through the air, promising a treat that’s as refreshing as a sunny afternoon picnic.
These Lemon Cherry Bars hold a special place in my heart, reminding me of warm summer days spent baking with family, laughter echoing in the kitchen. Whether you’re hosting a backyard barbecue or simply craving a sweet pick-me-up after a long day, these bars are sure to elevate any occasion and leave everyone yearning for seconds. Get ready for an unforgettable flavor experience!
Why Is Lemon Cherry Bars So Irresistibly Good?
Bright, zesty flavors come alive in every bite, thanks to fresh lemon juice and zest that elevate the sweet cherry preserves. Simple ingredients like all-purpose flour and unsalted butter create a perfectly buttery crust that complements the tangy filling. Quick prep time of just 20 minutes means you can whip these up for any occasion without fuss. Crowd-pleasing appeal makes them a hit at gatherings, while their delightful balance of sweet and tart keeps everyone coming back for more!
Lemon Cherry Bars Ingredients
For the Crust
- 1 cup all-purpose flour – This forms the base of your bars, providing structure and a tender bite.
- 1/4 cup granulated sugar – It sweetens the crust just enough to balance the tangy filling.
- 1/2 cup unsalted butter (softened) – Use softened butter for a rich, buttery flavor and easy mixing.
- 1/4 teaspoon salt – A pinch of salt enhances all the flavors in this delightful dessert.
For the Filling
- 2 large eggs – They bind everything together and give the filling a lovely texture.
- 1 cup granulated sugar – Sweetness is key to balancing the tartness of the lemon juice.
- 1/4 cup fresh lemon juice – Freshly squeezed juice adds a bright, zesty flavor to the bars.
- 1 tablespoon lemon zest – Zest brings an extra punch of citrus aroma that elevates the dish.
- 1/4 cup cherry preserves – This sweet topping complements the tangy lemon filling beautifully in these Lemon Cherry Bars.
- 1/4 cup all-purpose flour – This helps thicken the filling, allowing it to set properly while baking.
- 1/2 teaspoon baking powder – It provides lift, making your bars light and airy in texture.
- 1/4 teaspoon salt – A small amount rounds out the sweetness and balances flavors perfectly.
How to Make Lemon Cherry Bars
1. Preheat the oven to 350°F (175°C). Grease your baking pan with a touch of butter or oil to ensure easy removal later.
2. Combine flour, sugar, softened butter, and salt in a mixing bowl. Mix until crumbly, creating a delightful texture that will serve as the base of your bars.
3. Press the mixture into the bottom of the prepared pan to form an even layer. Use your fingers or a spatula for an even distribution.
4. Bake for 15 minutes or until lightly golden. The crust should be firm yet tender, filling your kitchen with a warm aroma.
Make the filling:
5. Whisk together the eggs and sugar in a clean bowl until well combined. This creates a fluffy base for your tangy lemon filling.
6. Add fresh lemon juice, lemon zest, cherry preserves, flour, baking powder, and salt to the egg mixture. Mix until smooth, ensuring all flavors meld beautifully.
7. Pour the filling over the baked crust, spreading it evenly to cover every corner with that luscious lemon-cherry goodness.
8. Return to the oven and bake for an additional 15-20 minutes, until set and slightly puffed up. The edges will turn a lovely golden color when done.
9. Cool in the pan before cutting into squares. This helps them firm up, making it easier to slice without losing their shape.
10. Serve chilled or at room temperature for delightful bites that burst with flavor!
Optional: Dust with powdered sugar for an elegant finish before serving.
Exact quantities are listed in the recipe card below.
Tips for the Best Lemon Cherry Bars
- Perfect Crust Texture: Ensure your butter is softened but not melted; this helps achieve that crumbly yet firm crust needed for Lemon Cherry Bars.
- Don’t Overmix Filling: When combining the filling ingredients, mix until just smooth. Overmixing can incorporate too much air, which may lead to a less dense texture.
- Zest Carefully: Use only the yellow part of the lemon peel for zest. The white pith can add bitterness and alter the sweet-tart balance of your Lemon Cherry Bars.
- Chill Before Cutting: Allow the bars to cool completely in the pan before slicing. Chilling them helps maintain clean edges and enhances their flavor.
- Watch Baking Time: Keep an eye on the bars during the last few minutes of baking. Overbaking can cause them to become dry, so aim for a slight jiggle in the center when you take them out!
How to Store and Freeze Lemon Cherry Bars

- Room Temperature: Keep your Lemon Cherry Bars in an airtight container at room temperature for up to 3 days for the best flavor and texture.
- Fridge: For longer freshness, store them in the refrigerator for up to a week. Ensure they’re covered well to prevent drying out.
- Freezer: Freeze individual bars wrapped tightly in plastic wrap and then placed in a freezer-safe bag for up to 3 months. Thaw overnight in the fridge before enjoying.
- Reheating: To enjoy warm, reheat in the microwave for about 10-15 seconds or until just warmed through.
Make Lemon Cherry Bars Your Own
Feel free to get creative and personalize your delightful bars with these fun variations!
- Gluten-Free: Substitute the all-purpose flour with a 1:1 gluten-free baking blend for a delicious alternative. You’ll still achieve that lovely texture, perfect for any gluten-sensitive friends or family.
- Berry Bliss: Swap cherry preserves for raspberry or blueberry preserves to bring a new fruity twist. Each berry offers its unique flavor profile, making these bars even more exciting!
- Nutty Crust: Add 1/4 cup of finely chopped nuts, like almonds or pecans, into the crust for an extra crunch. This delightful addition not only enhances texture but also adds a rich, nutty flavor that pairs beautifully with the tangy lemon.
- Coconut Delight: Mix in 1/4 cup of shredded coconut into the crust for a tropical flair. The hints of coconut will complement the lemon beautifully and transport you straight to a sunny beach!
- Herb Infusion: Incorporate 1 teaspoon of finely chopped fresh rosemary or thyme into the filling for an unexpected herbal note. This savory twist can elevate your dessert experience and intrigue your taste buds.
- Spicy Kick: Add a pinch of cayenne pepper to the filling for a subtle heat that contrasts nicely with the sweetness. Just a hint can create an exciting dance of flavors without overpowering the citrus charm.
- Zesty Orange: Replace half of the lemon juice with fresh orange juice for a vibrant citrus combination. This swap brightens up the bars and brings a refreshing twist that everyone will love!
Make Ahead Options
These delightful Lemon Cherry Bars are perfect for meal prep, allowing you to enjoy their tangy sweetness any day of the week. You can prepare the crust in advance by mixing together 1 cup of all-purpose flour, 1/4 cup of granulated sugar, 1/2 cup of softened unsalted butter, and a pinch of salt. Once baked and cooled, the crust can be stored in an airtight container for up to 3 days. For the filling, whisk together 2 large eggs and 1 cup of granulated sugar, adding in your lemon juice, zest, cherry preserves, flour, baking powder, and salt. This mixture can be prepped up to 24 hours ahead; just keep it covered in the fridge until you’re ready to bake it over your crust. When it’s time to serve your Lemon Cherry Bars, simply pour the filling over the crust and bake as directed for a fresh-tasting treat!
Lemon Cherry Bars Questions Answered
What type of flour works best for the crust?
For the crust of your Lemon Cherry Bars, all-purpose flour is ideal as it provides the perfect balance of structure and tenderness. If you’re looking for a gluten-free option, you could substitute it with a 1: 1 gluten-free baking blend, but keep in mind that it may alter the texture slightly.
Can I use salted butter instead of unsalted butter?
While unsalted butter is recommended for this recipe to control the salt content, you can use salted butter if that’s what you have on hand. Just be mindful to reduce the additional salt in the crust by a pinch to avoid overpowering flavors.
How should I store leftover Lemon Cherry Bars?
To keep your Lemon Cherry Bars fresh, store them in an airtight container in the refrigerator. They will stay delicious for up to a week! Just remember to let them cool completely before storing to prevent excess moisture from building up.
Can I freeze Lemon Cherry Bars for later?
Absolutely! These bars freeze beautifully. Simply cut them into squares and wrap each piece tightly in plastic wrap followed by aluminum foil or place them in a freezer-safe container. They can be kept in the freezer for up to three months. Thaw them in the fridge overnight before enjoying!
What if my filling doesn’t set properly?
If your filling isn’t setting after baking, it might need a little more time in the oven. Try adding an extra 5 minutes, checking frequently until it’s set and firm to the touch. Make sure not to overmix your filling ingredients, as excessive air can result in a less stable texture.
What is the serving size for this recipe?
This recipe yields about 4 servings, with each bar containing approximately 220 calories. These sweet treats are perfect for sharing or indulging yourself after dinner!