

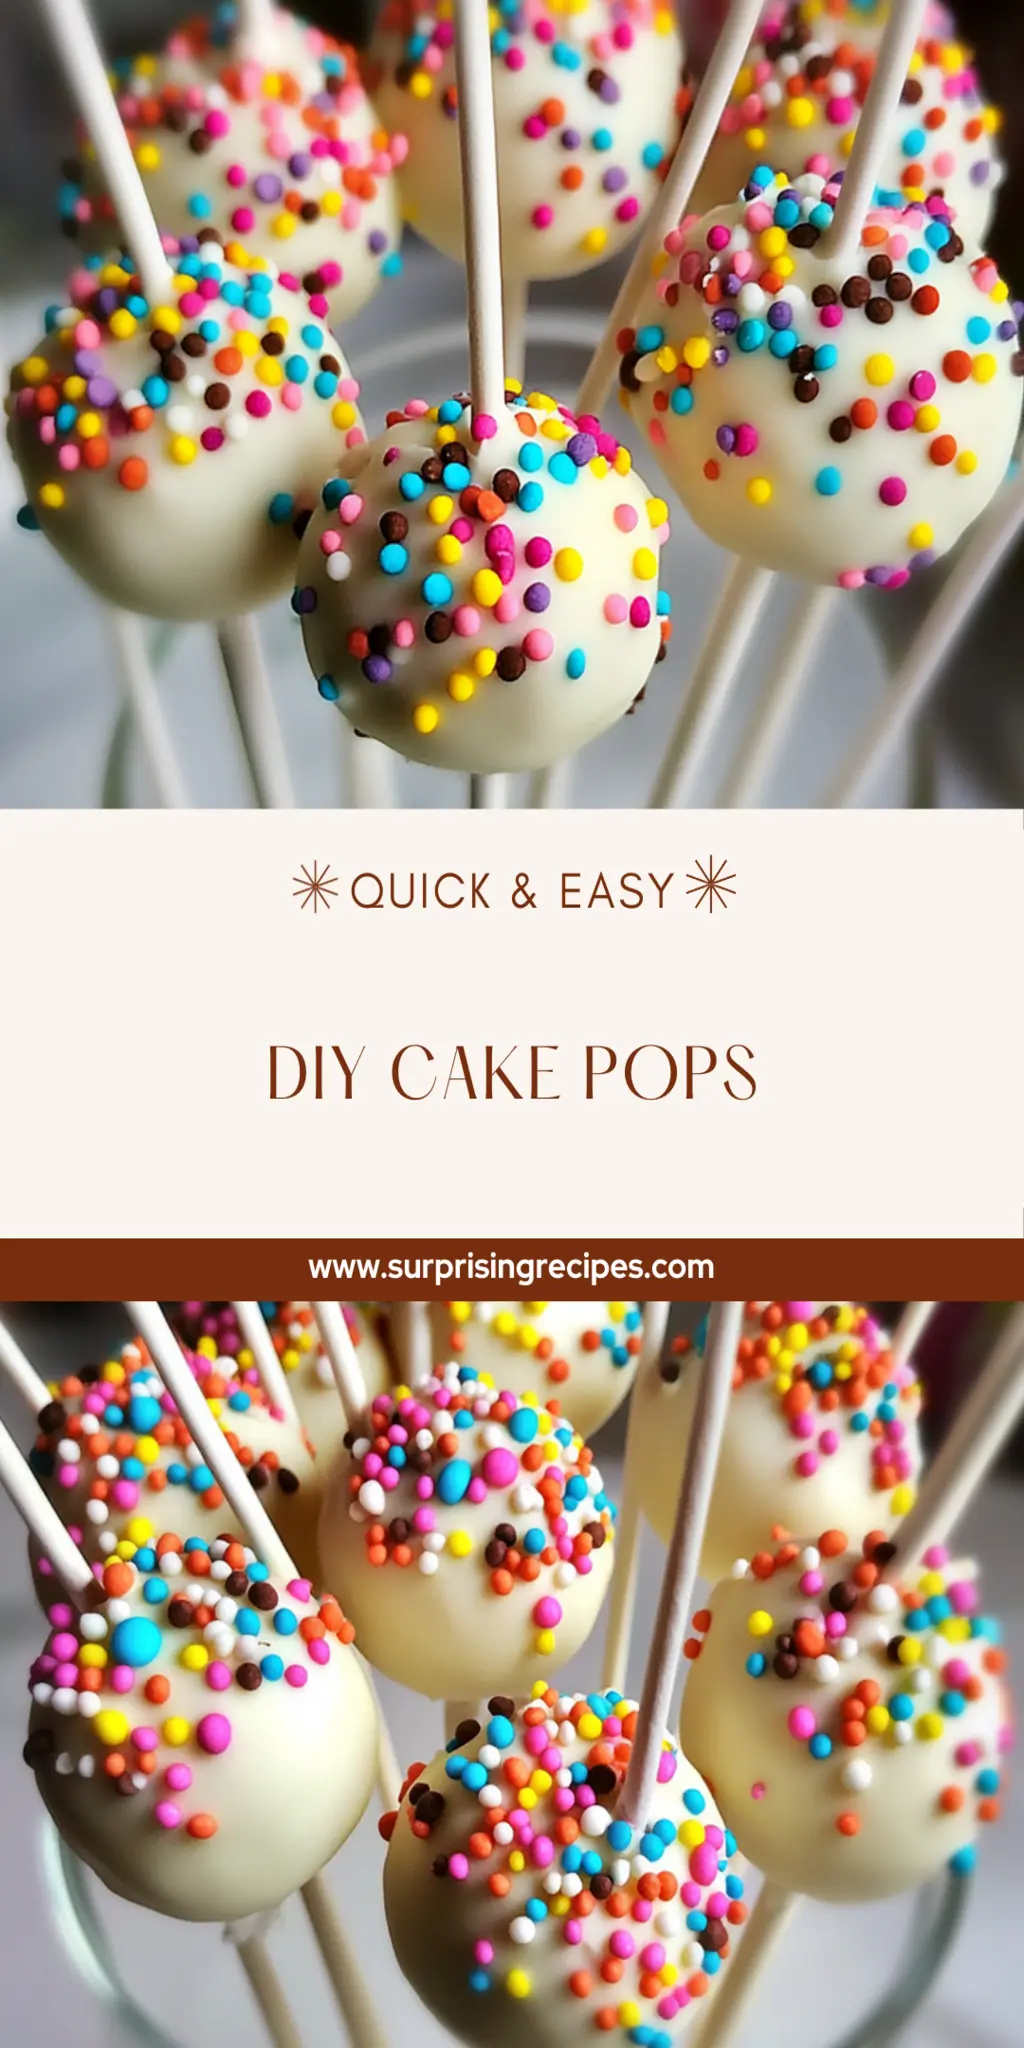
There’s something undeniably delightful about the idea of DIY cake pops. Imagine small, round bites of moist cake, perfectly coated in rich, velvety chocolate, with a sprinkling of colorful toppings that make your sweet tooth sing. This scrumptious treat not only has the power to brighten up a dull day but also turns any ordinary gathering into a celebration of deliciousness.
Whether you’re planning a birthday bash or simply want to bring a smile to your loved ones’ faces, DIY cake pops are the way to go. Easy to make and irresistibly tasty, these little beauties are pure joy on a stick! The combination of textures – the soft cake and the smooth chocolate coating – is simply out of this world, and I promise, one bite will lead to a second (and perhaps many more).
Why You'll Love This DIY Cake Pops
- This incredible DIY Cake Pops transforms simple everyday ingredients into restaurant-quality flavors that will blow your mind completely.
- Foolproof recipe techniques guarantee perfect results every single time, making even novice cooks feel like professional chefs instantly.
- Stunning visual appeal with gorgeous colors and mouthwatering aromas creates the ultimate Instagram-worthy dish for any special occasion.
- Endlessly adaptable for different dietary needs while working beautifully for meal prep, date nights, or entertaining large groups effortlessly.
Ingredients for DIY Cake Pops
Here’s what you’ll need to make this delicious DIY Cake Pops:
1 box (15.25 oz) cake mix – Choose your favorite flavor, chocolate or vanilla, for that rich base.
3 large eggs – These will help bind everything together and provide moisture.
1/2 cup unsalted butter (melted) – Butter adds richness, making the cake pops decadent and delightful.
1/2 cup frosting – Any flavor will do; this is the secret to achieving that dough-like consistency.
8 oz melting chocolate or candy melts – This is the luscious coating that makes cake pops irresistible.
1 cup sprinkles – Essential for that festive touch and extra sweetness!
How to Make DIY Cake Pops
Follow these simple steps to prepare this delicious DIY Cake Pops:
Step 1: Preheat Your Oven
Preheat your oven to 350°F (175°C) and grease your baking pan. This is the first step in ensuring your cake bakes evenly and releases easily afterward.
Step 2: Bake the Cake
Prepare the cake mix according to the package instructions, mixing in the eggs and melted butter. Bake until a toothpick inserted into the center comes out clean. Let that delectable cake cool completely before moving on – trust me, patience is key!
Step 3: Crumble the Cake
Crumble the cooled cake into fine pieces in a large bowl. You want to get a fine texture here – almost like sand, but with a buttery promise of sweetness!
Step 4: Add the Frosting
Mix in the frosting until the mixture reaches a dough-like consistency. This is the moment when you realize you could probably just eat the batter (don’t worry, I won’t tell anyone if you sneak a spoonful).
Step 5: Form the Pops
Roll the mixture into 1-inch balls and place them on a parchment-lined baking sheet. Channel your inner artist here; it’s all about getting those little spheres just right.
Step 6: Insert Lollipop Sticks
Melt your chocolate or candy melts according to package instructions. Dip the lollipop sticks into the chocolate before inserting them halfway into each cake ball. This technique ensures that they stick together like best friends at a party.
Now, chill those beautiful pops for about 30 minutes. After they’ve firmed up, dip each one in the melted chocolate, coating fully. While they’re still wet, add those fabulous sprinkles to amp up the festive look!
Finally, let them set before transferring to a platter for serving. These cake pops are ready to steal the show!
So, there you have it – a fun, easy, and scrumptious recipe for DIY cake pops that will make you the star at your next gathering. Whether serving them at a birthday party, as a special treat for the family, or creating an at-home dessert table, these cake pops promise to deliver smiles and sweet satisfaction. Enjoy your baking adventure, and happy popping!

You Must Know About DIY Cake Pops
- This showstopping DIY Cake Pops delivers restaurant-quality results using simple ingredients you probably already have at home.
- The perfect balance of textures and flavors creates an unforgettable dining experience that will have everyone asking for seconds.
- Picture-perfect presentation with vibrant colors makes this dish absolutely Instagram-worthy and guaranteed to impress any dinner guest.
- Incredibly versatile recipe that works beautifully for weeknight dinners, meal prep, special occasions, or even outdoor entertaining sessions.
Perfecting DIY Cake Pops Cooking Process
To create the best DIY Cake Pops, start by baking the cake mix and allowing it to cool completely before crumbling. While waiting, prepare your chocolate melts and sprinkles, ensuring an efficient workflow that guarantees smooth assembly and finished pops every time.
Add Your Touch to DIY Cake Pops
Feel free to swap out the cake mix flavor for fun variations like red velvet or spice cake. Experiment with different types of frosting, or toss in some mini chocolate chips for added texture. You could even add a splash of flavor extract to elevate your DIY Cake Pops!
Storing & Reheating DIY Cake Pops
Store your DIY Cake Pops in an airtight container at room temperature for up to five days. If you need to prolong their life, refrigerate them for up to two weeks. Just let them come to room temp before serving, and enjoy!
Chef's Helpful Tips for DIY Cake Pops
- This professional-quality DIY Cake Pops relies on precise timing and temperature control to achieve restaurant-standard results consistently.
- Master the art of mise en place by prepping all ingredients beforehand, ensuring smooth execution and preventing any last-minute cooking disasters.
- The secret lies in layering flavors throughout the cooking process rather than seasoning only at the end for maximum depth.
- Pro tip: let the finished dish rest for optimal texture and flavor development before serving to hungry guests waiting eagerly.
The first time I made DIY Cake Pops, my friends devoured them in record time. Their joy was contagious, and I knew I had struck gold with this recipe!
FAQs About DIY Cake Pops
What are DIY Cake Pops?
DIY Cake Pops are delightful bite-sized desserts made by mixing crumbled cake with frosting, then forming them into balls and covering them in chocolate. This fun and interactive treat is perfect for parties, celebrations, or simply to satisfy a sweet tooth. You can customize them with different flavors, sprinkles, and decorations, making each one a unique and tasty experience! They’re an easy way to turn classic cake into something playful, and they’re sure to impress friends and family alike.
How do I customize my DIY Cake Pops?
One of the best aspects of creating DIY Cake Pops is the endless customization options available. You can easily swap the cake mix flavor for something unique, such as red velvet or lemon. Additionally, choose different frosting flavors to cater to your taste. For added texture, consider mixing in mini chocolate chips or even nuts. Using various sprinkles and decorations can transform each pop into a work of art! Experimenting with flavors and designs lets you create your own signature cake pops.
Can I make DIY Cake Pops in advance?
Absolutely! DIY Cake Pops are perfect for prepping ahead of time. Once you’ve formed and decorated your cake pops, store them in an airtight container at room temperature for up to five days. If you’d like to keep them longer, you can refrigerate them for up to two weeks. Just make sure they come back to room temperature before serving so that they retain their delightful taste and texture. This makes them a fantastic treat for parties or family gatherings!
What are some common mistakes when making DIY Cake Pops?
Making DIY Cake Pops can be a bit tricky, especially for beginners. One of the most common mistakes is not allowing the cake to cool completely before crumbling it, which can affect the final consistency. Another mistake is not chilling the formed balls in the fridge for enough time before dipping them in chocolate; this can lead to falls off the stick. Additionally, using too much frosting can make them overly sweet and difficult to coat. Paying attention to these details will ensure your cake pops turn out perfect!
Conclusion for DIY Cake Pops
In conclusion, DIY Cake Pops are a deliciously fun treat that can elevate any occasion. With endless customization options, you can create unique flavors and designs tailored to your preferences. They are not only easy to make but also serve as a delightful surprise for family and friends. Remember to follow the preparation tips to achieve the best results. So, whether you’re celebrating a birthday or simply indulging your sweet tooth, DIY Cake Pops are all you need to bring joy to any gathering!

Easy DIY Cake Pops Recipe for Delicious Fun Treats
Ingredients
Equipment
Method
- Preheat the oven to 350°F (175°C). Grease and prepare your baking pan.
- Bake the cake mix with eggs and melted butter according to package instructions. Let it cool completely.
- Crumble the cooled cake into fine pieces in a large bowl.
- Mix in frosting until well combined and dough-like.
- Roll mixture into 1-inch balls and place on a parchment-lined baking sheet.
- Melt chocolate according to package instructions. Dip lollipop sticks into chocolate before inserting them halfway into each ball.
- Chill pops for 30 minutes, then coat each in melted chocolate, adding sprinkles while wet.
- Allow to set before serving.